Recommended Sites


Polar Lights Models: Klingon K’t’inga buildup process Pt.4
Continuing our series of guest blogs covering our brand-new STAR TREK: The Motion Picture 1:350 Klingon K’t’inga model kit…
K’tinga Build Part T’ree, Ready for Paint…
James Small, www.smallartworks.ca
This is the last step in the main building of the various sub-assemblies and main assemblies, rounding the bend now, getting ready for the really grueling part, the massive paint job. Not a lot to cover here but I do want to point out a few things, and it was my “overthinking” of a lot of it that put me so far behind. The biggest problem I thought I would encounter was the fact that the main body section of the ship has to be all sealed up after lighting is installed, so I wanted to make sure I didn’t make any mistakes before sealing up the top and bottom main sections. The way the kit is designed I thought would be … “unfriendly” at this point because I usually like to be able to install or at least be able to access a lot of the lighting gear even after main sections are glued together. For example, I wanted to be able to install the engines AFTER the main body was assembled so as to make clean up easier. That’s why on two of the kits I cut large sections out of the insides of the battery box tub so that wires could be reached with tweezers etc, to pull them back in if they slipped out and went back inside the body after I had it all assembled. This is STILL a good idea but it turns out my concerns were unfounded. I spent far too many hours thinking this through and it turned out to be unnecessary for the most part. However a lot of other time was spent thinking through the special requirements for the modified photo model too (which still took too long!).
Note: The rest of this mostly applies to the stock kit, not the one I made with the modifications for photography.
You assemble the engines with the lighting installed and the wires hanging out the top of the nacelles. Then you glue the finished engines to the bottom of the lower hull section pylons. You glue in the “wing radiators” at this time as well. With lighting firmly installed in place (AND TESTED!!!!) as shown, you can then glue on the top body section you see there, making sure to feed the wires in through the bottom hole in the battery tub. Once it’s all glued together, and if you are careful (remember that gluing hints article I referenced in a previous post) cleanup is really easy, no putty needed. With patience, it all goes together remarkably smoothly, everything lined up perfectly. Yes, it’s a bit of a chore to get all those locator pins to line up and all fall into place, but once you do, you just run a little liquid plastic cement along the seam allowing capillary action to do its thing. (I actually use a concoction of my own, a half-and-half mixture of lacquer thinner and acetone which is a lot cheaper and works better for me than the overpriced hobby glues and even dries quicker, but only works for joints where capillary action is used.) Press together, let the melted plastic ooze out between the joints and hold or clamp ‘til set. When dry, just use your knife to trim off the bead and you have a nice clean joint, no putty required.
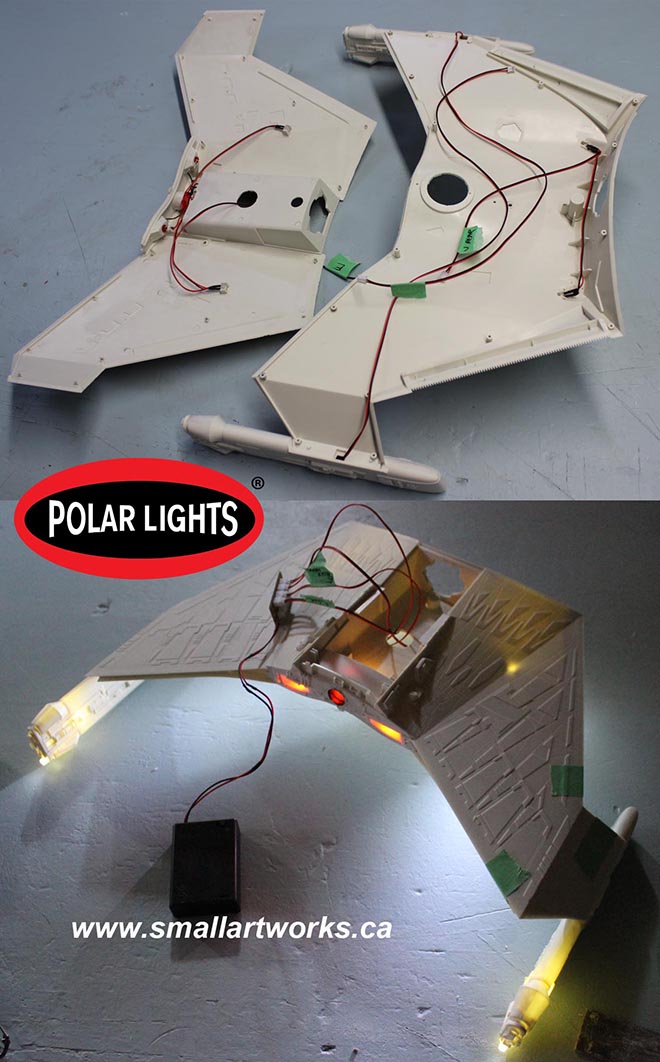
Yes, I know the plastic is translucent. Light blocking will be done by first coating the model (after careful masking) with Krylon gray primer which is effectively opaque. The colour coats will be applied over that. Also, some lighting elements are not yet installed. Those can be done after all the paint work is done.
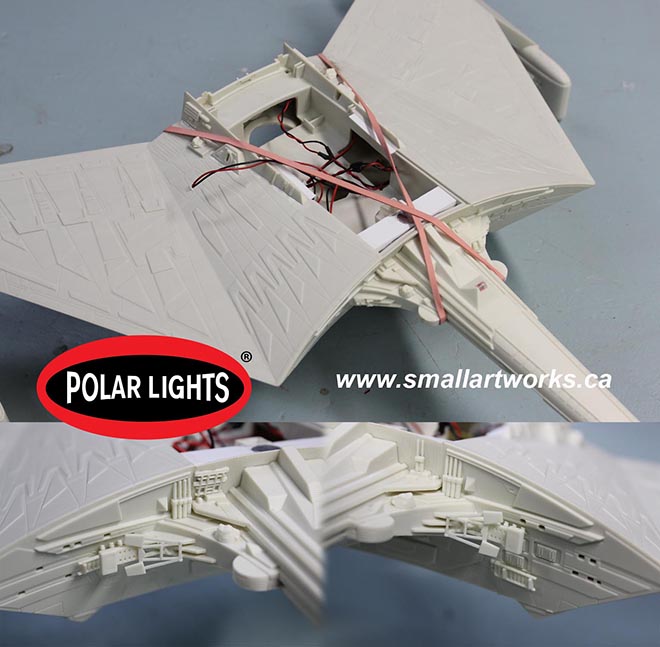
Next I glued the neck in place and held it to the body using elastic bands (modified model shown here but principle is the same for stock kit). Like joining the body together, just push it in place (everything lines up perfectly) then apply the thin glue along the edges and let it set. Once dry, I removed the elastics and was able to put on all the little greeblies that get attached to the bulkhead. I also installed the thin rear panels that go in between the wings at this time as well.
All three models’ sub-assemblies are finished (for the most part) and ready to begin the massive job of masking and painting. A few parts not shown here such as the top bridge dome will not be added until painting is finished.
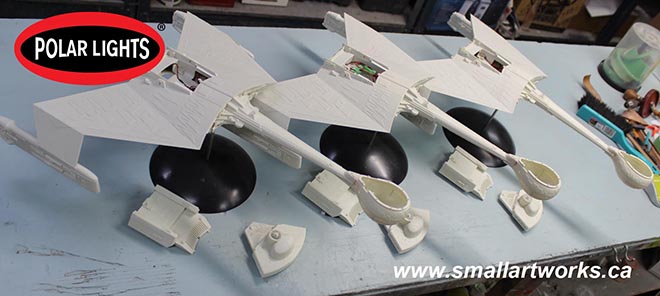
Due to time constraints to get the photography model done in time for Jamie to use for his box art and publicity material, I will now concentrate on just getting the modified model done first and will finish up the other two after the first one is all finished and photographed. Most of the time delay was my fault because I was overthinking so much of it.
Building this model is the easy part. Painting it will present some wonderful challenges… Hint: Most of the colours that were heavily researched by Jamie ended up being quite a bit different than I was expecting or appears to be in most photos! More on that as this build continues.
You are doing a great job with these “multi” builds. Thank you for your time and sharing this valuable information.
Have you thought to contact James Van Hise former publisher of Trek Fanzine Enterprise Incidents? I’m not sure if he’s even around anymore but he did a photo-feature on the models of TMP in his publication once. Maybe he has photos you haven’t seen yet? I am not affiliated with him nor do I have his contact info. Maybe Paul M. Newitt? He used to submit material for Hise’s publiction. Just a thought.
Paul Newitt is helping us out.