Recommended Sites


Archive for November 10th, 2016
1:32 Kitbash: 1930 Ford Model A Roadster Pickup – Part 2
Goto PART 1
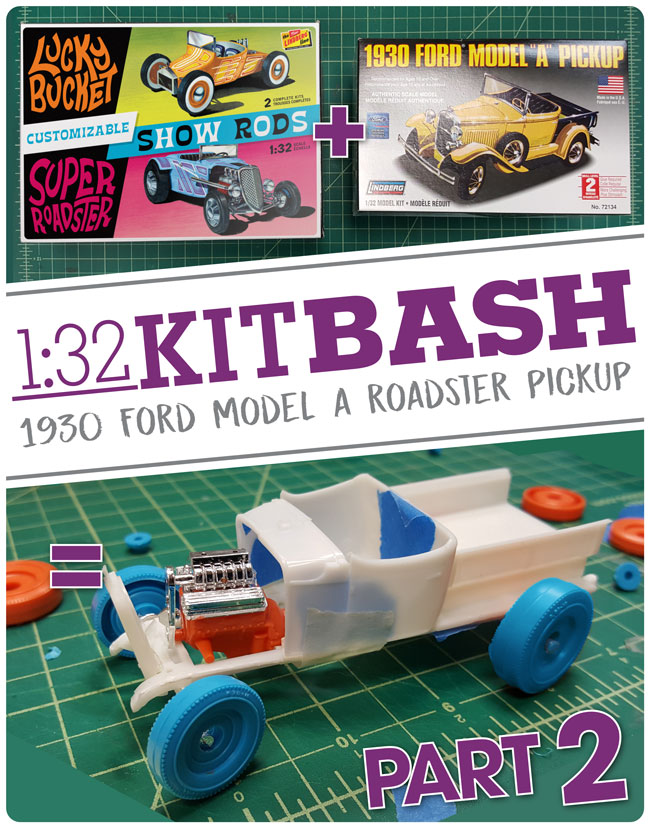
This is part 2 of my 1930 Ford Model A Roaster Pickup kitbash using the Lindberg 1:32 Customizable Show Rod 2-pack and Lindberg 1:32 1930 Ford Model A Pickup.
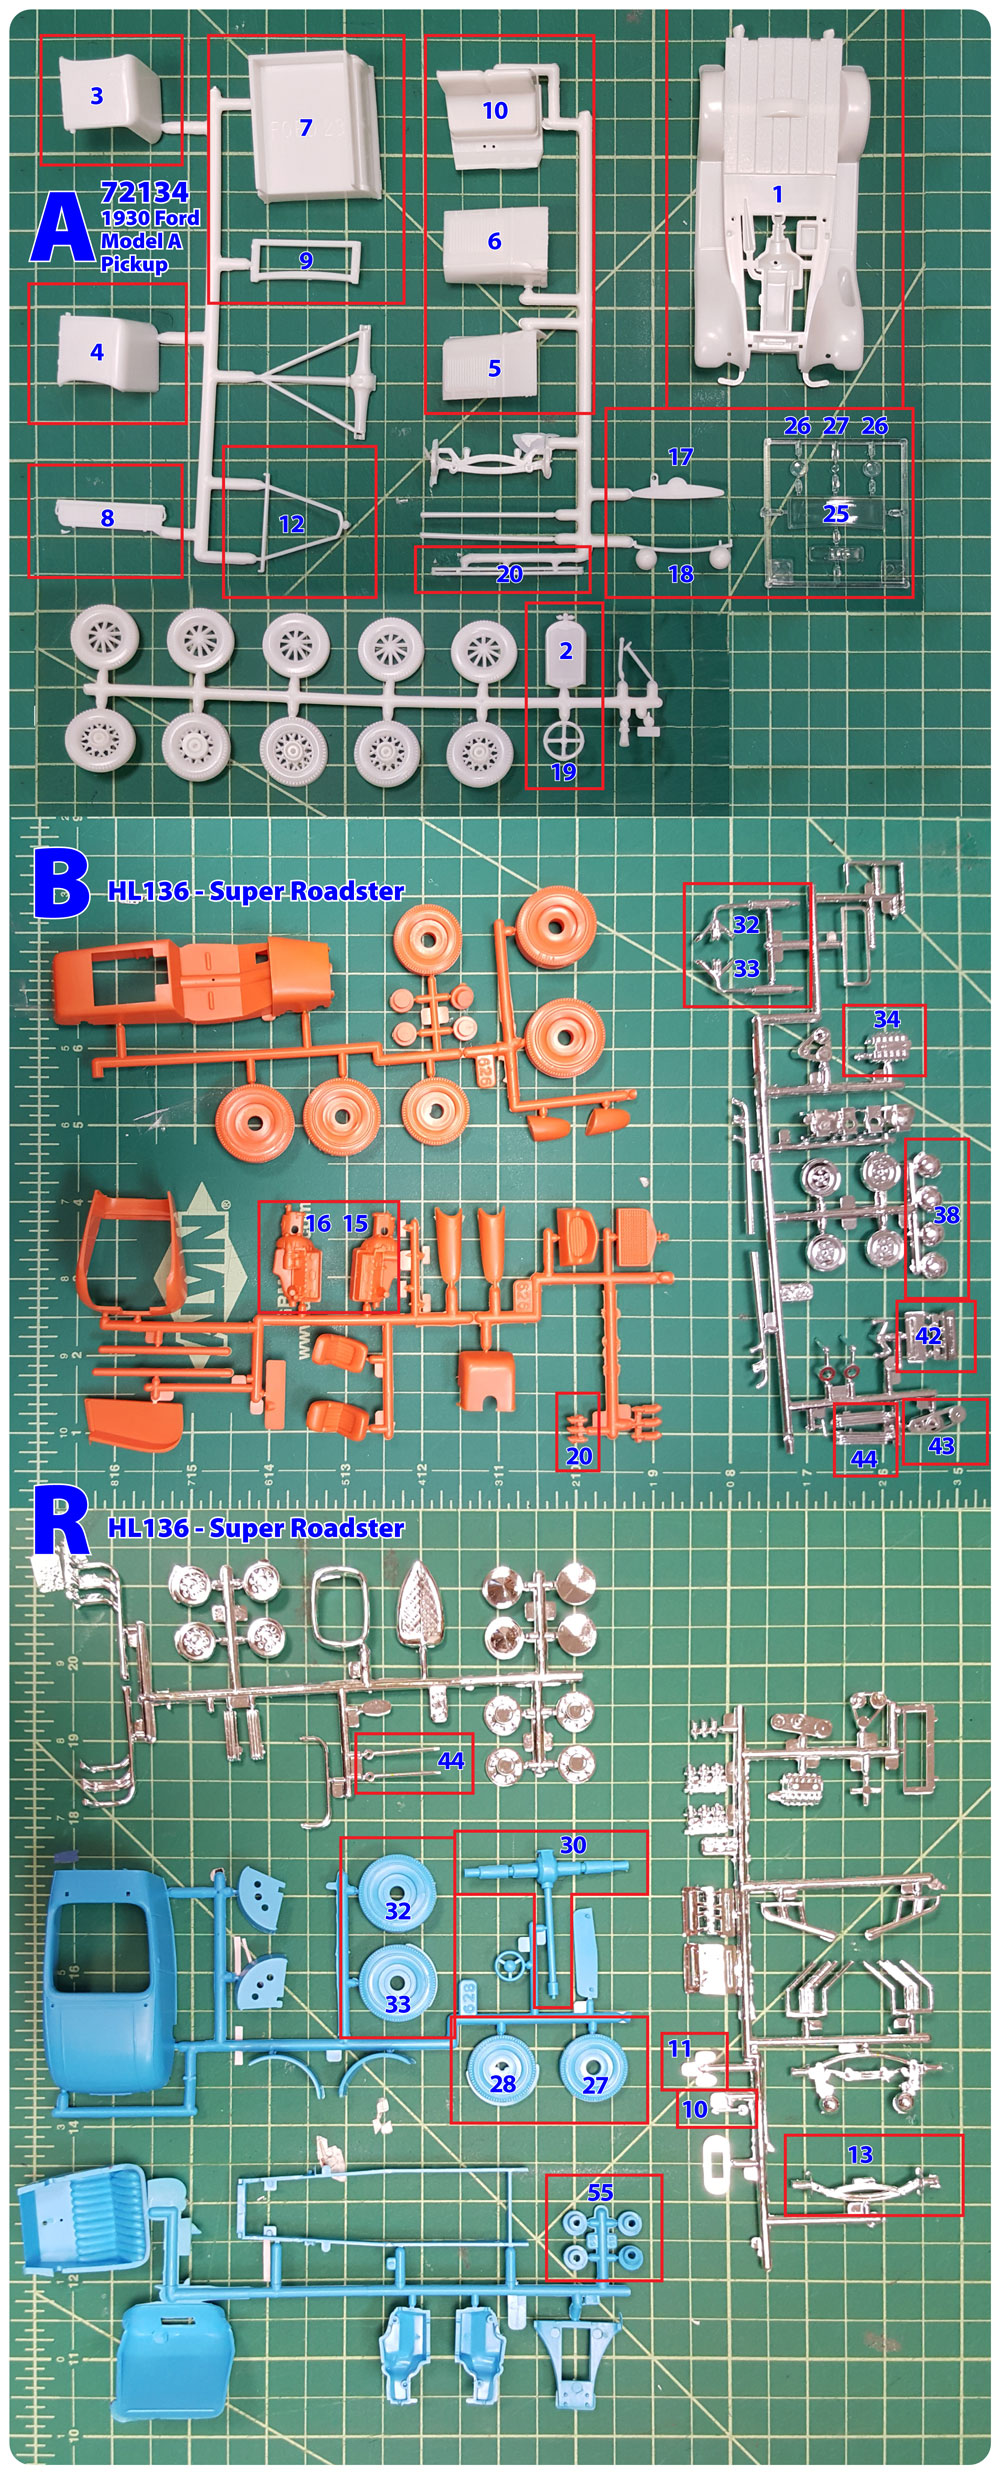
Above are the parts from each kit that were used. Note that I will reference 1930 Ford Model A Pickup kit part with an “A” in front of the part number, “B” for the Lucky Bucket and “R” for the Super Roadster.
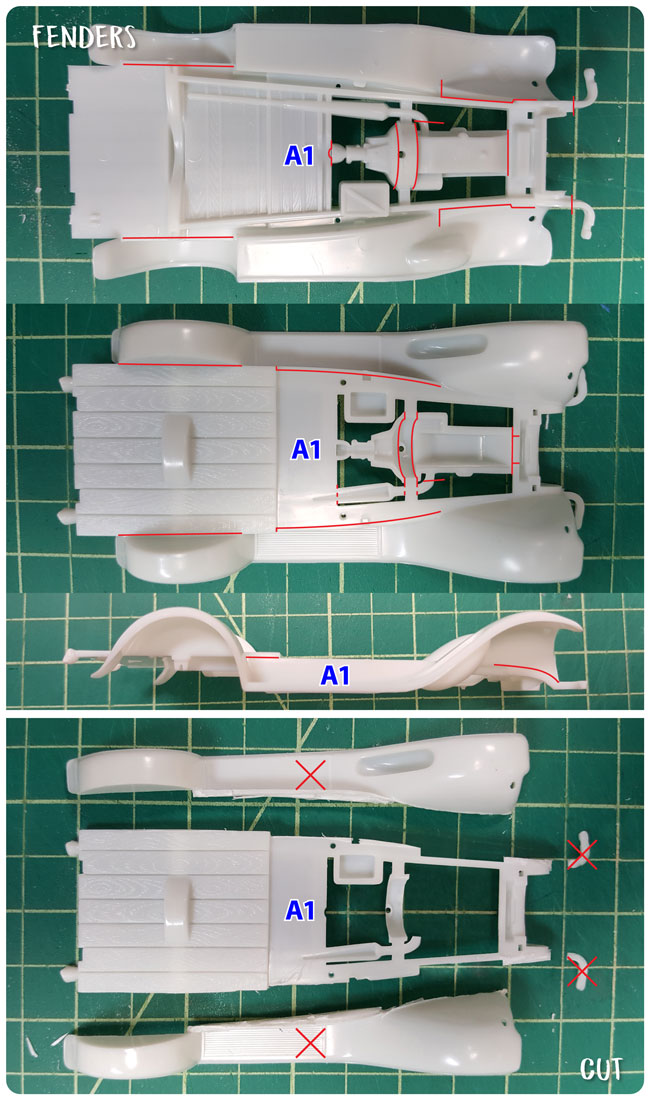
First I removed the fenders from the frame (A1). Cutting along the the red lines as shown above. I discarded the fenders (i.e. set them aside for future projects).
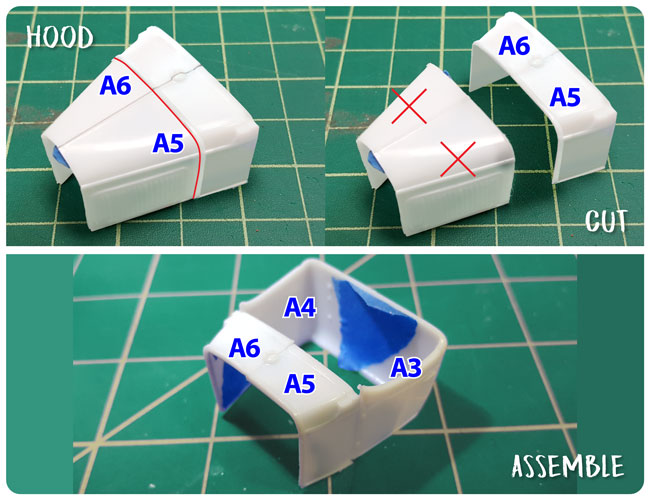
Next I separated the hood from the cowl halves (A5,A6), cutting along the red line. The hood halves were not used on this build, so discard. The cowl halves (A5,A6) and the body sides (A3,A4) were then glued together.
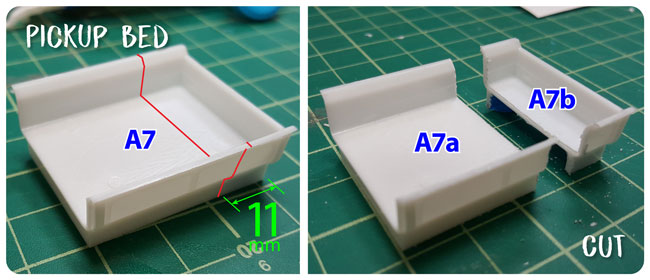
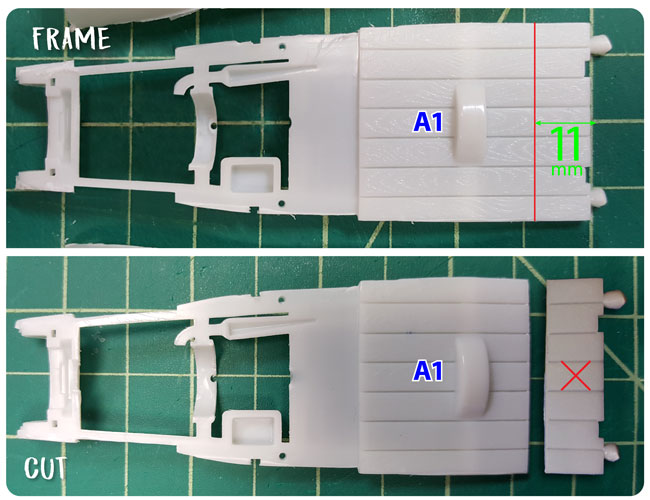
I wanted to shorten the pickup bed (A7). The excess is be used in next step, so you would need to remove at least 7mm, I went with 11mm. I will refer to the halves now as parts A7a and A7b. I also trimmed 11mm off the bed on frame (A1). The excess from A1 is discarded.
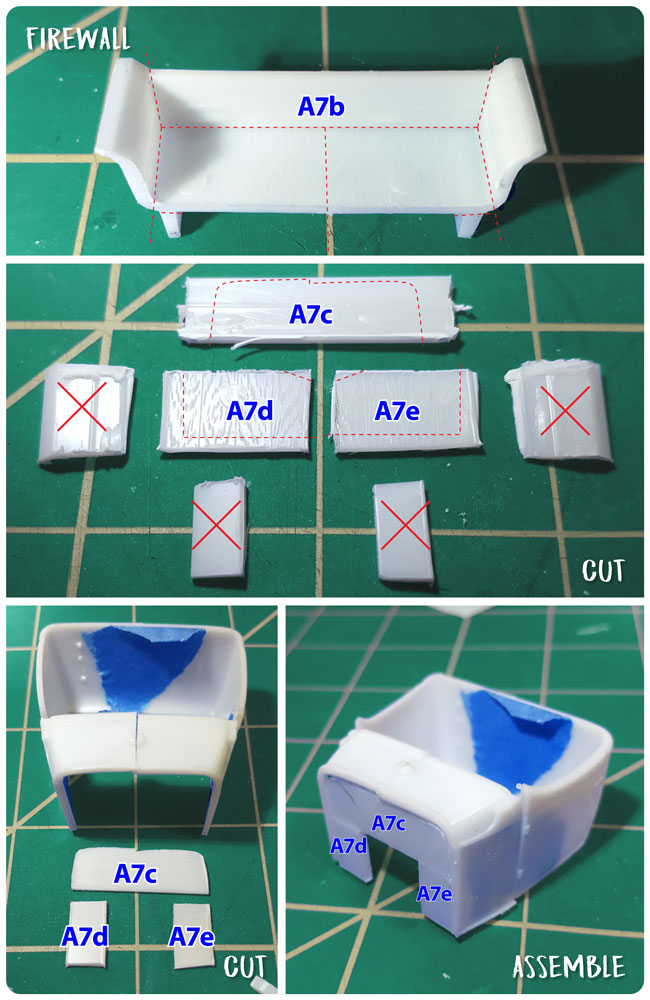
The body (A3+A4+A5+A6) is missing a firewall so I used part A7b to create it. I cut it into the pieces shown above and then cut 3 pieces down to fit in the cowl (A5+A6). The pieces were about 7mm wide and A7c was cut to fit the curve of the cowl. Parts A7c, A7d and A7e were glued to the body.
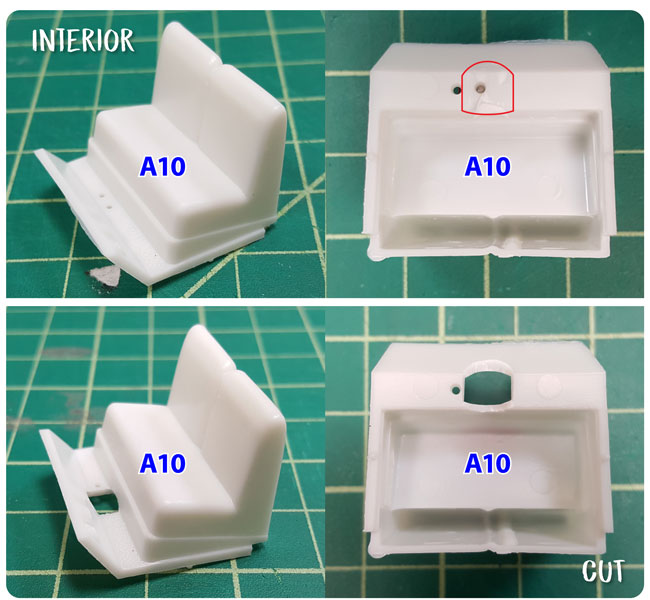
Next I cut a “hole” in interior’s floor (A10) to make room for the drive shaft (R30) from the Super Roadster.
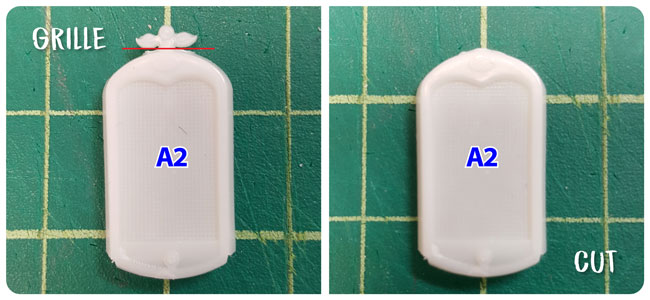
I cut the hood ornament from the grille (A2). I didn’t like it.
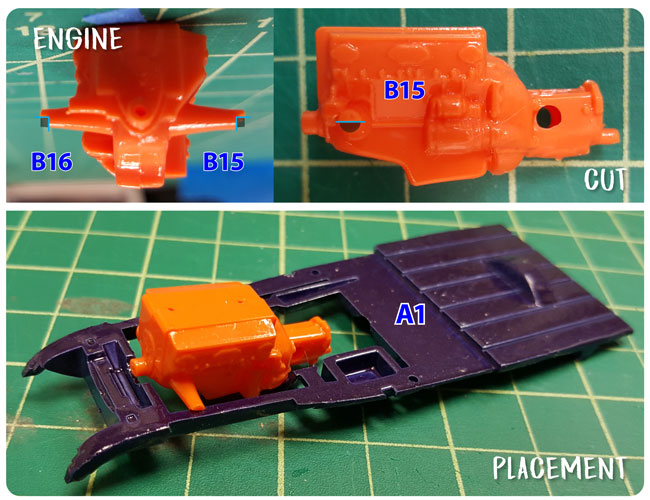
I used the motor halves (B16,B15) from the Lucky Bucket. I cut a half circle from the end of the support rods that enable the engine to sit perfectly in place on the frame (A1) with very little modification. Note I had to cut a half circle notch off the frame at the front of the engine to leave room for the belt (B43). For the motor assembly I used the “Rear Mill Bucket” version, option B on the instructions for the Lucky Bucket, but with different exhaust. I will show this in my next post.
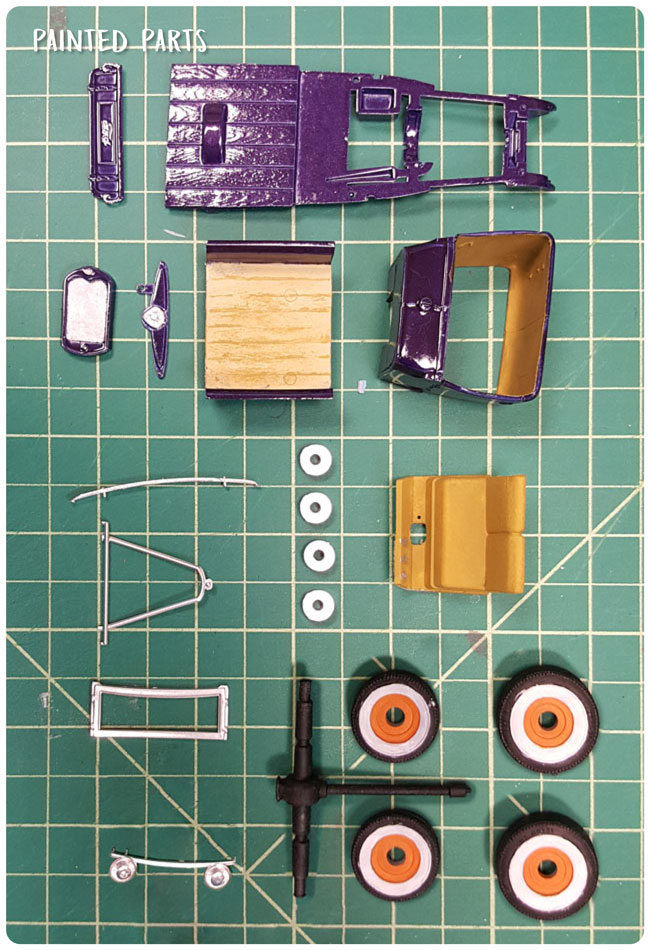
Next I painted the parts as shown above. My paint scheme was inspired by the vintage Lindberg Freaky Ford kit. (as mentioned in Part 1) I painted the frame (A1), body (A3+A4+A5+A6), dash (A17), bed (A7a), grille (A2), and tail gate (A8) a metallic grape purple, first hitting them with a dull medium blue then the purple to give the color a little more depth. I painted the wood planks on the bed to look like wood and the grille and gauges chrome. The interior of the cab and the seats were painted tan. The front radius rod (A12), headlight assembly (A18), bumper (A20), windshield frame (A9) and 4 wheel hubs (R55) were painted chrome. The small front wheels (R27,R28), rear wheels (R32,R33) and drive shaft were painted black. The rims on the wheel were painted orange and whitewalls were added.
Look for my next post for final modifications and assembly.