Recommended Sites


Star Trek Models: My Enterprising Journey pt. 3
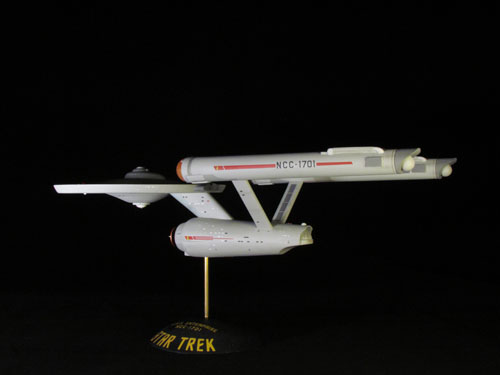
Here we are with Michael Scarola’s third part of his build process of our classic AMT U.S.S. Enterprise kit.
My Enterprising Journey: Building the Classic AMT 18” Enterprise – Part 3
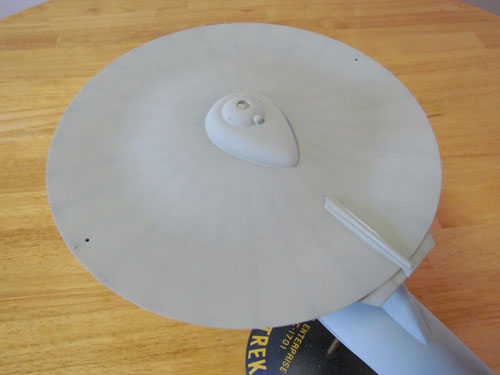
There have been many discussions and articles that talk about the color of the TOS Enterprise studio model. On screen it appears anywhere from white to blue to green-gray to silver. It’s been revealed by Richard Datin that the studio model was actually a light gray with a hint of green. Datin chose the WalMart Concrete color chip as a near perfect match to the Enterprise’s hull color.
I started my research with a WalMart Concrete color chip and found Tamiya JN Grey appears to be a little too green. I had access to Gary Kerr’s actual paint samples of the hull color and the color that appears on the leading edge of the dorsal and also a sample that was matched to the Master Replicas TOS Enterprise.
The mixture I came up with is 3 parts Tamiya JN Grey, 1 part Sky Grey & 4 parts Flat White. It looks neutral with a color shift towards green when viewed under indoor lighting and it even appears to shift a bit blue at times. It’s right in the ballpark of the 3 samples and is very close to Gary Kerr’s hull color, only lighter, which is a good thing for the smaller scale AMT kit.
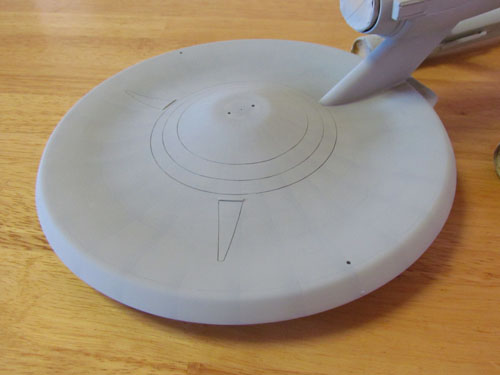
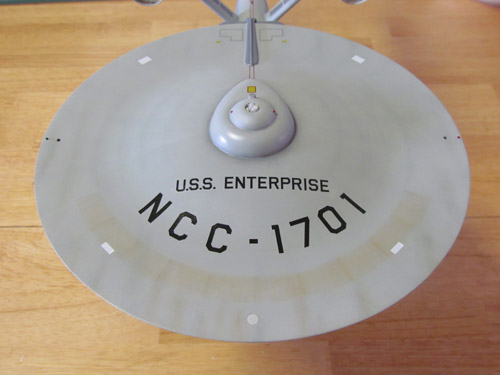
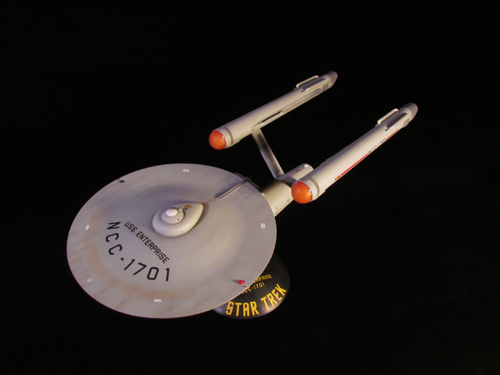
After the main hull color was painted I drew on the saucer grid with a pencil using the scaled blueprints, a straight piece of styrene sheet and a compass.
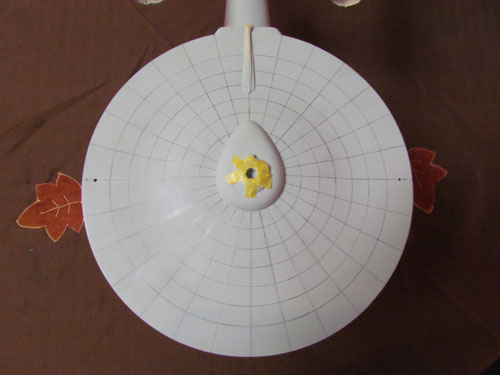
I mixed a darker shade of gray to pre-shade the grid lines and toned it down with the hull color.
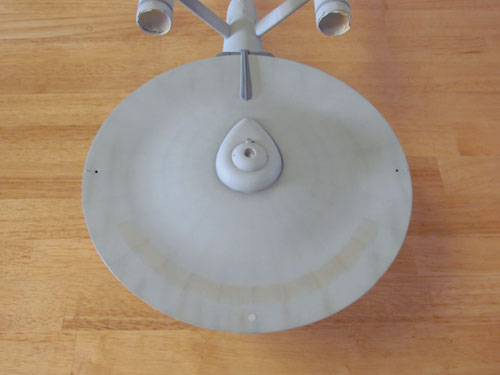
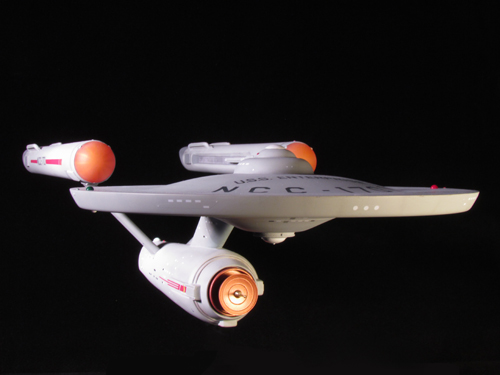
I mixed some Testors Acryl US Navy Blue Grey, Pale Green and Flat White for the leading edge of the dorsal and used Testors Acryl Neutral Gray for the darker colors. The nacelle grills are painted Tamiya Chrome Silver and the ends of the Intercoolers and Control Reactor are Testors Acryl Neutral Gray lightened with white. For the triangles on the bottom of the saucer and the darker areas on the undersides of the front of the nacelles I mixed a darker, more neutral, variant of the hull color.
Weathering and decals…
Dark gray and green pastels are used for most of the weathering and rust colored pastel chalk for the ‘rust ring’ on top of the saucer.
I did my best to represent most of the look of the weathering of the 11 foot studio model while toning it back a bit for this smaller project.
The decals that come with the Round 2 kit are very accurate. I did, however, separate the saucer’s U.S.S. ENTERPRISE/NCC-1701 decal into pieces. The ‘U.S.S. ENTERPRISE’ seemed to sit a bit too close to the ‘NCC-1701 and the spacing of the ‘U.S.S. was a bit too much compared with the 11 foot studio model. In addition I also separated the NCC-1701 into individual decals. This eliminated the clear film and due to the grid on the saucer I was able to place them according to the studio model’s placement. Other than this, the decals actually are very accurate. The below image shows the placement of the decals on the top of the saucer.
I sprayed Future floor polish over the model before applying the decals and sealed them with Testors Create FX acrylic flat clear, with a few drops of semi- gloss clear added to keep the surface from appearing chalky.
All in all I had a lot of fun working on this project. This is my first time building the AMT 18” TOS Enterprise and I’m glad I started with the Round 2 release. The smooth top of the saucer and the wonderful decal sheet really improved this classic kit.
I’d like to thank Jamie Hood and everyone at Round 2 for giving me the opportunity to share my build.
Michael Scarola
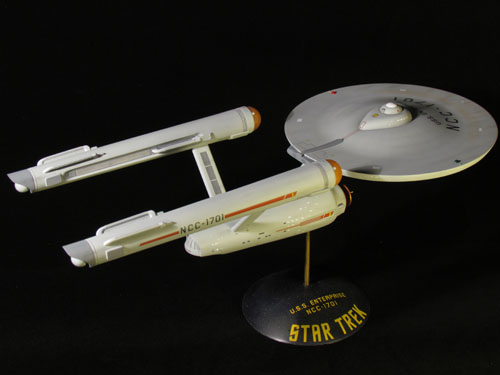
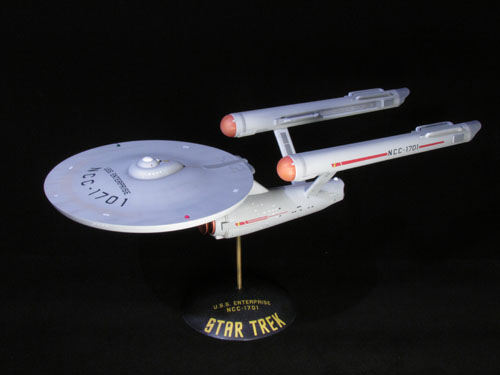
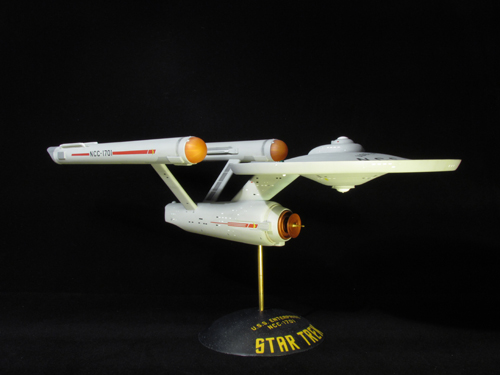
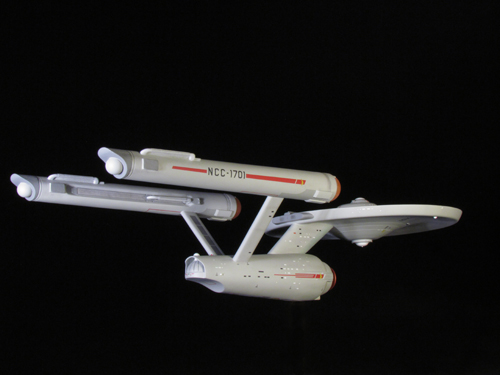
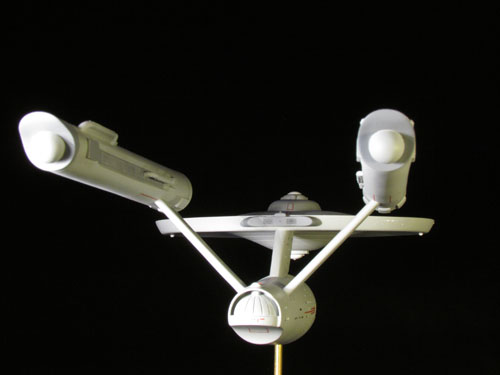
Take a bow, Mike. Great job. Have a gander at these beauty shots of the finished model.
Easily the best buildup of that kit I’ve ever seen! May even be the best one that ever existed. Can’t wait to see what you do with the old MPC 12″ Eagle kit!
Nice work on this project. I built many of these kits as a kid in the 1970’s. (molded in white, baby blue, and one that was a silver grey – try covering that up with white paint!). I still have a few of these released in recent years by Round2. It has it’s issues, but I still like the model. Maybe it’s the nostalgic memories LOL. I’m actually building the 1:350 Enterprise now. I’m curious what colors you used for the deflector dish and the front round part of the nacelles? I don’t plan on lighting this build and I want to paint the clear nacelle ends like you did. Thanks 🙂
Thanks Jim and Rocketfin for the kind words!
Rocketfin, I painted the deflector dish with Tamiya XF-6 acrylic Copper and then clear coated with a mix of Testors CreateFX satin and flat. The front round part of the nacelles are clear domes that I painted Tamiya X-26 Clear Orange on the inside with my airbrush. I then sprayed some Testors Acryl flat clear on the inside and outside. The fins on the inside are Tamiya masking tape painted silver. They are applied to a smaller set of clear domes which have some flat white misted on the insides.
That looks great. Nice job.
would love to see Rd 2 do an accurate 18″ kit