Recommended Sites


Search results
Polar Lights Models: More K’t’inga goodness
It has been a great week. Thank you for such an overwhelmingly positive reaction to our K’t’inga kit announcement. We knew Star Trek modelers everywhere would love it, because you’ve made it perfectly clear how badly you wanted it. But still, the reaction was better than we could have predicted. A set of test shots for another kit did not show up this week as expected, so we’ll share some more images and info on the K’t’inga kit.
First, let’s answer some questions.
How long is the model? – In our excitement last week, we neglected to mention the length of the model. It will be 24″ long and nearly 18″ wide. Some have suggested that seems small, but the length was based on existing information that was widely accepted. Could one debate that it should be longer? Sure, but in process of developing a kit of this stature, weight has to be given to tooling space and the cost that incurs. So, it comes down to A) we can make an argument that at 1:350 scale the ship would be 24″ long and B) we can afford to tool up a 24″ long K’t’inga. We can’t afford to do a bigger one. If you disagree with the scale, you can call it what you want. No hard feelings.
Yay! Now when can we expect a 1:350 D-7, Reliant, 1:1000 Enterprise-D or 1:32 Galileo? – Your guess is as good as ours. Our history speaks for itself. So, don’t expect them soon. But, let’s consider this… what would there be interest a Galileo without a full interior? Deleting the interior would make it an affordable option at some point. No promises one way or another, but feel free to offer feedback on that notion.
It looks like the white parts in the mockup represent the clear parts in the kit. Is that how you plan to address the windows on the bulb? – For the most part, the unpainted resin parts in the mockup represent parts that are to be included as clear parts in the kit. However, part of the purpose of doing a prototype is to see what you think will work actually works in practice. After seeing the cobra head windows knocked out, we are considering knocking windows out in the bulb. Those windows will be tiny. A clear backer will be included, but if you want those portholes to filled to present a flush face window, we will be suggesting liquid window maker to fill them.
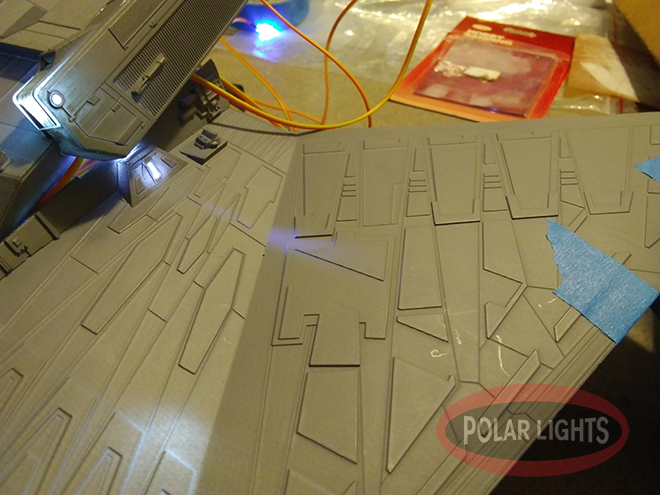
Is the hull plating symmetrical? – On the kit yes, on the filming miniature not so much. It mostly was, but not 100%. We are going to KISS it. (Keep It Simple Stupid)
What will prevent neck sagging? – Good engineering. The mockup had no locators whatsoever. We will be sure we have accounted for the possibility of the neck to sag or break at the bulkhead. It is a lot like the pylon issue on the 1:350 TOS kit. We know well enough to figure it out.
Will ALL the detail be maintained? – Yes and no. The work in the mockup had not fully taken into account tool drafting. In some spots details might be compromised, or we will break parts up a bit differently to get as much detail as we can. In some instances we aren’t satisfied with the result and we’ll see if the factory can find a way to do better. I predict we will be able to maintain about 95% of the detail by the time it is done.
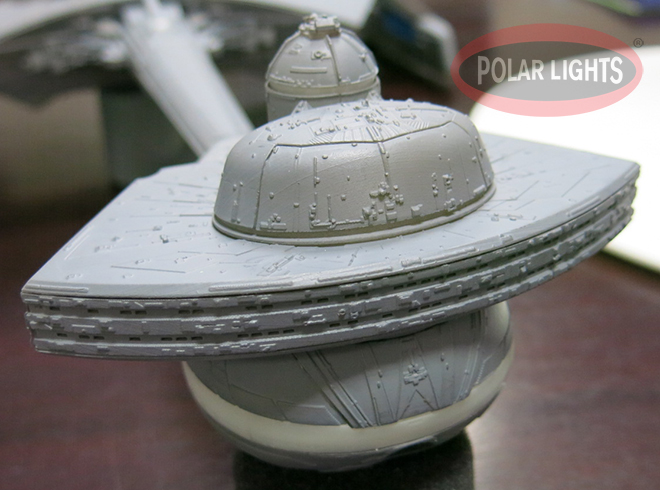
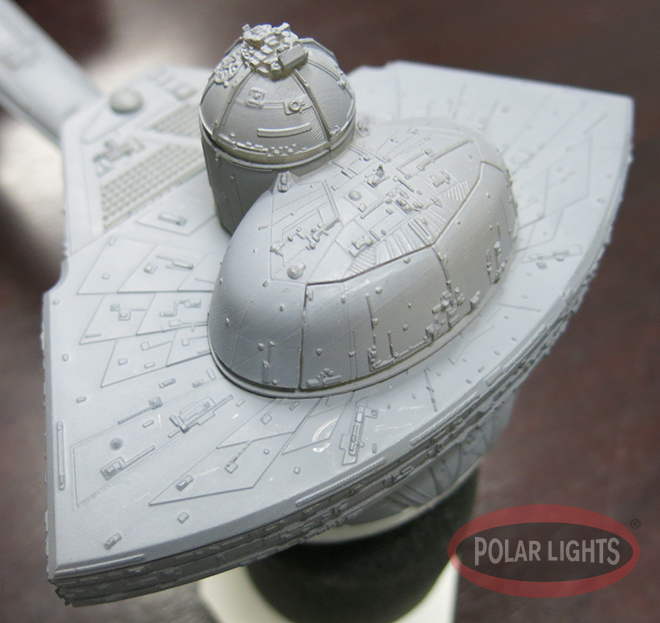
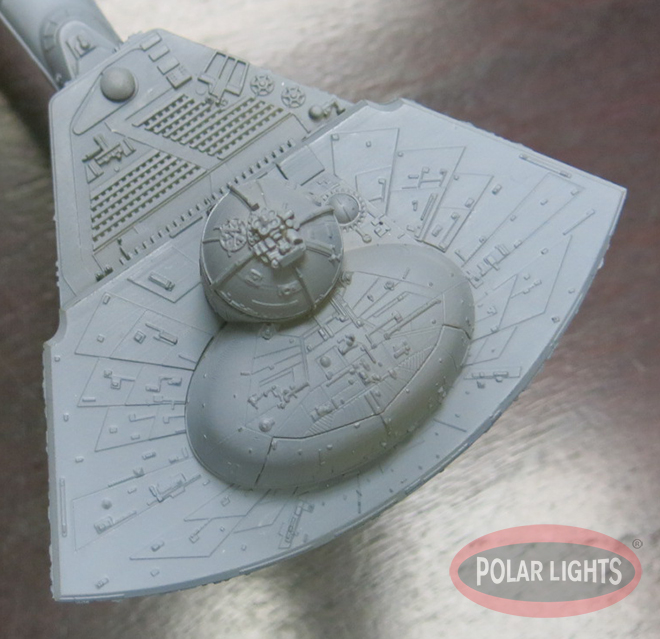
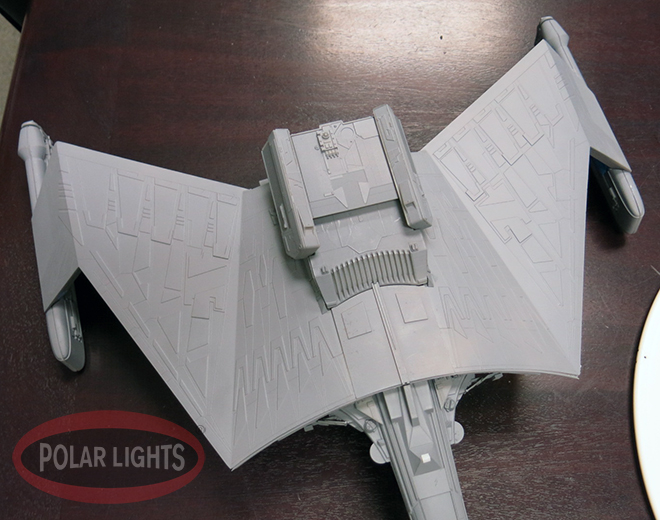
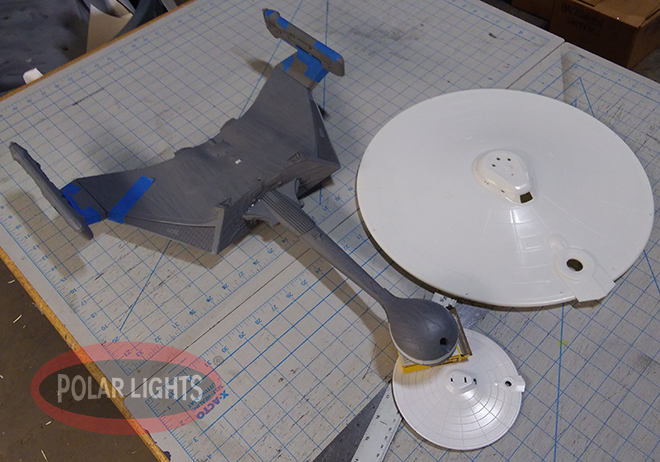
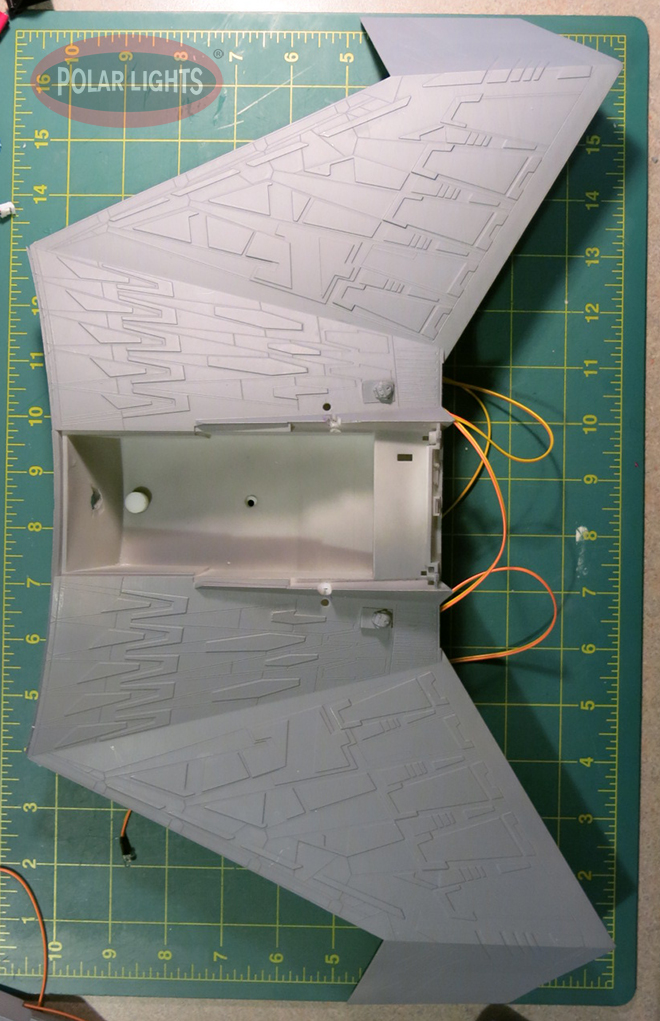
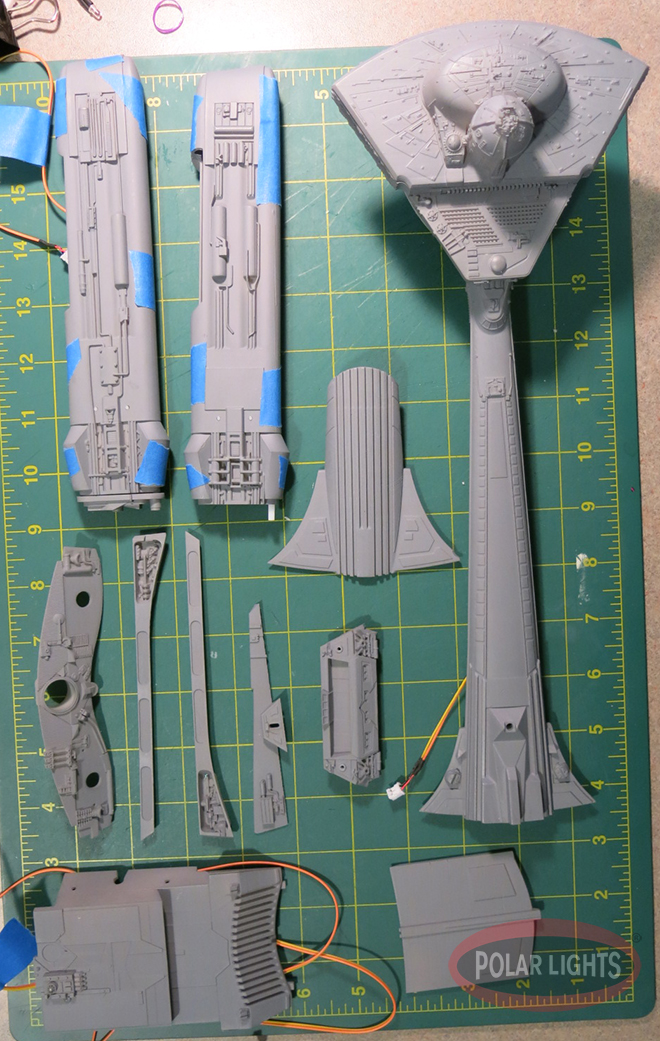
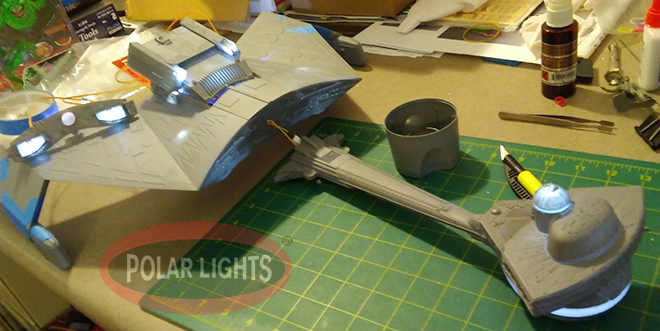
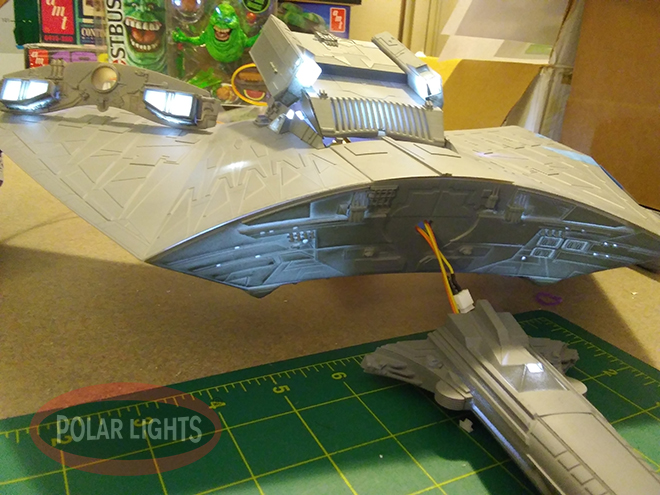
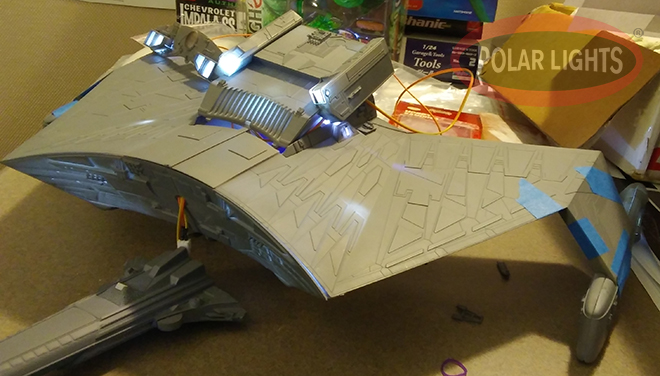
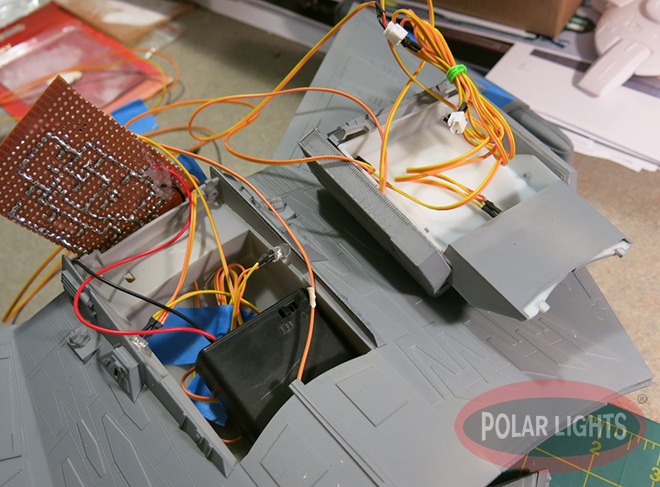
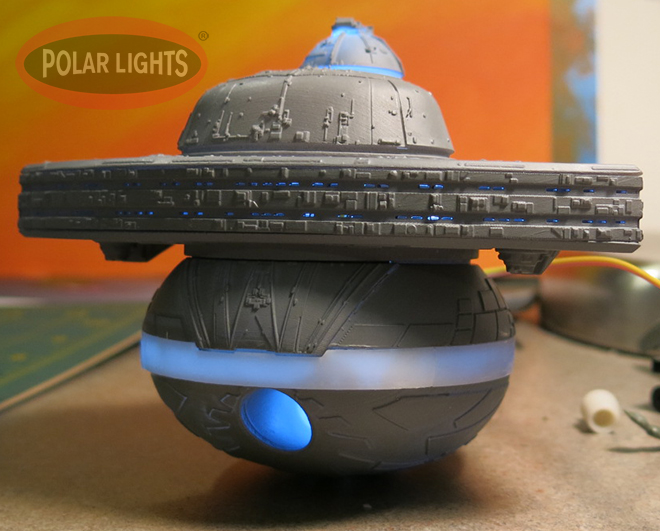
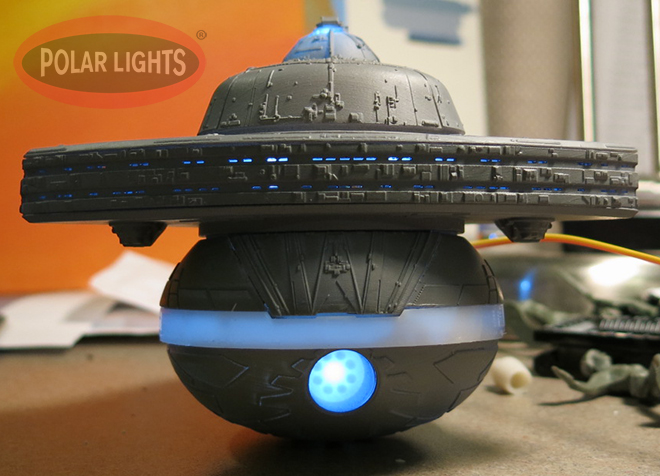
The photos below will show some “behind the scenes” shots of the mockup in various states of assembly. They should provide a decent sense of scale. It also gives a preview of how the light kit will look. A thin coat of primer wasn’t enough to hide the light, but we needed to install as much as we could to be sure we had enough light where we needed it and adjust as needed.
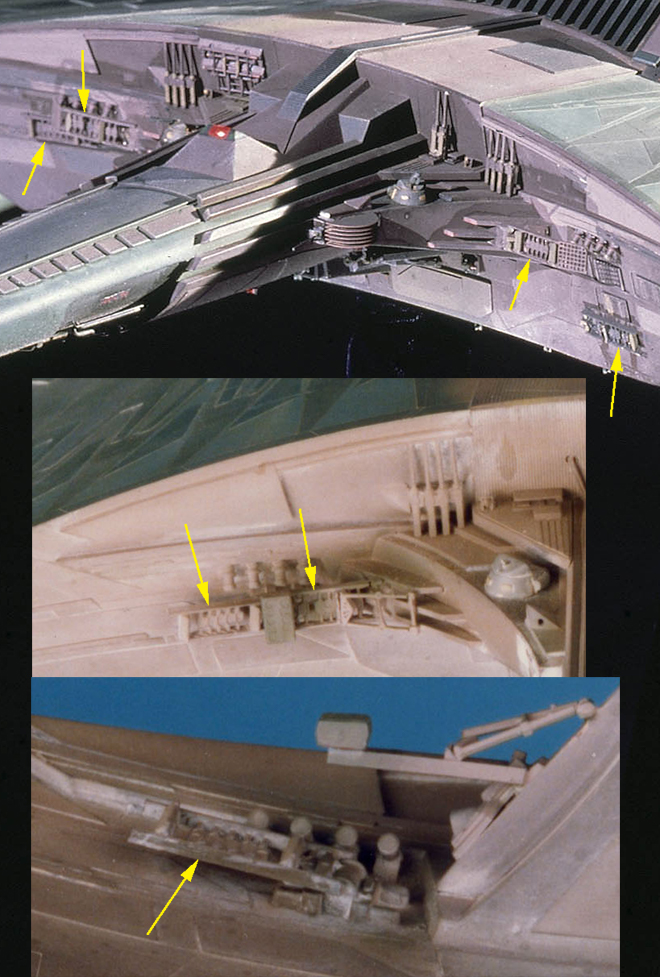
Lastly, you’ll see an image with yellow arrows pointing to some parts on the filming miniature. As most people realize, many of these details were pulled from plastic model kits available during production of the film. Our consultant team identified nearly all of the “greeblies” that were used. This is the most noticeable piece one has evaded our attempts to identify the kit (or thing) it originally comes from. If you know, please let us know. We used the limited reference we have to draw up the part. If we can make it more accurate, we would like to.


Round 2 Models: 2018 off to a good start
It has been a while since I’ve showed a pic like this. It doesn’t show the stacks of boxes and test shots immediately to the right of this view.
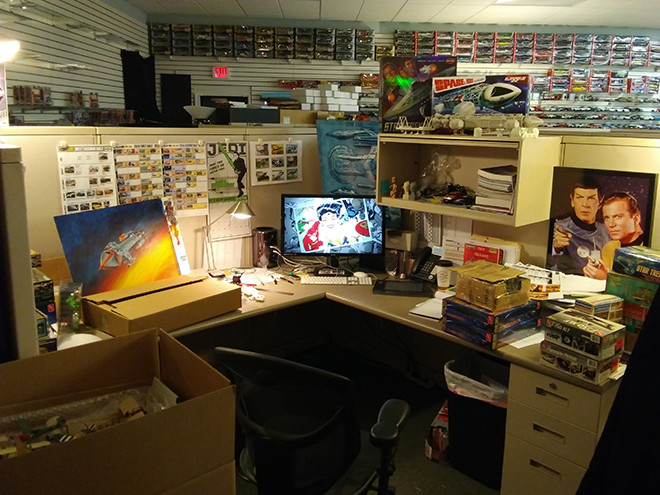
In the life of a Round 2 model kit developer, there are ebbs and flows just like in every other job. Sometimes you are working at a breakneck pace to get a release (or several) out on time. Sometimes the work you are doing just isn’t all THAT interesting such as when we are retouching vintage model kit box art or working on assembly instruction sheets (tedious work and the most undervalued part of any kit). And then sometimes, every once and a while, within a week’s time you get deluged with new and exciting stuff to review and comment on and you realize it is all stacked up in one place. So you snap a pick like this one. I’ll be unveiling closer looks at all of this stuff in the coming weeks.
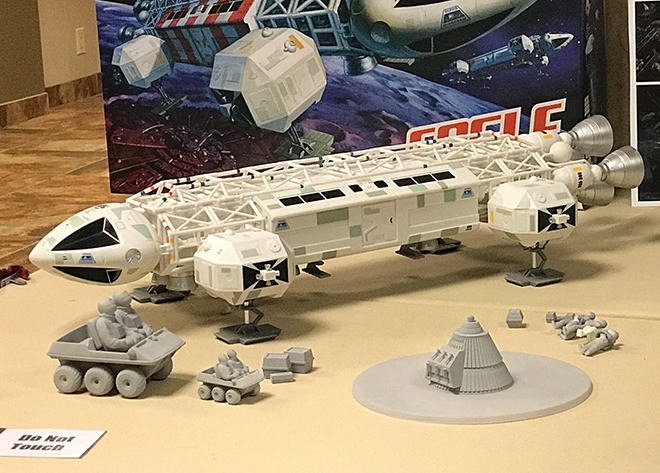
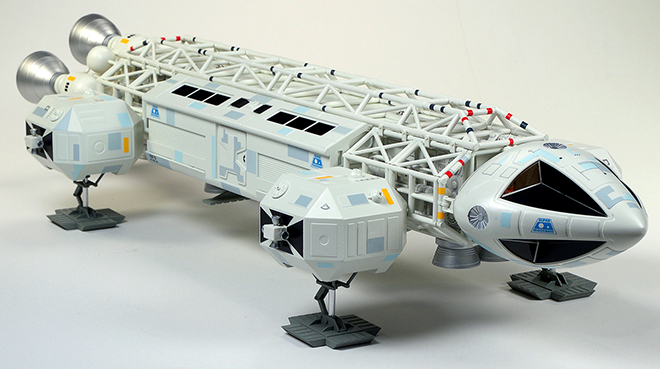
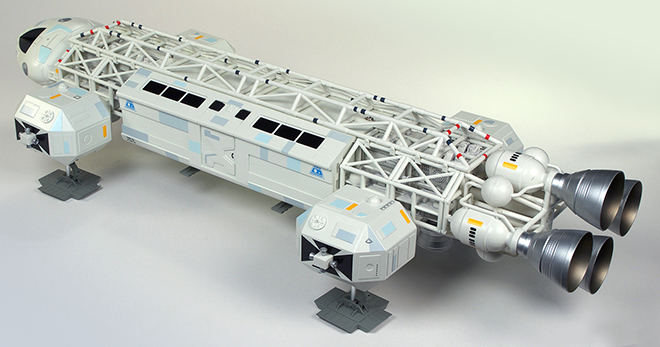
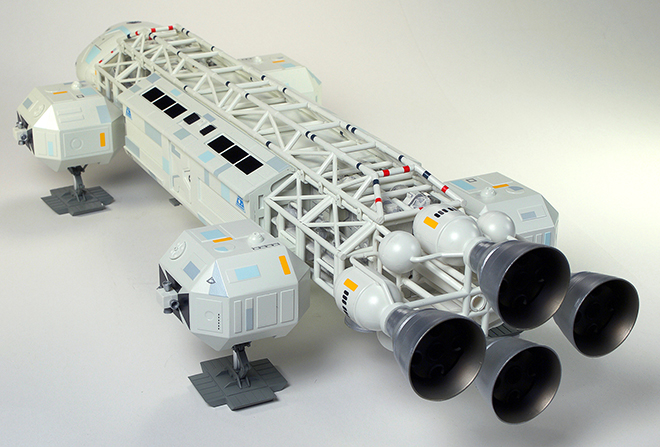
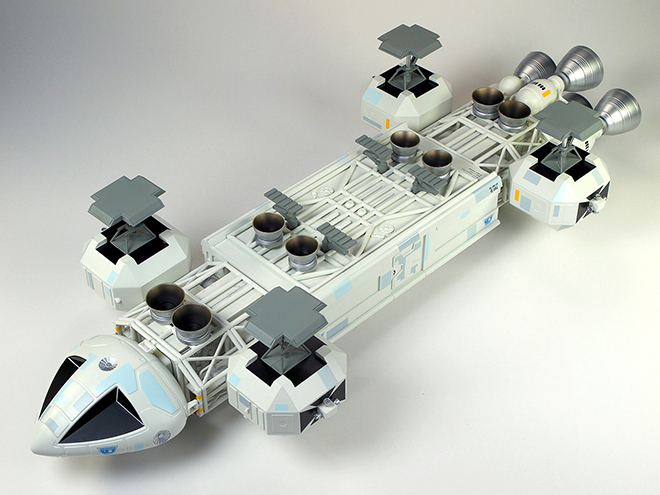
MPC Models: Space:1999 Eagle Display Model
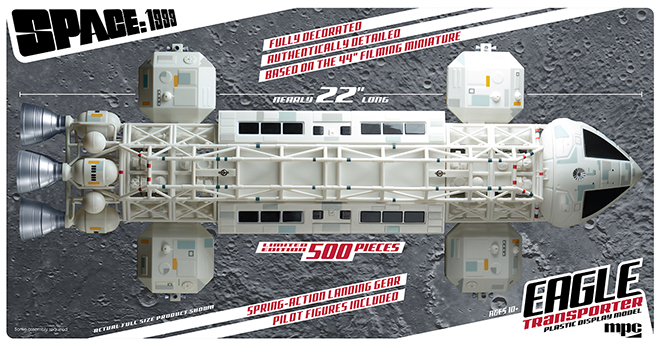
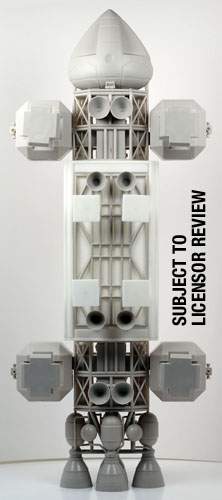
When we signed the Space:1999 license a few years back, we felt we’d take a “let’s roll this out slow and see how things go” approach. First, we found great success with our old MPC 12” Eagle kit. It went so well that we did a deluxe version that included resin parts to create the lab pod version of the ship complete with spine booster parts. Continued sales on those gave us enough confidence to tool up our all-new 22” Eagle Transporter kit. One of our intentions at the time we did that was to eventually bring a relatively affordable 22” Eagle model to market that collectors without modeling skills would appreciate. So here we are…
(BE SURE TO NOTE THE UPDATE AT THE END OF THIS POST!)
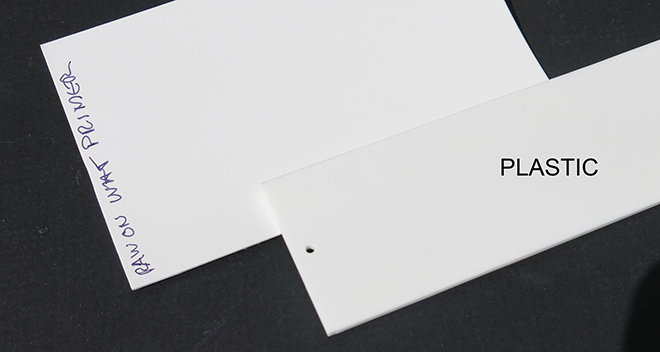
We had sent the first factory deco sample to Alpha 2017, a Space:1999 fan event, to get feedback on it to check ourselves. We knew the deco needed a color adjustment, but we wanted to know how plain injected ABS plastic would go over.
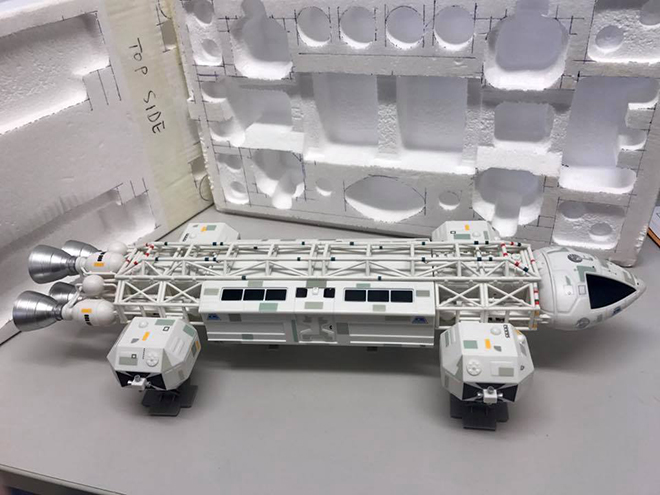
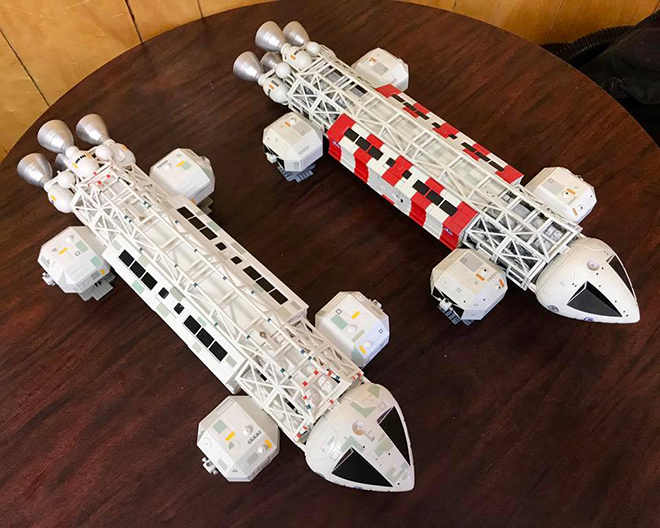
Here is a side by side with another Eagle from the Todd Morton collection.
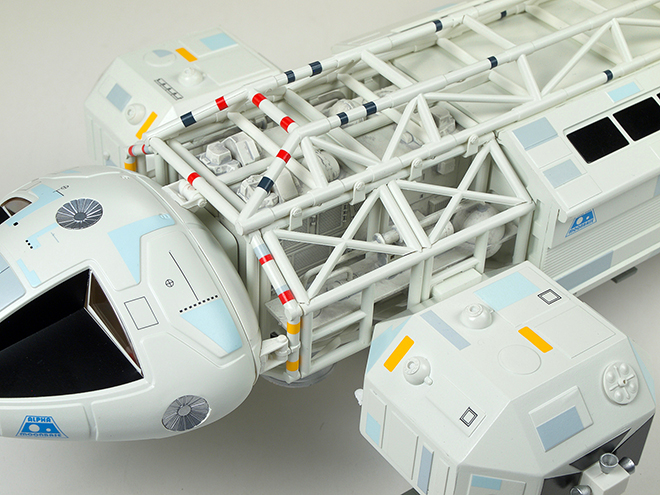
We took heed of the feedback many offered that the product looked too toy-like and opted to apply a base coat of paint to it and we added a weathering treatment to boxes inside the cages at that point. We all agree we ended up with a much better result. Here are a couple close up pics of the ABS plastic.
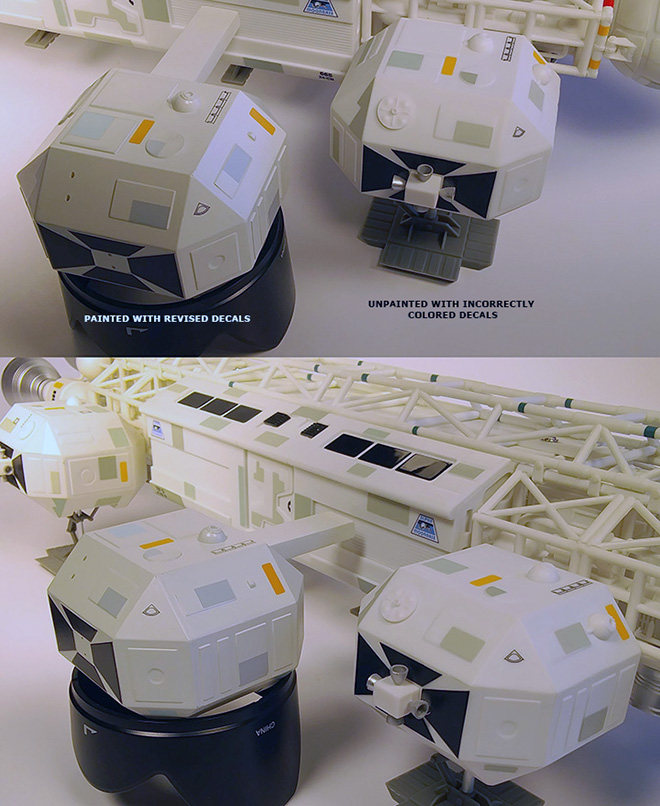
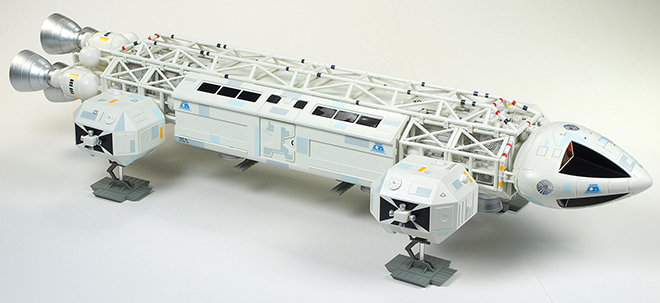
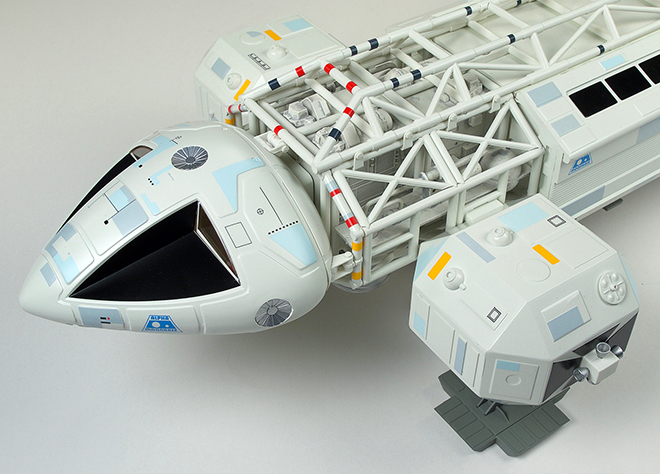
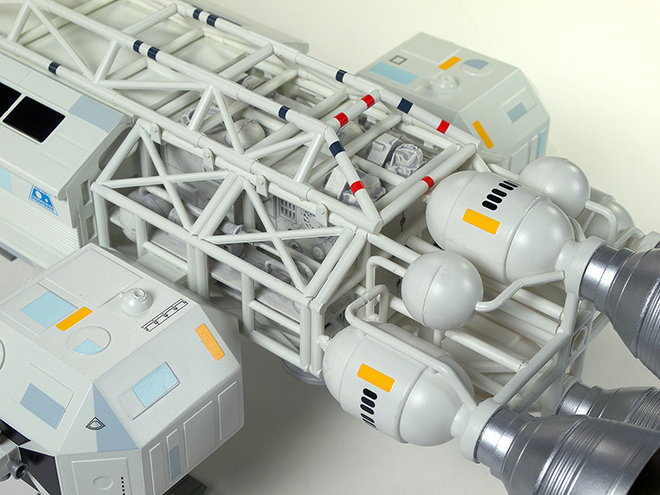
Although the model is –mostly- pre-assembled and it is completely decorated. The deco look is a relatively clean looking Eagle reminiscent of mid-season one appearance of the filming miniature. All of the logos and technical markings are present as is a modest amount of surface paneling and the weathering on the boxes inside the cages. Engine bells come unattached. This was done so that collectors could opt to upgrade to the aluminum engine bells included in our Deluxe Accessory Set.
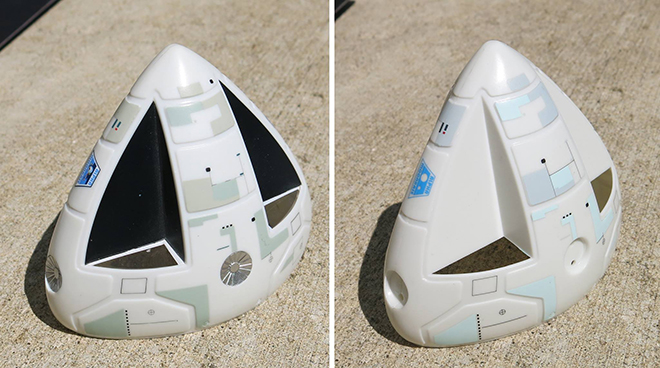
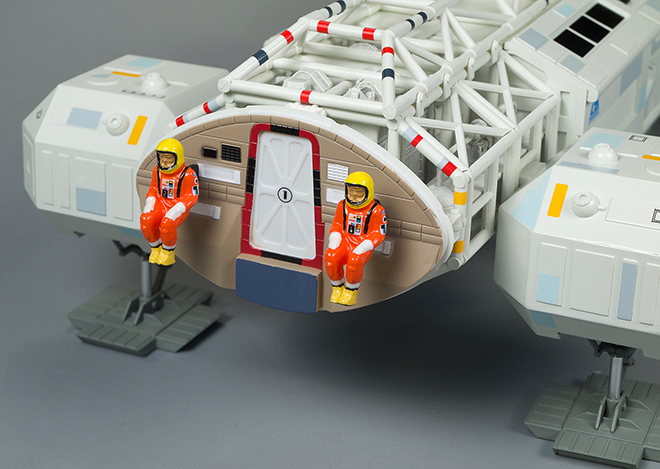
The nose cone cap is also left off to show the pilots and rear cockpit wall. Just like the kit, the landing gear are spring loaded for an authentic feel.
Suggested retail price of the model is $300, but that varies greatly between retailers. Some may feel this is too much, but we can assure you we have done everything we can to keep the cost as low as possible to satisfy as many collectors as we can. The product is meant to appeal to non-modelers. We know what our usual modeler can do quality-wise, and achieving that level of finish is worth every penny a contract builder would charge, but I doubt you will find a contractor to build a kit with an all-in price that competes with our price point. To get a decent grasp on the demand of the market, we have decided to limit this release to 500 pieces. We will use the reaction to the product to judge whether to offer another version later down the road.
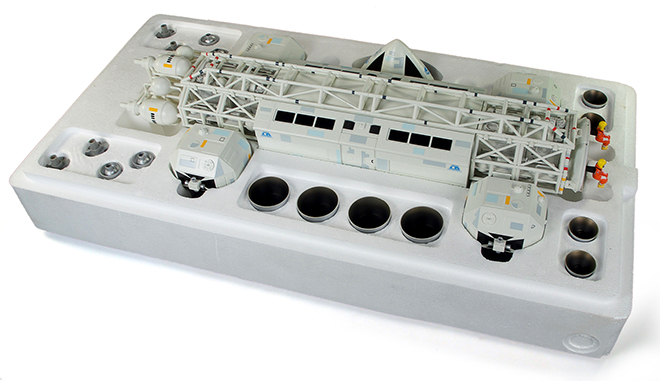
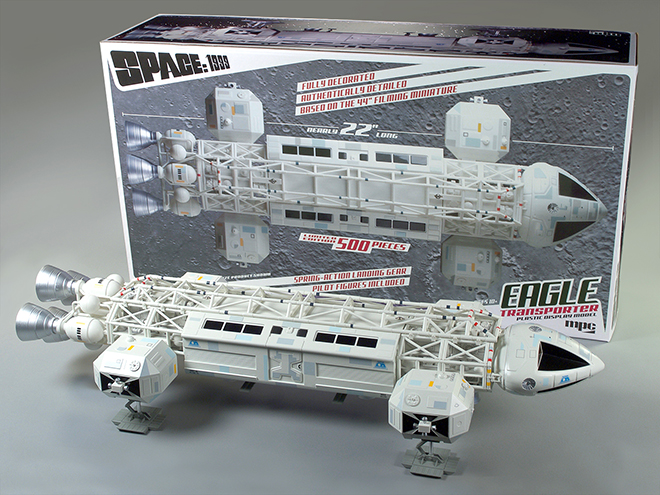
Here is a look at the final pre-production sample. As of this writing, the product is expected be available in December and we are about 75% sold through on the full run of 500. (UPDATE: 11/16/2017 – WE ARE SOLD OUT! BE SURE TO PRE-ORDER WITH YOUR RETAILER. PRODUCT WILL BE AVAILABLE CLOSE TO CHRISTMAS.)
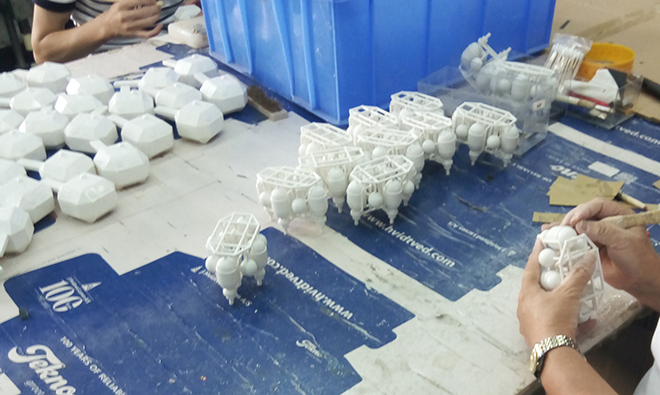
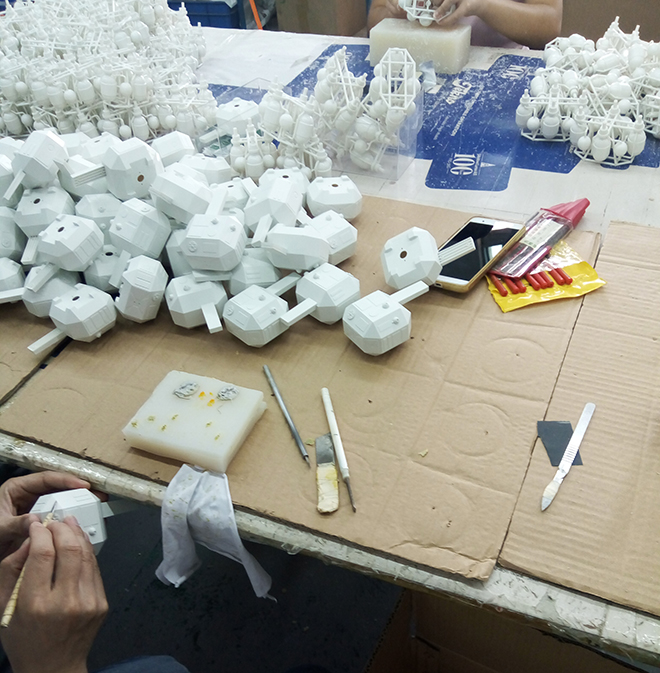
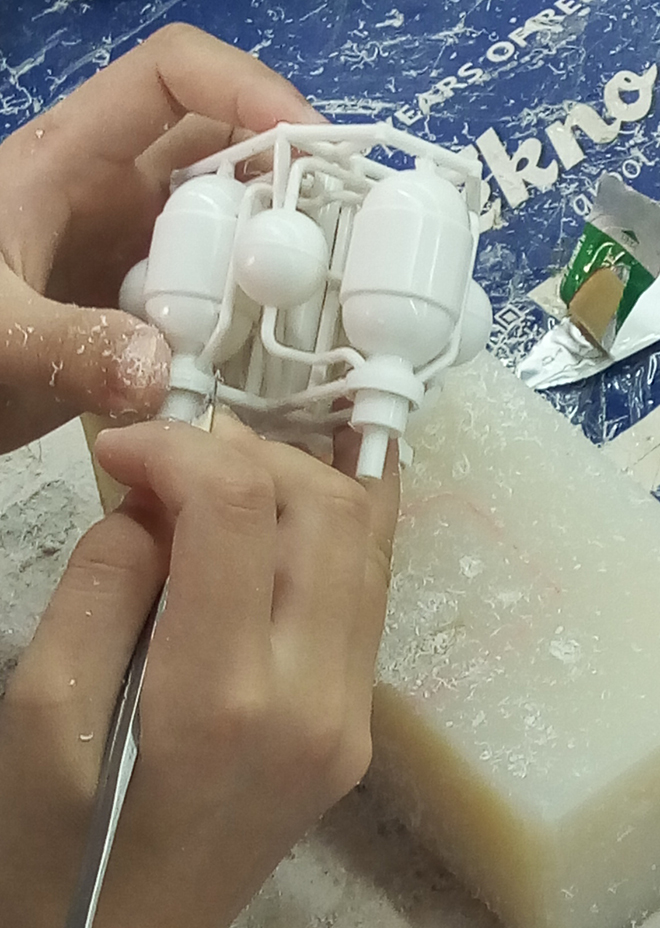
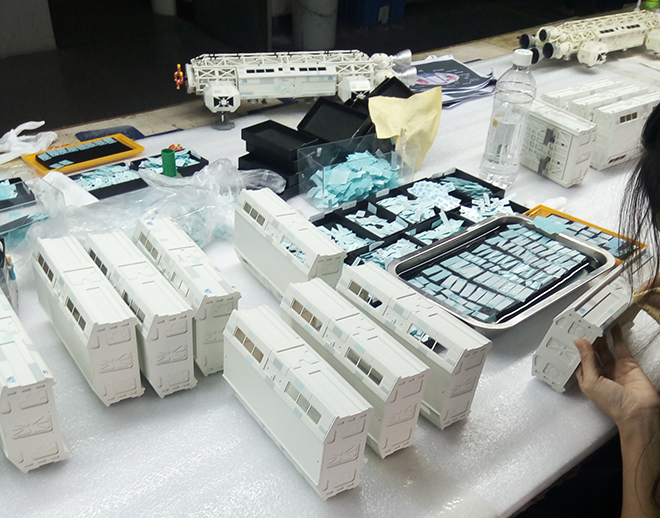
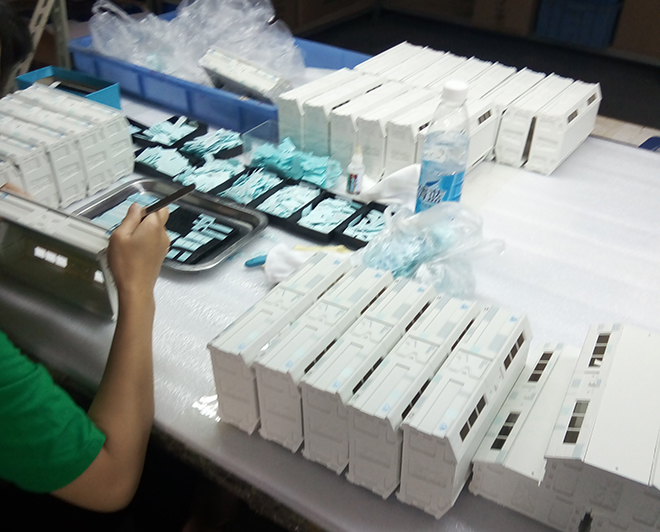
This just in… photos of the production.
Assembly and hand cleaning seams.
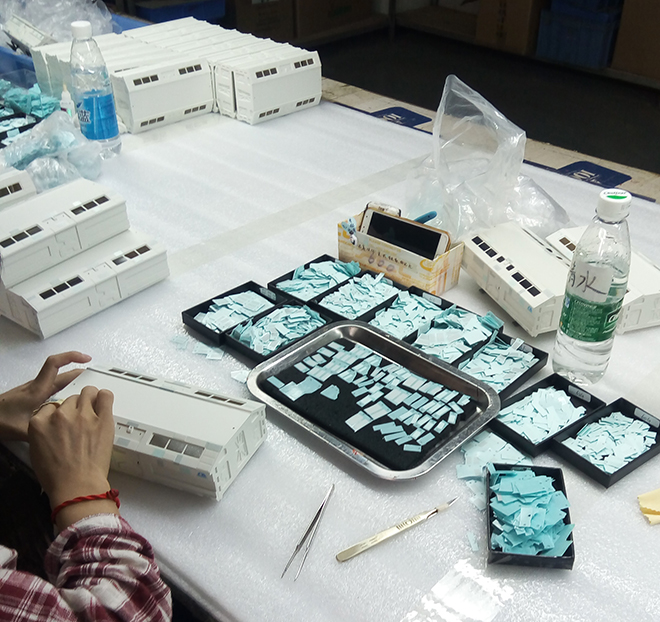
Hand applying all of the decals. Nothing is pad-printed.
(UPDATE #2) Check out this promo video!
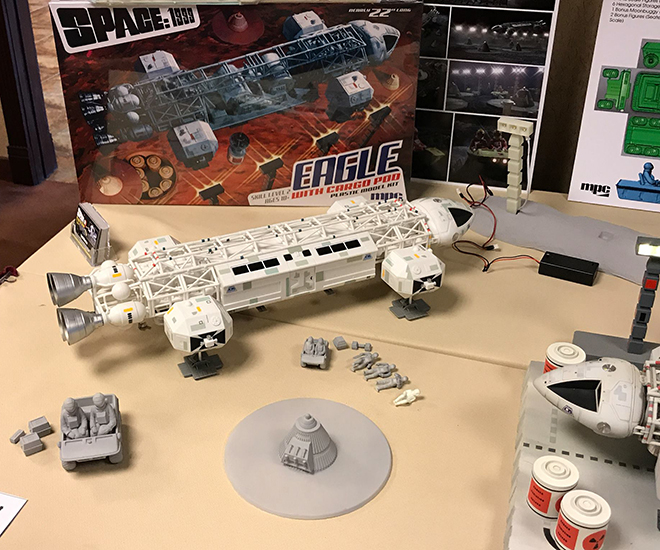
MPC Space:1999 Models: Announcing 22″ Cargo Pod Eagle
Since our 22″ Space:1999 Eagle hit the market, modelers have been clamoring for more and continue to ask what is coming next. Here is our official announcement that the next Space:1999 kit will be a 22″ Eagle with Cargo Pod! I don’t have much time at the moment, so I’ll dive right into the details as we know them right now.
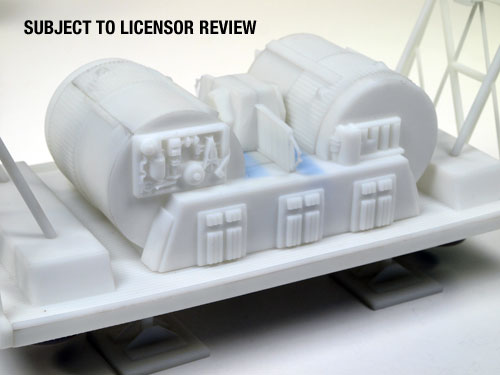
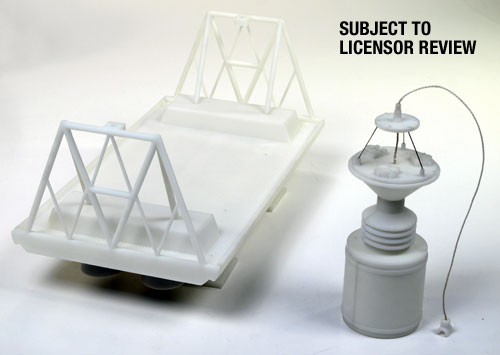
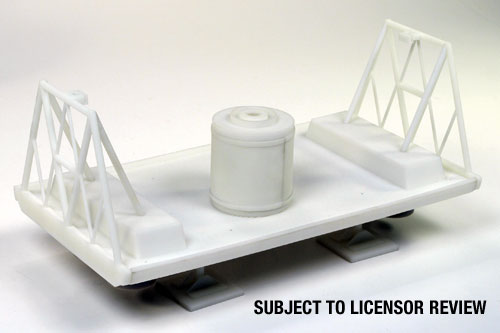
Of course it includes the flatbed “cargo” pod, but comes with a couple options. It will come with a full winch assembly along with the magnetic hoist. Yes, magnets will be included. The kit will also come with four nuclear waste canisters. You can rig one up to work with the magnetic hoist or use all four to fill the flatbed.
The kit will be a full Eagle kit. We will be swapping out tooling inserts that replace the tools that injected the passenger pod parts for tools that will inject cargo pod parts. I say this to be clear that it will not be possible to produce separate pod kits for our 22″ Eagle. Doing it this way keeps both the tooling investment and production costs lower in order to deliver the kit at the lowest price possible.
We haven’t announced the pricing or release date yet. Due to using one sprue of new parts and including things like the magnets, expect it to be a bit more expensive than the standard 22″ Eagle. It will probably be available in mid-summer. The development of the new parts so far has proceeded at a brisk pace, and we will be tooling the parts soon. Expect to see our buildup at Wonderfest in May, 2017.
While I’m mentioning Wonderfest, let me remind everyone that we offer a substantial award in the model contest for the best use of a Round 2 kit. We give prizes to both the adult category and the best to come out of the junior & teen groups. Historically, we like to see either pristine builds using one of our kits OR the significant use of one of our kits in a creative new design or kit bash. They hope to set a new record of 700 entries this year. Sounds like an amazing opportunity!
I also wanted to mention that due to an unexpected delay with the Special Edition Eagle that spotlights Brian Johnson, we are not certain at this point if the kits will ship before the end of the year. There is a chance, but it is slim. If it doesn’t release by the end of the year, it shouldn’t be much further than a week or two into January.
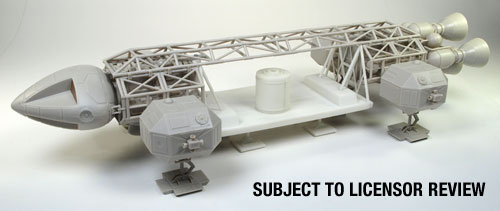
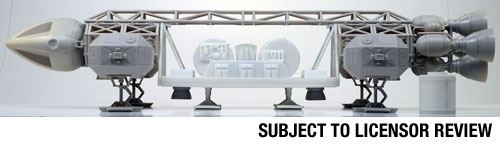
Anyway, on with the pics of the Cargo Pod Eagle!


MPC Models: 22″ Eagle Special Edition
[UPDATE] The kit will not ship by the end of the year. Look for it towards the end of January or February. This is primarily due to misprints on the decal sheet. -JH
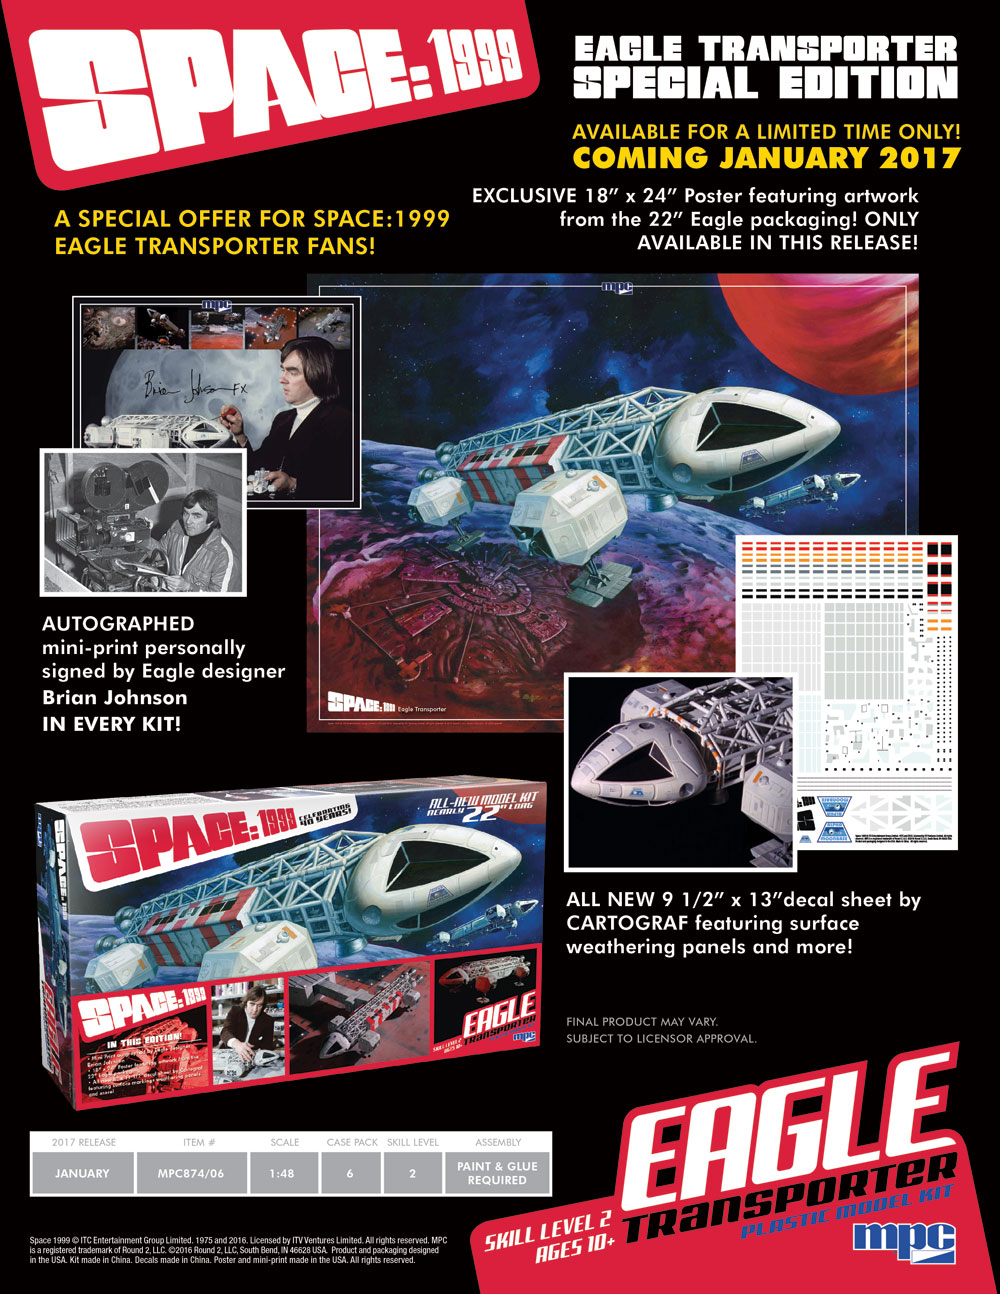
Okay, guys. Time to let a cat out of the bag. We will be offering a special edition of the 22″ Eagle. This release gets a few very special extra goodies thrown in for the Space:1999 aficionados out there.
It starts off with an 18″ x 24″ poster featuring the box art from the kit. Logos have been minimized to really show off the great art on its own. We have gotten several requests to offer this poster. So here is your chance.
Next, we are adding a big sheet of additional decals that feature some specific paneling arrangements that were shown on the filming miniature. It comes with additional marking and “weathering” to randomly spread across the model. This allows the builder to use no paint, or just use a base coat, then apply all these new decals to achieve a great look without additional masking and painting. This special sheet is has been produced by Cartograf of Italy, known world-wide for their outstanding quality.
Last, and best of all, this edition comes with a signature card signed by the Eagle Transporter’s designer Brian Johnson! This is not a blind draw, “chance” offering. Every kit will come with an authentic hand-signed card. Brian is a BAFTA and Academy Award winning special effects wizard with credits on films like 2001: A Space Odyssey, ALIEN, ALIENS and The Empire Strikes Back, not to mention his contributions to other Gerry Anderson productions such as Thunderbirds. This is a truly unique opportunity!
So… details…
If things go well, (and they are so far) the kit will be available before Christmas. We suggest it should retail for about $200, but you will need to check with your usual retailer. The kit will be available for a limited time and in limited number. Right now, we are looking at an edition of 500 copies, but if we get an overwhelming response, we may do more. When they are gone, they are gone.
I’m sure many will wonder if we will ever sell the add-ons separately. The answer is that we may offer the decal sheet later on, but not for a while and definitely not until we have sold out of this edition.
Click on this preview to see all the details.
Then, either click and print this form and fill in the info for your usual hobby dealer.
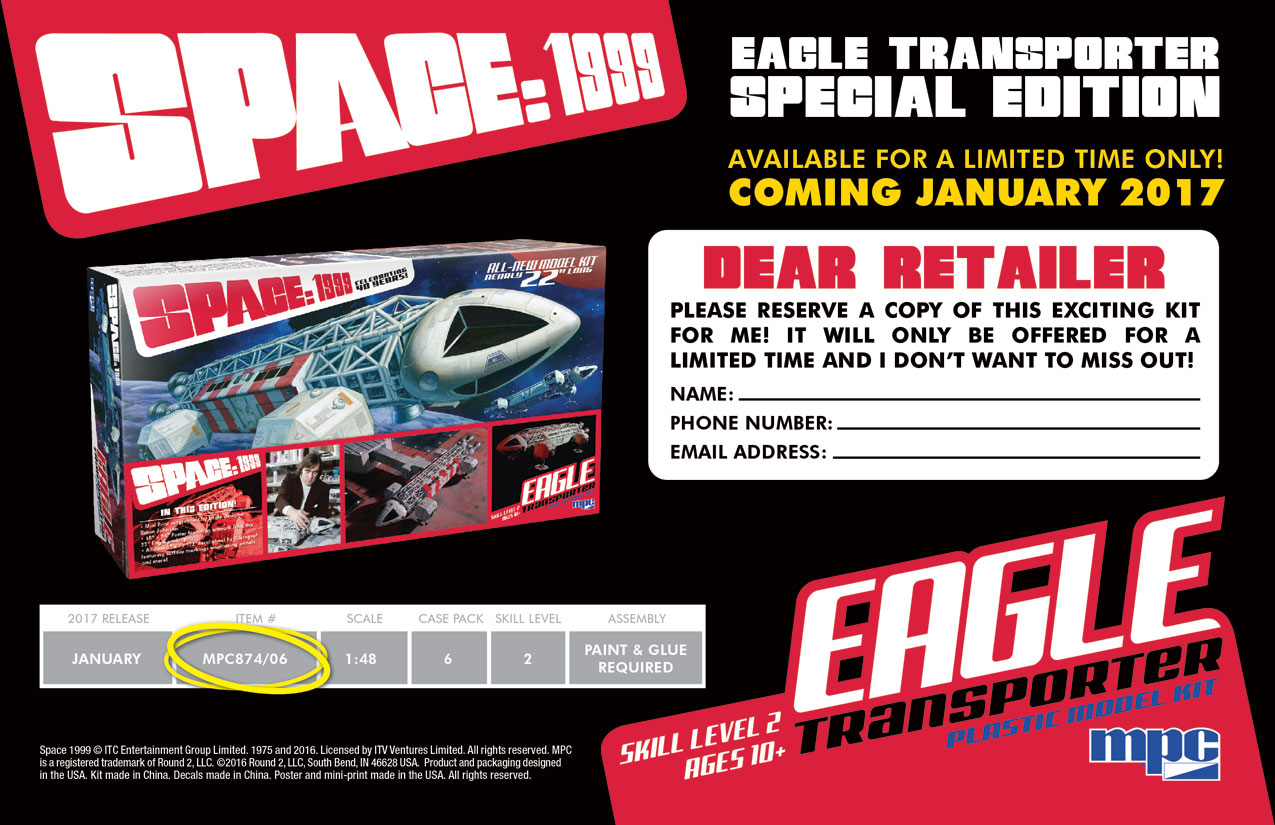
Or download a PDF here. Fill in the form fields and email it to your dealer to reserve your copy.
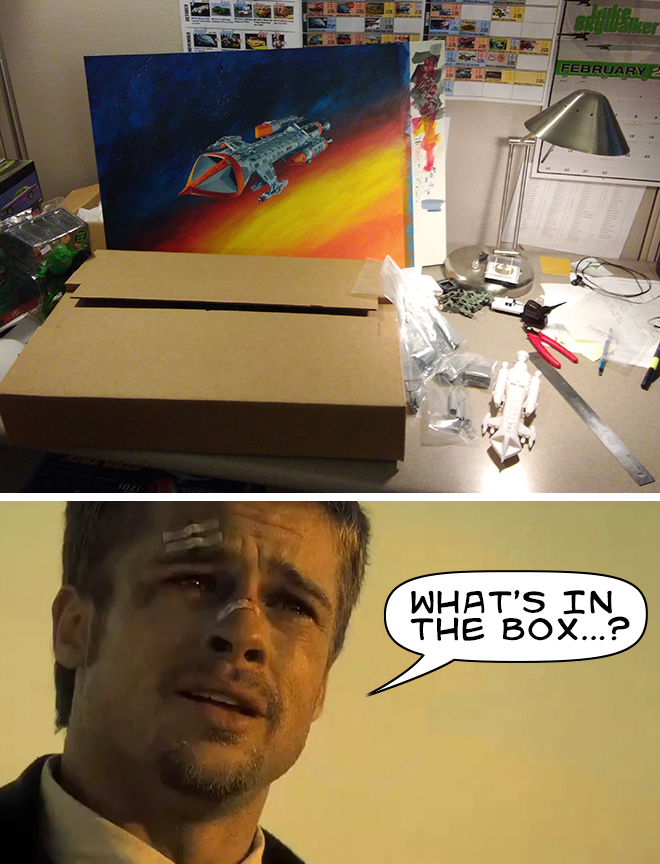
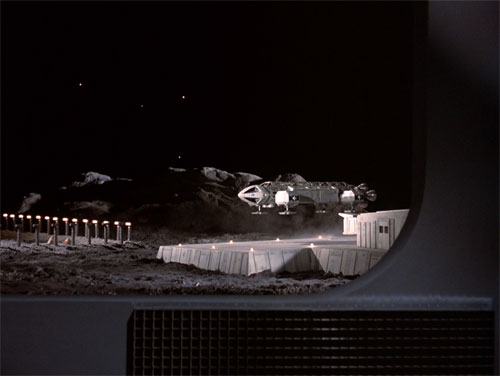
MPC Models: And now for something completely different…
This blog entry is based on true events. Every last word of it. I can assure you. Really…
[harp strings]

[race car sounds. Yes, we know it is in the silent vacuum of space, but race car sounds are cool.]
[Eeeeart!]
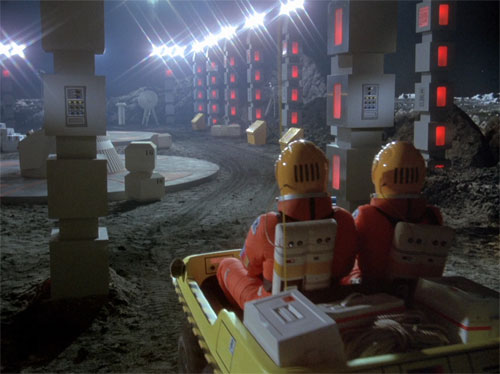
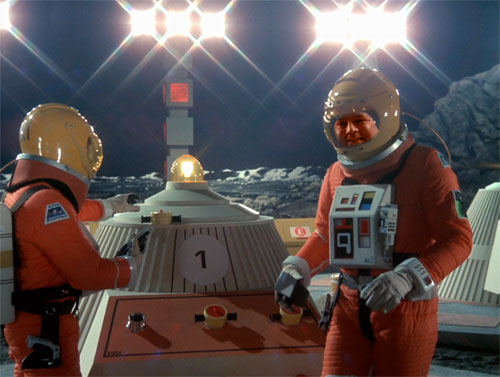
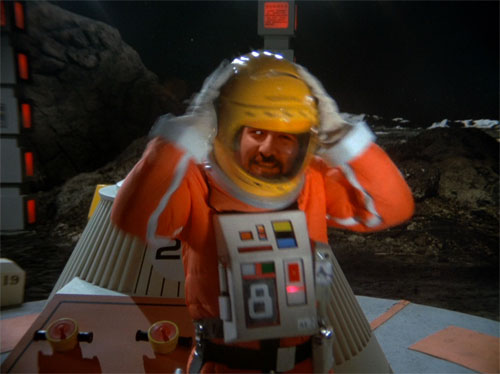
Smallnier: Hey, watch where you aim that thing.
Hoodstrom: I think the batteries are worn out.
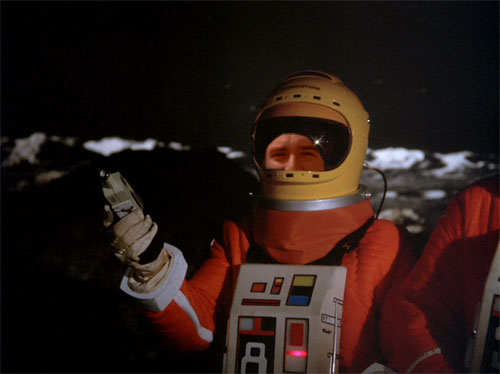
Smallnier: Just shake it a little.
[Beeeep.]
Smallnier: See. Told ya.
Smallnier: Smile, you’re on Candid Camera.

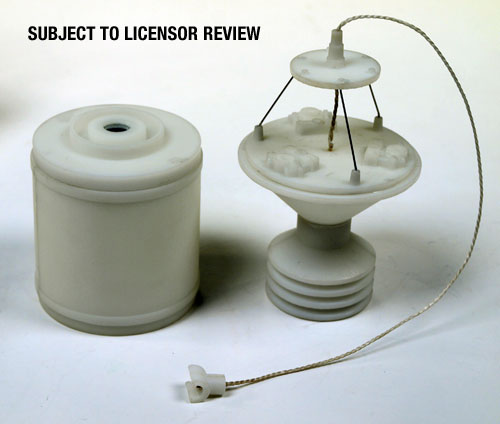
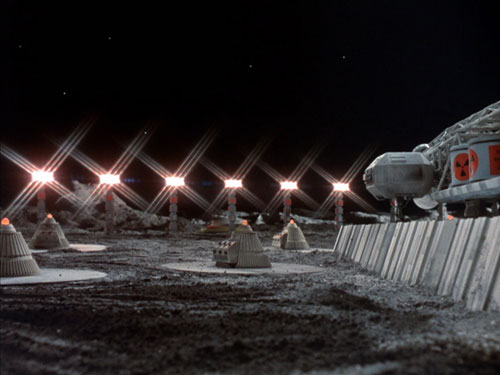
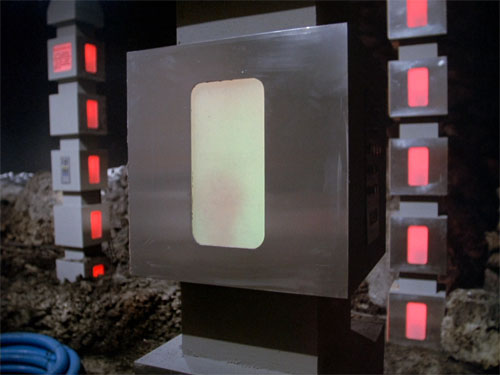
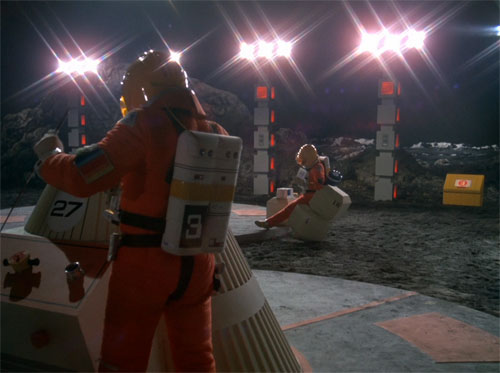
Hoodstrom: Professor Mortonman, it’s Jamie Hoodstrom. We just passed through the laser barrier and we should be able to take a few manual measurements off the Nuclear Waste covers in a couple of minutes.
Professor Morton: Alright, Hoodstrom. We are watching you closely.

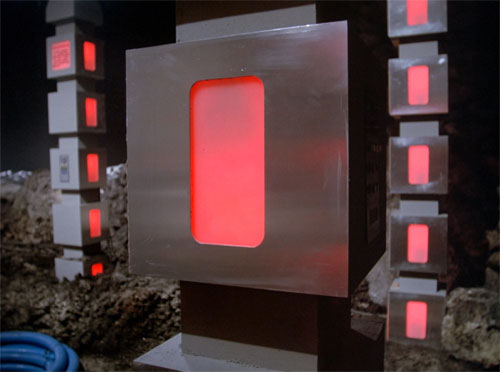
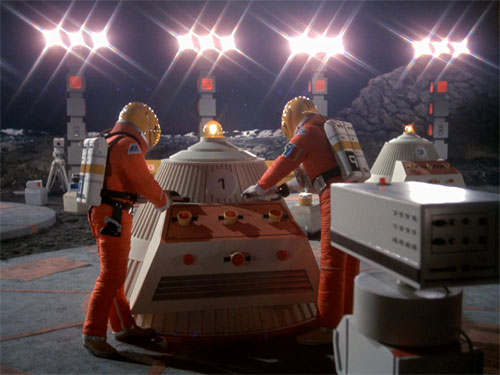
Hoodstrom: Something seems off about these things. Let’s see how big this one is…
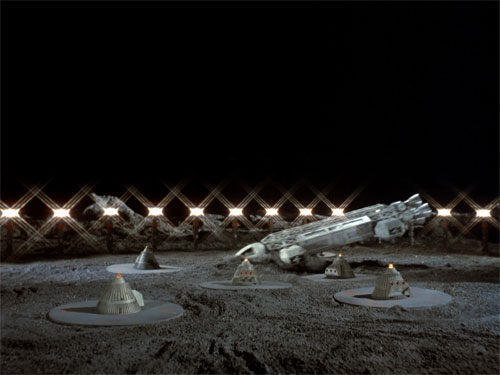
Hoodstrom: They seem a lot smaller than they did in that footage of the Eagle crashing into waste area 2 last week. They looked like they should have been 8 feet tall or more.
Smallnier: It might be your imagination.
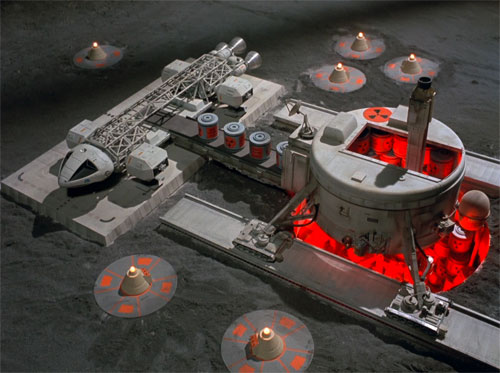
Hoodstrom: I dunno… They don’t look like the ones closer to the center of the field where the waste gets unloaded off the Eagles…
Smallnier: Probably just a different model.
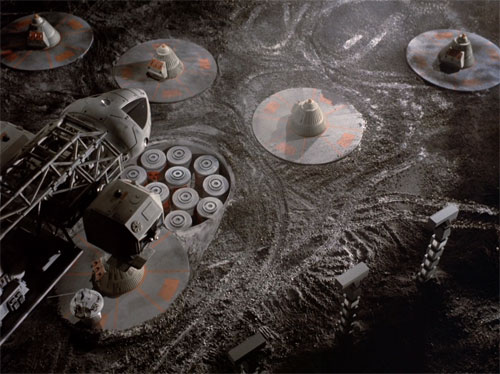
Hoodstrom: But they were almost the same diameter as the waste cannisters. When we moved the storage caps off those last week, they were bigger…
Smallnier: That’s because they used the 22” miniature for one shot instead of the 44”.
Jamie: What?
Smallnier: Oh, nothing…
Hoodstrom: something also seems different about them compared to the ones I see outside my apartment near the Eagle landing pad.
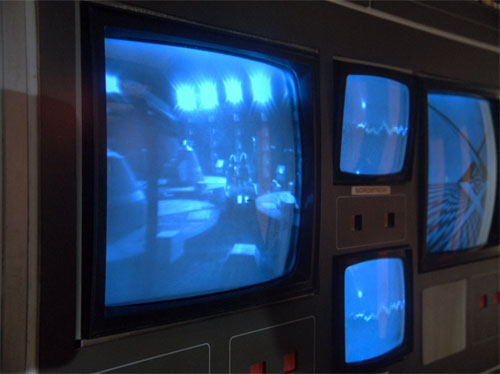
Smallnier: Now, see. That really was an interesting camera effect. You see, the shot used the 22” Eagle miniature. (You can tell it by the fact that it doesn’t have the elbow linkage behind the landing gear) But yet they made the cones at yet another scale to force the perspective in the background…
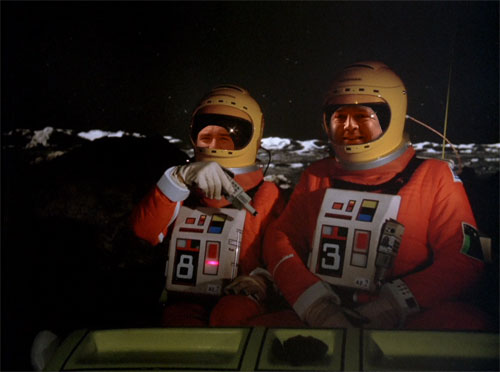
Hoodstrom:… Anyway, these control handles look a lot different too.
Smallnier: You are right. They don’t look anything like Plastruct relief valves. Hey, what is wrong with your eye?
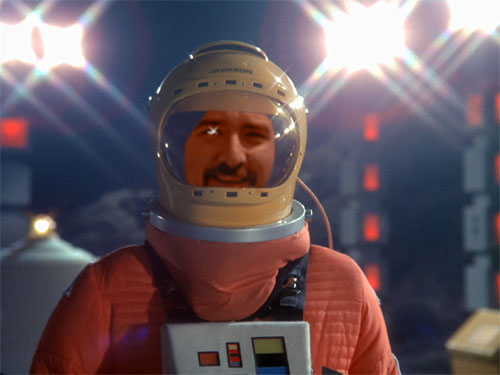
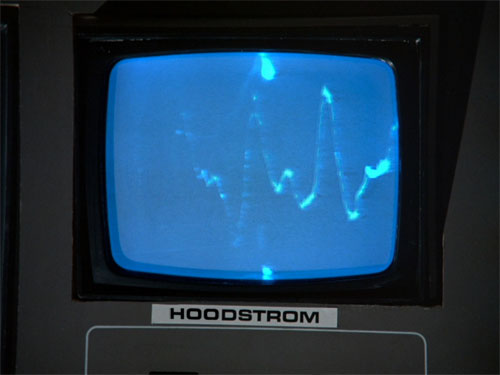
Professor Morton: It’s an increase in brain activity. Smallnier, get Hoodstrom out of there. I think he is in trouble.
Hoodstrom: What the heck is Plastruct? What do you mean different models? These cones must have been built in four different sizes. That is just crazy! I’m losing my mind!
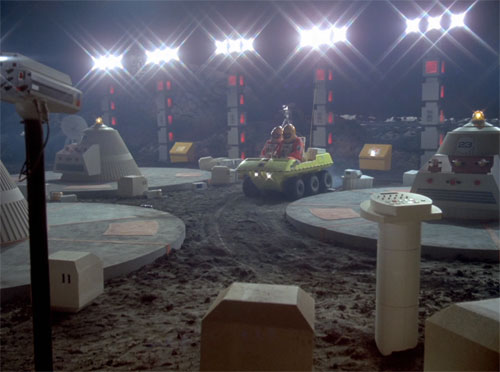
Smallnier: Well, it isn’t anything to get too upset about. Hey, watch out for those boxes! In the moon’s lessened gravity they are bound to bounce far up into the air!
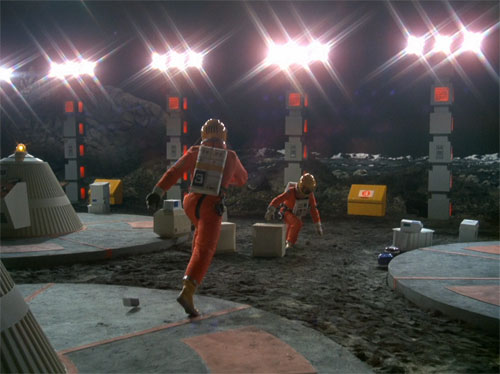
Smallnier: Okay, maybe not. Let me help you up.
Hoodstrom: I’m suddenly in the mood to dance!
Smallnier: Okay, why not? Not one else is around…
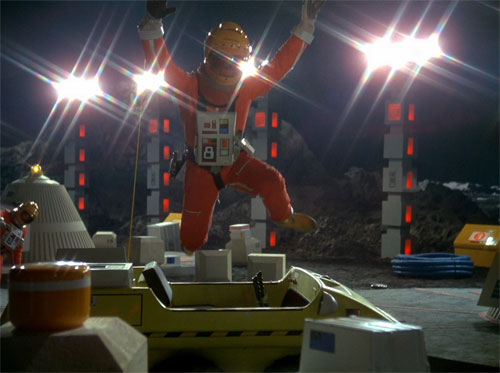
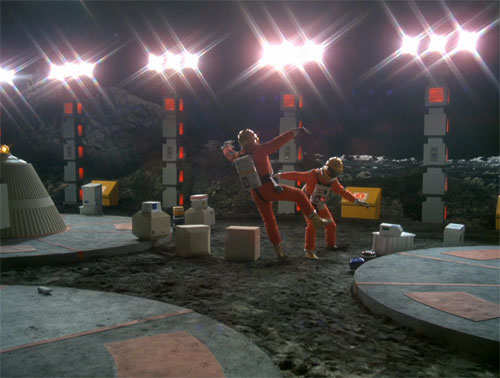
Hoodstrom: I feel so funky I bet I can jump over the moon buggy!
Smallnier: Showoff! Hey, watch out for the laser fence.
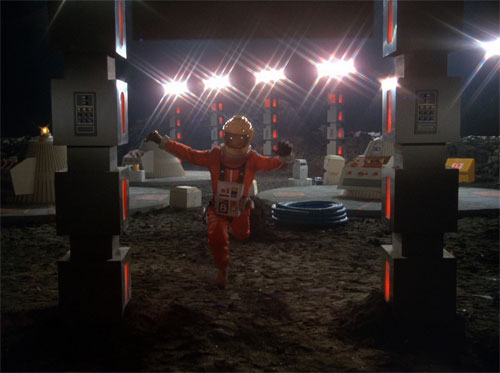
Hoodstrom: Wha!?!
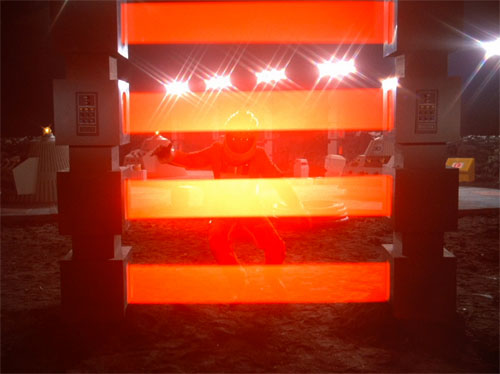
Hoodstrom: AAAHHH!

Stay tuned to this space for some upcoming announcements about MPC’s Space:1999 kits. And this blog was only based on fact so much as the Texas Chainsaw Massacre was based on true events. Your mileage may very…
Star Trek Models: 1:350 scale developments
UPDATE: It now looks like a strong possibility we will have test shots of the new saucer parts at Wonderfest. See you there…
It has been a while since we’ve talked about upcoming sci-fi releases. I’ll spill the beans on a few things, but focus on what we have in the works for our 1:350 scale kits that should arrive later this year to commemorate the 50th anniversary of STAR TREK: The Original Series.
Part of the fun of fandom is holding the great debates… DC or Marvel…? Star Wars or Star Trek…? Chicken or egg…? When developing our 1:350 TOS Enterprise kit, it was “engraved panel lines or no engraved panel lines…?” In order to serve what we considered to be the widest range of modelers, we opted to engrave the panel lines on the upper and lower saucer. We did so knowing that it might upset some, but would satisfy others that didn’t have the skill or tools to install them in pencil like the filming miniature had. We have decided it is time to reverse course and offer the saucer without the panel lines. We will be releasing the saucer as an accessory piece so everyone that already has untouched kits can supplement them with these replacements and save the time and effort from filling and sanding them. Along with that change, we have corrected the position of two sets of windows that were off by a few degrees, but got by us. The “toothy” surface texture will also be removed so the saucer should now be as smooth as a baby’s bottom.
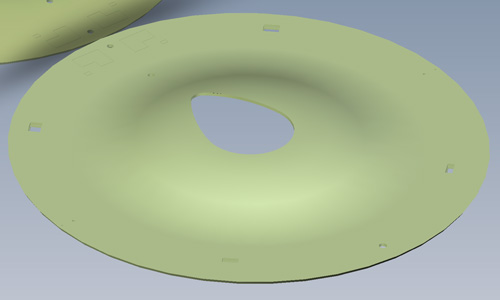
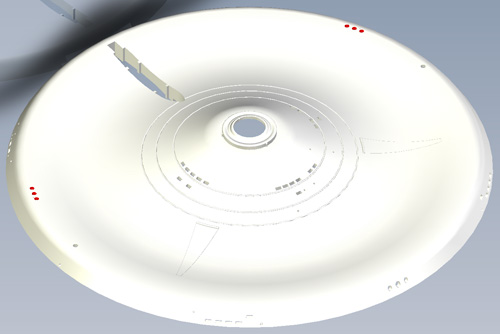
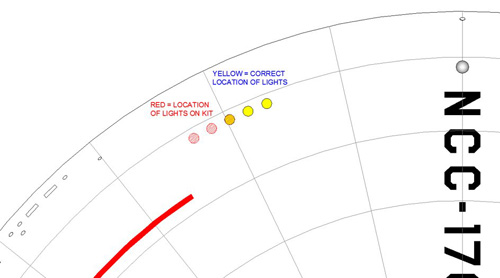
Some may say “Well, if you are doing that, you may as well include them in the kit that way now.” To which we say “Yes, indeed.” And while we are at it, we will be updating the color reference to reflect new-found information gleaned by the team of experts that are restoring the Enterprise filming miniature. Our go-to Star Trek guy, Gary Kerr, has played a key role in the restoration and is dutifully documenting the untouched/unseen areas of the miniature to determine the exact paint colors that were used. We’ll finish off the offering with an updated 50th anniversary scheme on the packaging. We plan on giving the Pilot parts accessory pack the same treatment and everything should be out by the end of the year. Additionally, we’ve heard the demand for more light kits and a new batch is on a boat as I write this. Expect them on store shelves within a month. If you have been on the lookout for a set, let your retailer know you want a copy (item number is MKA007).
There is a slim chance that we may have a test shot of the saucer on display at Wonderfest. We should have a preliminary look at the 50th anniversary packaging at the show as well. As usual, we look forward to seeing everyone at the show. It is a personal highlight of mine every year to get a chance to meet the builders that enjoy our products so well. We will once again be sponsoring two prizes in the model competition. We will present awards for what we deem to be the best use of a Round 2 model (any brand or subject) in the junior/teen and adult categories. The junior/teen winner gets a selection of kits from all of our brands. The adult winner will receive a gift certificate to autoworldstore.com which despite the name does deal in sci-fi kits as well. Good luck to all who enter. see you at the show!
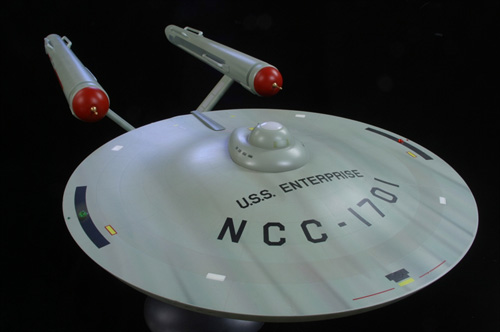
Star Trek Models: My Enterprising Journey pt. 3
Here we are with Michael Scarola’s third part of his build process of our classic AMT U.S.S. Enterprise kit.
My Enterprising Journey: Building the Classic AMT 18” Enterprise – Part 3
There have been many discussions and articles that talk about the color of the TOS Enterprise studio model. On screen it appears anywhere from white to blue to green-gray to silver. It’s been revealed by Richard Datin that the studio model was actually a light gray with a hint of green. Datin chose the WalMart Concrete color chip as a near perfect match to the Enterprise’s hull color.
I started my research with a WalMart Concrete color chip and found Tamiya JN Grey appears to be a little too green. I had access to Gary Kerr’s actual paint samples of the hull color and the color that appears on the leading edge of the dorsal and also a sample that was matched to the Master Replicas TOS Enterprise.
The mixture I came up with is 3 parts Tamiya JN Grey, 1 part Sky Grey & 4 parts Flat White. It looks neutral with a color shift towards green when viewed under indoor lighting and it even appears to shift a bit blue at times. It’s right in the ballpark of the 3 samples and is very close to Gary Kerr’s hull color, only lighter, which is a good thing for the smaller scale AMT kit.
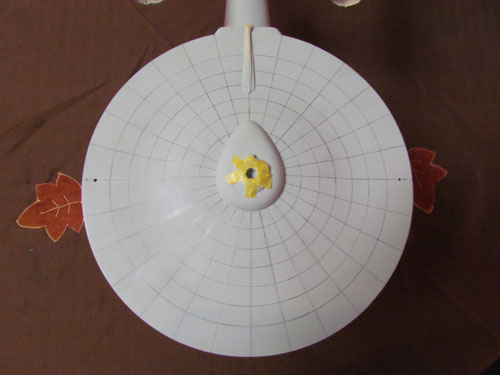
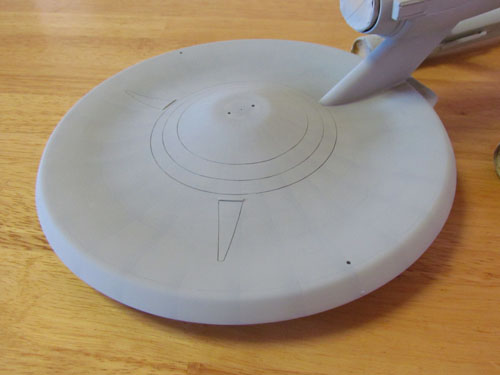
After the main hull color was painted I drew on the saucer grid with a pencil using the scaled blueprints, a straight piece of styrene sheet and a compass.
I mixed a darker shade of gray to pre-shade the grid lines and toned it down with the hull color.
I mixed some Testors Acryl US Navy Blue Grey, Pale Green and Flat White for the leading edge of the dorsal and used Testors Acryl Neutral Gray for the darker colors. The nacelle grills are painted Tamiya Chrome Silver and the ends of the Intercoolers and Control Reactor are Testors Acryl Neutral Gray lightened with white. For the triangles on the bottom of the saucer and the darker areas on the undersides of the front of the nacelles I mixed a darker, more neutral, variant of the hull color.
Weathering and decals…
Dark gray and green pastels are used for most of the weathering and rust colored pastel chalk for the ‘rust ring’ on top of the saucer.
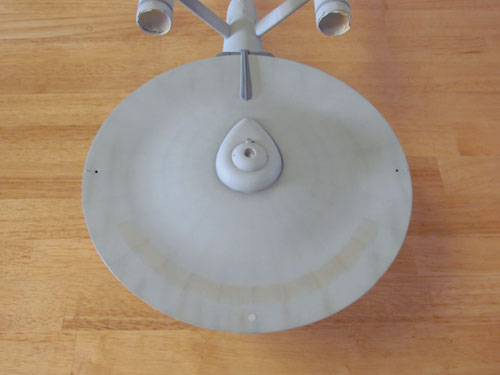
I did my best to represent most of the look of the weathering of the 11 foot studio model while toning it back a bit for this smaller project.
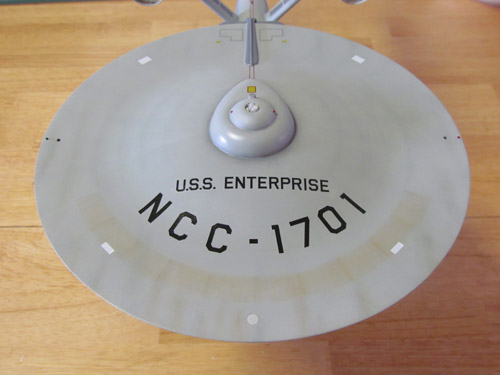
The decals that come with the Round 2 kit are very accurate. I did, however, separate the saucer’s U.S.S. ENTERPRISE/NCC-1701 decal into pieces. The ‘U.S.S. ENTERPRISE’ seemed to sit a bit too close to the ‘NCC-1701 and the spacing of the ‘U.S.S. was a bit too much compared with the 11 foot studio model. In addition I also separated the NCC-1701 into individual decals. This eliminated the clear film and due to the grid on the saucer I was able to place them according to the studio model’s placement. Other than this, the decals actually are very accurate. The below image shows the placement of the decals on the top of the saucer.
I sprayed Future floor polish over the model before applying the decals and sealed them with Testors Create FX acrylic flat clear, with a few drops of semi- gloss clear added to keep the surface from appearing chalky.
All in all I had a lot of fun working on this project. This is my first time building the AMT 18” TOS Enterprise and I’m glad I started with the Round 2 release. The smooth top of the saucer and the wonderful decal sheet really improved this classic kit.
I’d like to thank Jamie Hood and everyone at Round 2 for giving me the opportunity to share my build.
Michael Scarola
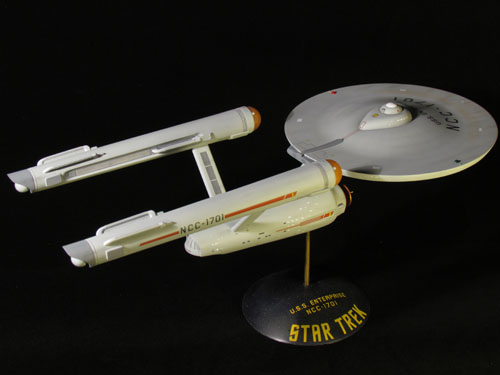
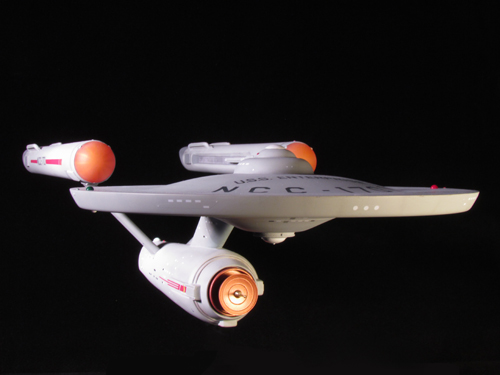
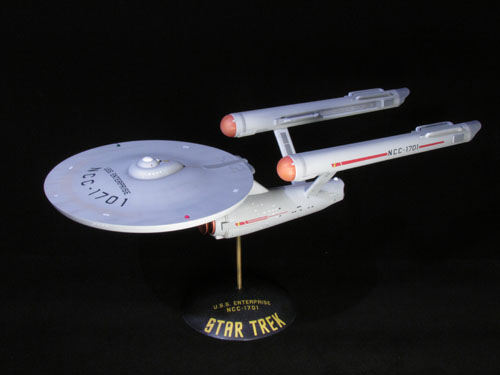
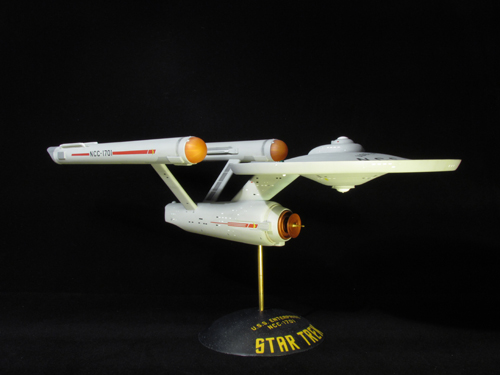
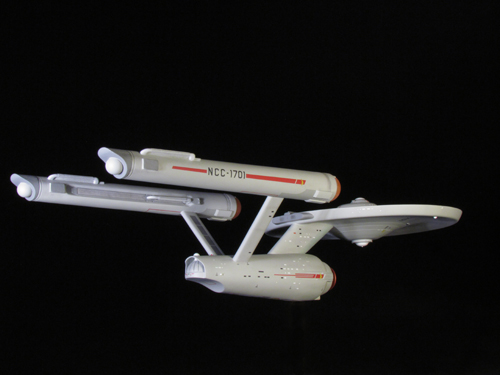
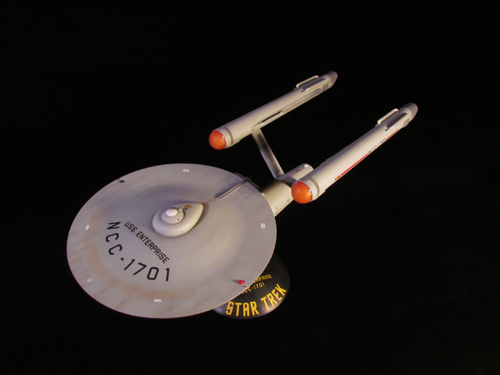
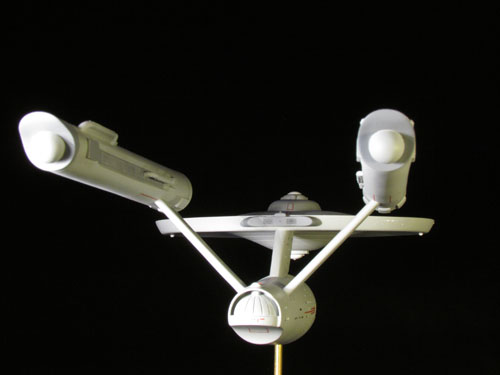
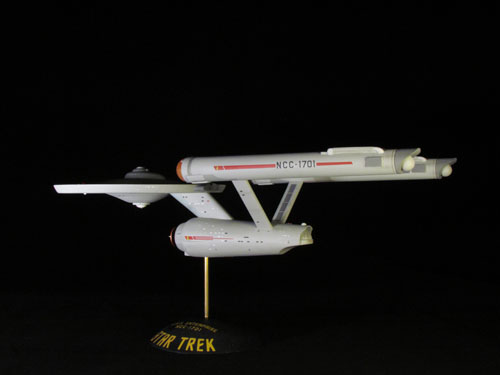
Take a bow, Mike. Great job. Have a gander at these beauty shots of the finished model.
Star Trek models: My Enterprising Journey Pt. 2
Here we are with Michael Scarola’s second part of his build process of our classic AMT U.S.S. Enterprise kit.
My Enterprising Journey: Building the Classis AMT 18” Enterprise – Part 2
The work continues…
Now that the saucer’s details and shape were worked out it was time to move onto the secondary hull. I started by lengthening the hull. The 3 main parts were glued together and the rear section, in front of the pylons, was cut off and the hull was stretched approximately 1/16”.
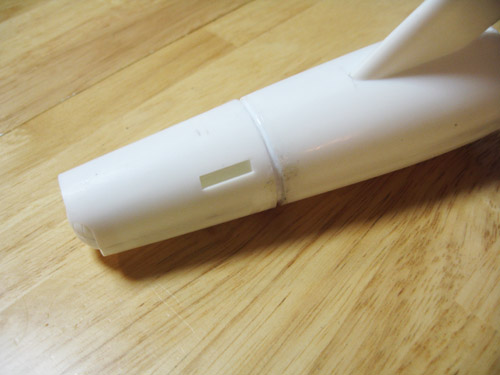
I used one of the AMT kit’s nacelle domes to make new landing bay doors by simply cutting it in half and scribing in some vertical lines.

Sheet styrene was added to the curve of the hull next to the hanger bar doors to achieve the proper shape. The front of the hull was built up with putty and the ribbed details on the deflector forks were added using pieces of .5 mm styrene rod placed side by side as well as some half round styrene rods above and below.
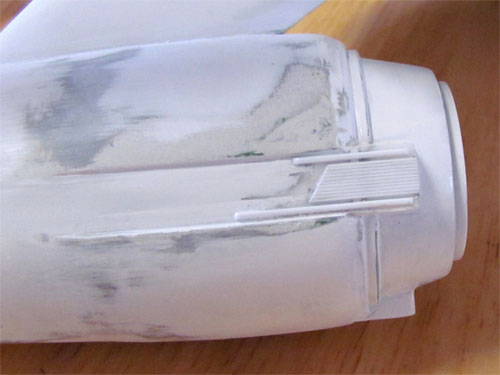
I combined the rear of the kit’s deflector housing with the front of a resin housing from JT-Graphics. The outer housing itself was puttied and re-shaped.
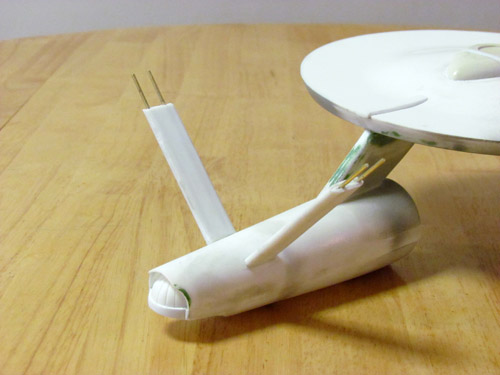
The nacelle pylons were narrowed and shortened to match the blueprints. They were attached at an angle slightly less then 90 degrees using a template I made from the blueprints. I strengthened the pylons with sheet styrene and 1/8” brass rods.
The kit’s nacelles were used and also modified. I cut off the grooves behind the bussard domes since I was using resin bussard domes from JT Graphics, which already these details. To create the taper of the studio model’s nacelles I drew a line with a pencil from the front corner of each half that goes to 2.5 mm at the rear.
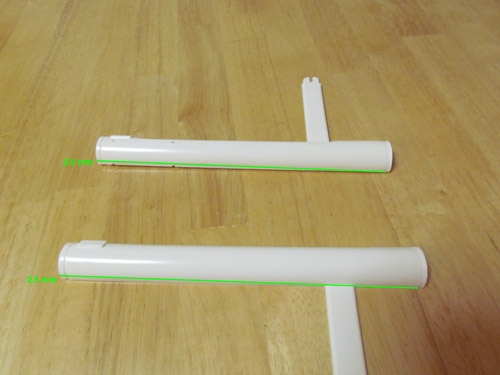
The above image illustrates where the cuts were made. Unfortunately I didn’t take a picture of the actual kit parts so I used nacelle halves from an older kit for figure 12’s illustration. It’s basically long skinny triangles that needed to be cut away. In order to make sure the inner trenches stayed centered on each nacelle the cut on both parts has to be made on the same side, as indicated in the picture. The 2 halves were heated with a hair dryer and rolled on a flat surface to create the taper towards the rear. When I glued the halves together I sanded, for what felt like days, to get them round and even.
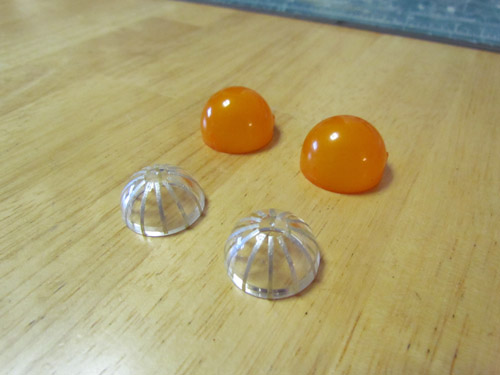
I used a set of correctly sized end caps from Federation Models that come with their Surya resin kit. The bussard domes from JT-Graphics have inserts to simulate the fan blades but have other details that weren’t actually on the studio model. Instead I used a set of clear domes I had on hand and added the fan blades with some 1 mm masking tape, painted silver.
I used a set of JT-Graphics Intercoolers and Federation Models Control Reactors and rear vents to round out the nacelle’s details.
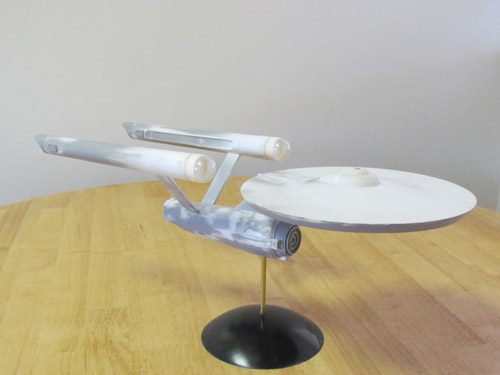
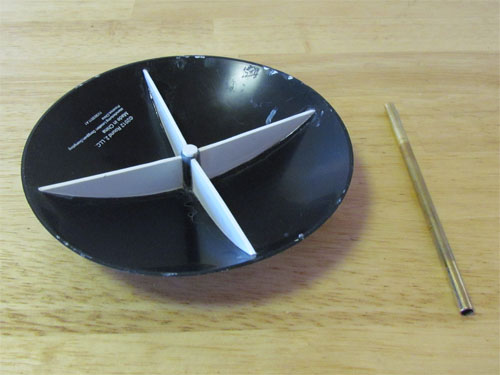
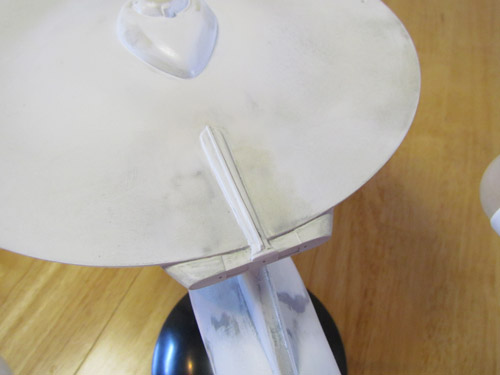
The above image shows the model almost completed sitting atop a Round 2 Dome Base, attached with a brass rod. I reinforced the dome base with 1 mm styrene sheet on the bottom. This keeps the Enterprise from swaying.
Having worked through all these modifications I was now ready to take a breath. The next round of fun would involve the hull color. With the Enterprise’s hull color being a big topic of debate over the years I knew it would take more then simply opening up a bottle of paint.
In my next and final installment I’ll cover the painting, weathering and the decals…
Michael Scarola
Round 2 Models: Please welcome a special guest
Hi guys. A while… a long while now… ago I was approached by a new, but respected modeler by the name of Michael Scarola. He was working on modifying a couple of our sci-fi kits and was pulling out all of the stops to make his buildups as accurate as the kits were iconic. We chatted a bit and we decided to have him document his process on the builds and post the results on our blog. We have had these in the can for some time now, but I’ve just come across a sliver of time to schedule them to publish.
Mike did some magnificent work to transform our classic 18″ AMT Star Trek U.S.S. Enterprise and our 12″ MPC Space:1999 Eagle. We’ll be starting with posts about his Enterprise model to coincide with our recent re-issue of the kit that commemorates the 50th anniversary of the television show. You should find the kit available now along with our re-issue of the Klingon Bird-of-Prey. Each series of articles will be three parts with some follow-ups showing beauty shots of his finished models. Off we go with part 1 of “My Enterprising Journey”. Enjoy!
My Enterprising Journey: Building the Classis AMT 18” Enterprise – Part 1
Round 2 has been doing a wonderful job bringing back classic models that we love. The classic AMT 18” TOS Enterprise has been released several times over the past few decades but Round 2’s release breathed new life into it. To start, the original box art was a real treat and the best part is under the lid. The raised grid from the earlier releases was removed from the saucer’s top and a new, and very accurate, set of decals is provided.
Onto the build!
My original intent was to build this kit mostly out of box with the addition of a few resin parts. I started by downloaded a set of blueprints from Charles Casimiro which I sized to the AMT saucer’s diameter. I figured once the saucer matched the blueprints all the rest would start falling into place. The profile of the dorsal (neck) matched the blueprints and I found that the secondary hull and warp nacelles also sized up nicely. At this point I decided to attempt to go all out and try and make this build resemble the 11 foot long Enterprise studio model that was seen in original Star Trek throughout the whole series.
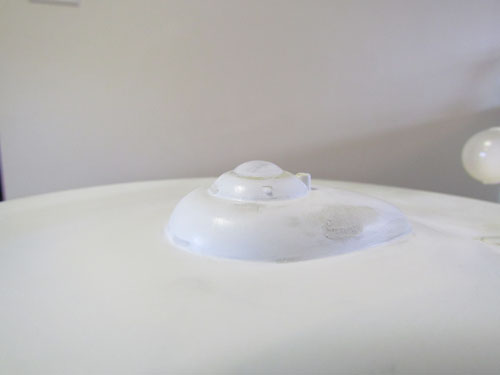
I started by removing the bridge and B/C deck structure from the top of the saucer. I replaced it with a part from Don’s Light & Magic (DLM), which I lengthened by 4 mm.
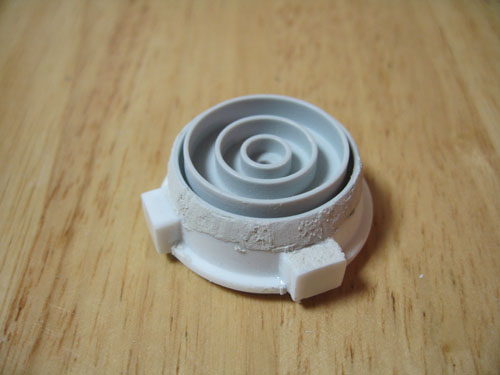
I re-shaped the Linear Accelerator using a razor saw and various files.
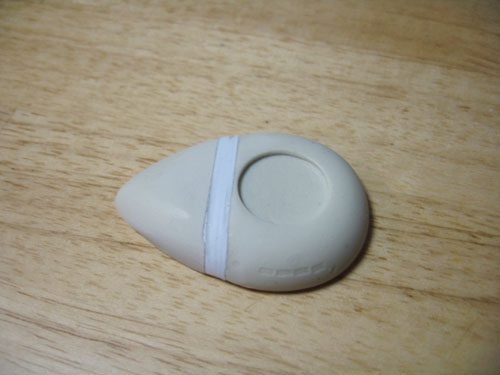
A new bridge dome was made using a spare nacelle dome from a Polar Lights 1/1000 TOS Enterprise kit.
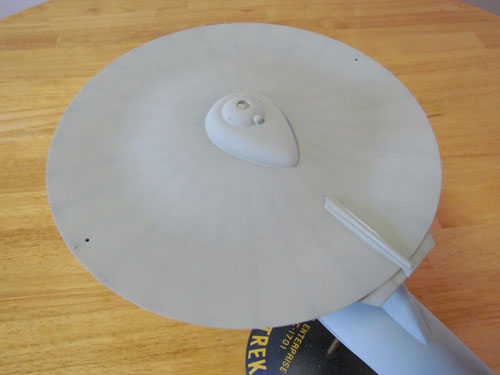
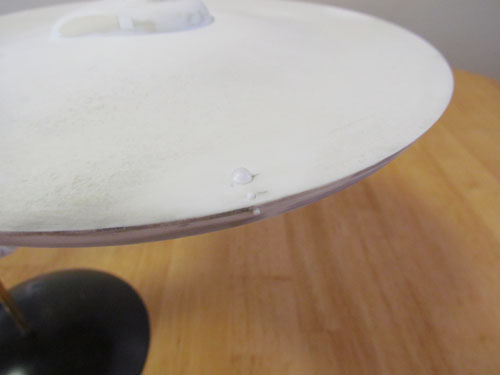
The bottom of the saucer proved to be a bit of a challenge. I glued strips of 1 mm styrene inside the saucer’s edge so I would have enough plastic to re-shape the outer edge’s contour.
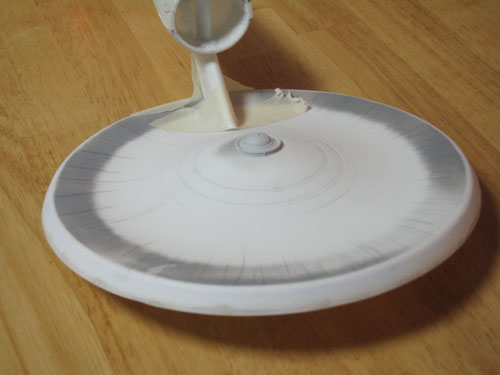
This was done using a razor saw, sanding sticks and lots of sanding. The 3 raised circular lines on the cone were removed and filled in as well as the 3 dimples by melting bits of plastic with liquid cement. The stepped area along the outer edge was removed and I added styrene sheet on the inside center of the cone and sanded down the raised area where the planetary censor attaches. The rest of the work involved sanding the bottom until it was even which seemed to go on forever. To scribe the 3 rings into the cone I used a compass cutter.
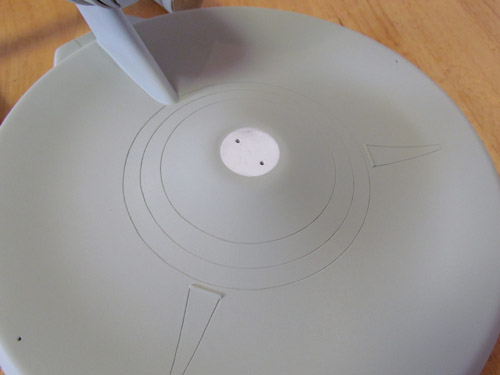
The above pic shows the completed work on the bottom of the saucer with the ‘triangles’ scribed in. For the navigation lights I used pieces of clear sprue from a Polar Lights 1/1000 TOS Enterprise kit. They are made to go in like pegs when the model is finished
The kit’s saucer does make an excellent platform to add details and modifications. The overall shape of the saucer is somewhat close to the studio model and just takes a bit of elbow grease to start looking the part. From the time I started my research this seemed like the most logical part to start on for the build.
In my next installment I’ll cover the secondary hull, nacelles, nacelle pylons, bussard domes and the base…
Michael Scarola