Recommended Sites


Posts Tagged ‘Enterprise’
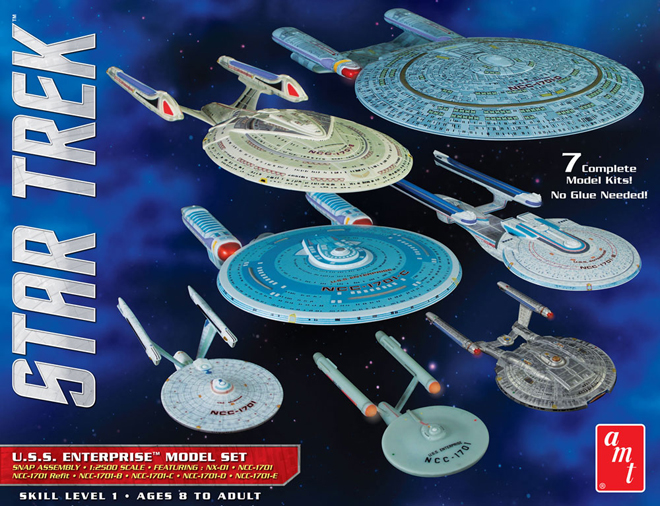
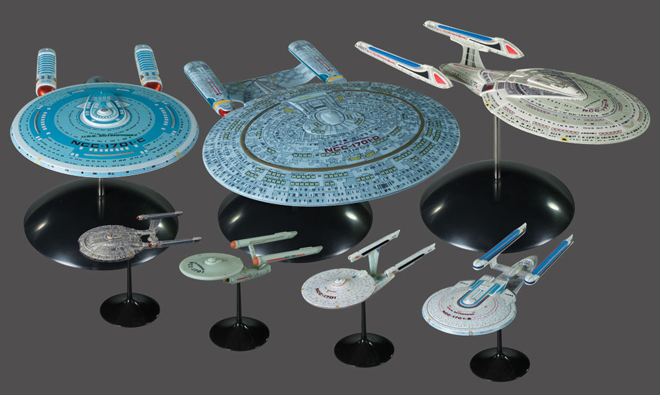
Star Trek Model Kits: 1:2500 scale Enterprise Box Set
Here’s a quick update on another exciting Star Trek kit that should be arriving on hobby store shelves before summer. The U.S.S. Enterprise Box Set should arrive on store shelves in April.
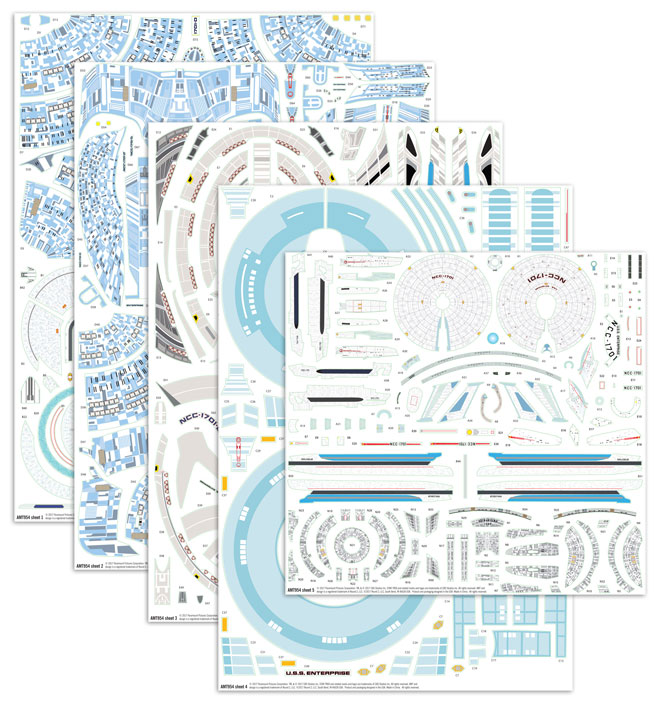
This set features snap-together kits of all seven ships from Enterprise to The Original Series and on through Star Trek: Nemesis. The NX-01 is all-new for this release for the first time in 1/2500 scale. Display bases are included for every ship in the set. One last minute change from our previous announcements about the set is that instead of pressure sensitive decals, such as those that come in Gundam figures, we will now include standard water-slide decals for every ship. The decals come on five large sheets that are packed edge to edge with technical markings as well as aztec paneling. Each ship comes molded in its appropriate base color leaving only a few spots of paint to be needed for completists.
In an upcoming blog I’ll feature our new 22″ Eagle with cargo pod and touch on the packaging for that to lead up to a full reveal of the new kit’s packaging.
Round 2 Model kits: Building a Reputation
First a quick apology… Technical difficulties prevented me from posting this yesterday, which would have made it a bit more pertinent.
Nostalgia… We are fully aware that this factor may be the most significant thing that provides the success we have with our AMT, MPC, Polar Lights and Lindberg models. Many of us remember building kits as kids. Some saved their builds and have done their best to hold onto them to this very day, but I’m betting the greatest majority suffered similar fates trying to withstand a black cat or twenty. Even still the surviving “fan” in each of us has drawn us back over time and Round 2’s faithful (and usually improved) reissues of vintage plastic kits supply the kits we remember so well the in WAY that we remember them.
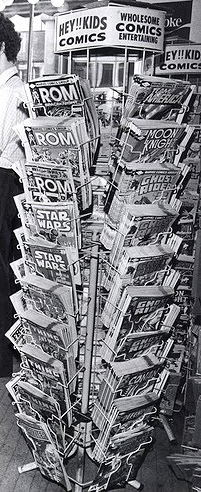
I’ve made no secret of my love for comic books and just as most modelers do, I have my own list of “Grail” comics, but I was lucky enough recently to obtain the one item at the top of my list. It is something I thought I would have to wait a long time to find and had limited hopes of having the cash on hand to purchase when found. But the stars aligned for me this time so I could experience the jubilation of landing the “thing” of my dreams. Some middle-aged men need a hot rod. Others are equally as happy to obtain a 1/350 scale TOS Enterprise or 22” Eagle Transporter. For me, it was a comic book spinner rack just like we remember from our childhood. Some of my earliest memories are of going to our local supermarket (the building still stands and was only ever as big as a 7-11 we have today), going to the cereal aisle to pick out the one box that seemed to offer the best balance of fruity/chocolaty/sugary goodness with the best prize soon to be dug out of the bottom. This was immediately followed by a jaunt to stand in front of the spinner rack while my mother shopped. It was for all intents and purposes my baby-sitter for the rest of the trip to the market. Mom had no fear I would wander anywhere else. And in those days, it wasn’t child endangerment if any other adult was around to ensure I wasn’t kidnapped. Oh, what a difference 40-odd years makes… But now, I have one of my own to fill with reading copies and books I clearly recall buying directly “off the rack.”
I mention this tale as a means to touch on the fact that I know what it is like to finally find a fan-grail and how I appreciate the opportunity to create products that fill that level of demand for our consumers. Though I can’t “regret” it, because it is out of my control, I just wish we were in a position to do more and more quickly. That said, I want to assure you we have the ball rolling on a few big things… Grail-level things. Things sci-fi modelers have been asking for for a long time and I’ve been saying “maybe someday” kinds of things.
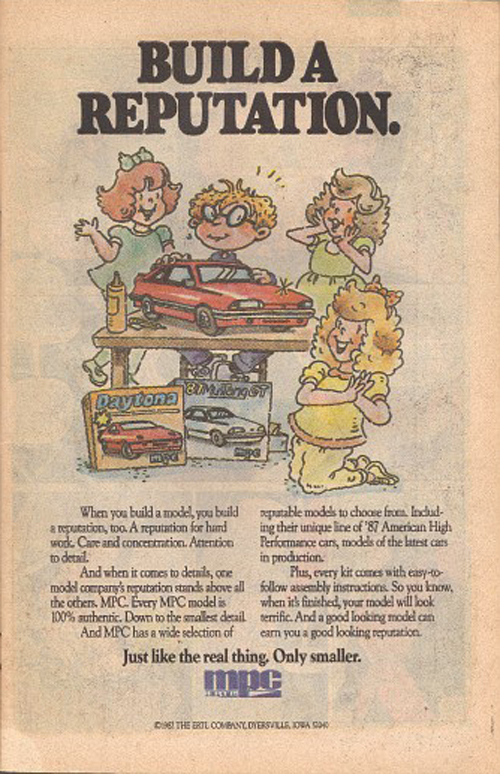
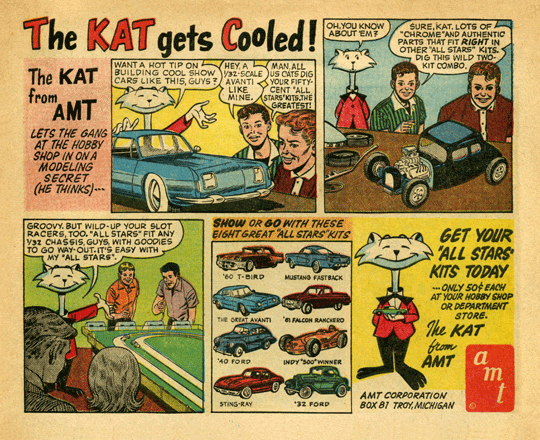
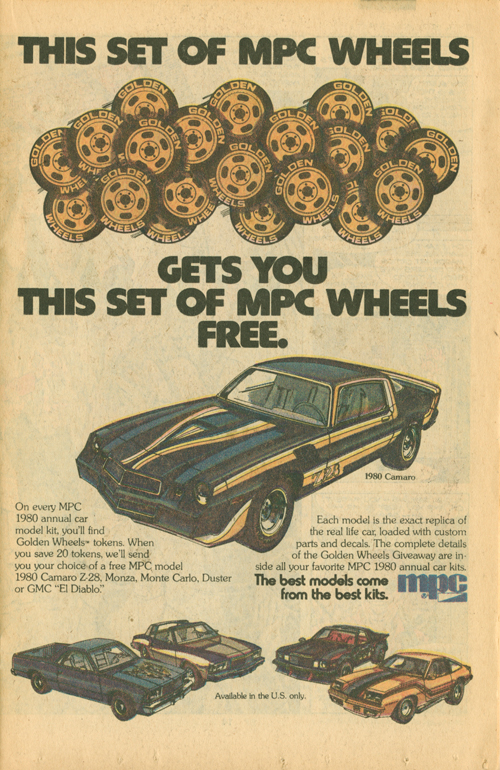
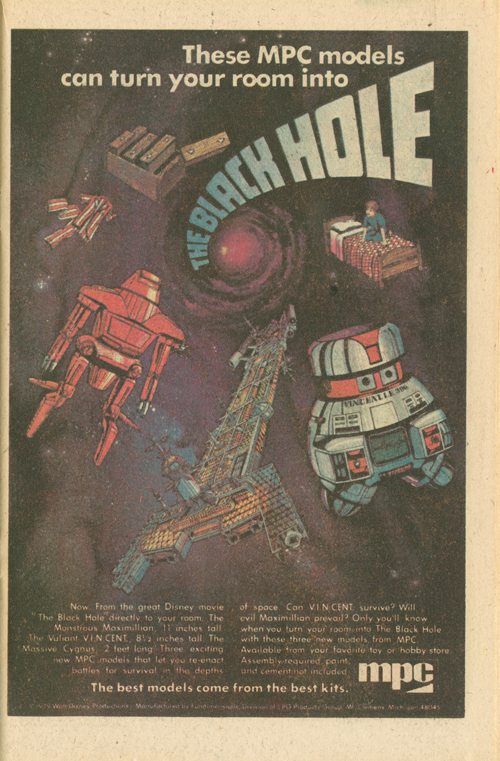
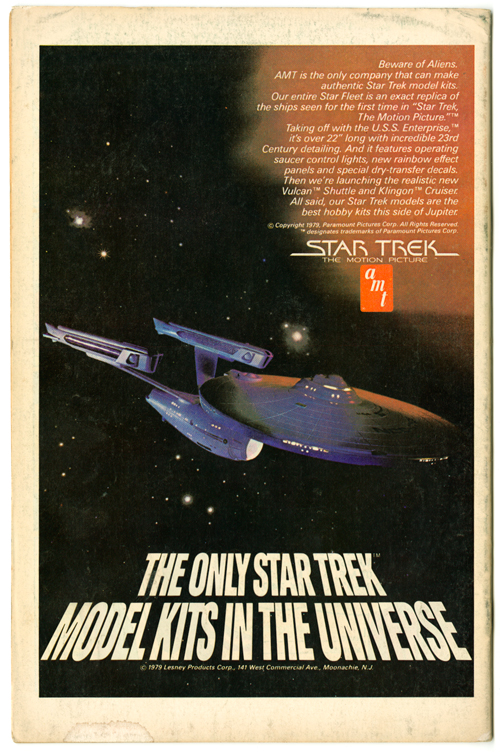
As I’ve been filling my spinner rack I’ve taken notice of some of the model kit ads that showcased our brands. Heck, half the fun of looking at old comics is looking at those goofy old ads. Here are a few I’ve found…
Lastly, I’d like to take a moment to officially commemorate the 50th anniversary of STAR TREK. We can all appreciate the future it imagined for us and even the gadgets we already enjoy 250 years ahead of time. With hand held communicators & computers and now replicators, transporters should be right around the corner. The characters are truly iconic and will always be… but because of my relationship with the model kits we’ve developed, I think I like the U.S.S. Enterprise the best. She was a character, and most of the episodes I liked the best featured her as a main component. So, here is to STAR TREK, Captain Kirk & crew, and the U.S.S. Enterprise. Live long and prosper…
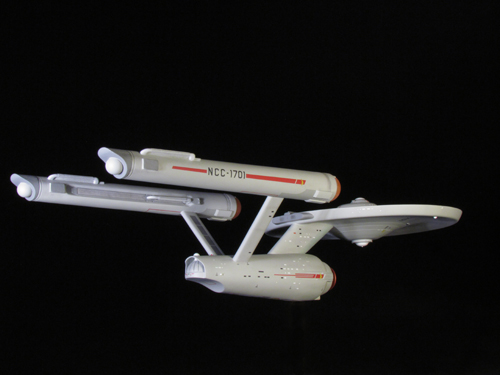
Star Trek Models: My Enterprising Journey pt. 3
Here we are with Michael Scarola’s third part of his build process of our classic AMT U.S.S. Enterprise kit.
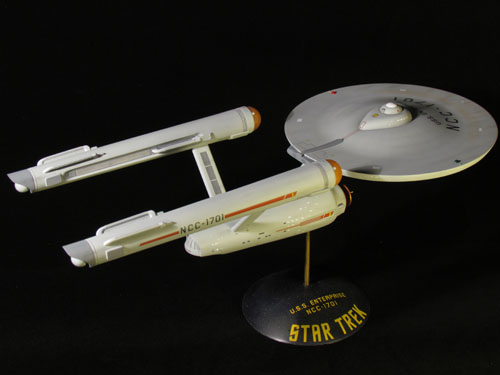
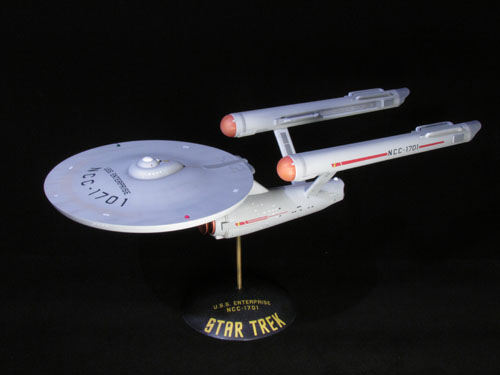
My Enterprising Journey: Building the Classic AMT 18” Enterprise – Part 3
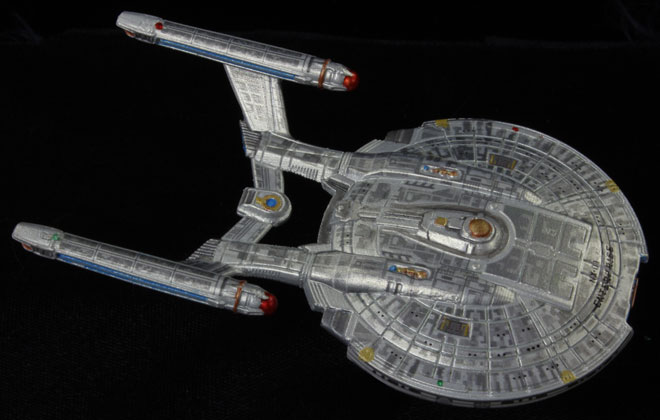
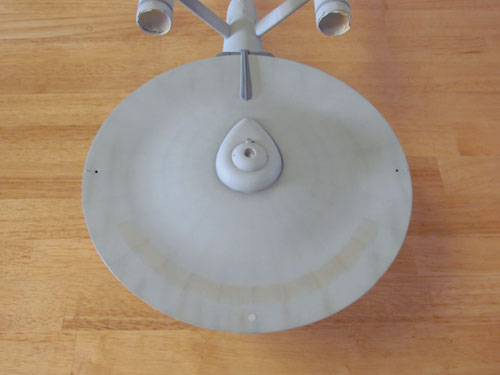
There have been many discussions and articles that talk about the color of the TOS Enterprise studio model. On screen it appears anywhere from white to blue to green-gray to silver. It’s been revealed by Richard Datin that the studio model was actually a light gray with a hint of green. Datin chose the WalMart Concrete color chip as a near perfect match to the Enterprise’s hull color.
I started my research with a WalMart Concrete color chip and found Tamiya JN Grey appears to be a little too green. I had access to Gary Kerr’s actual paint samples of the hull color and the color that appears on the leading edge of the dorsal and also a sample that was matched to the Master Replicas TOS Enterprise.
The mixture I came up with is 3 parts Tamiya JN Grey, 1 part Sky Grey & 4 parts Flat White. It looks neutral with a color shift towards green when viewed under indoor lighting and it even appears to shift a bit blue at times. It’s right in the ballpark of the 3 samples and is very close to Gary Kerr’s hull color, only lighter, which is a good thing for the smaller scale AMT kit.
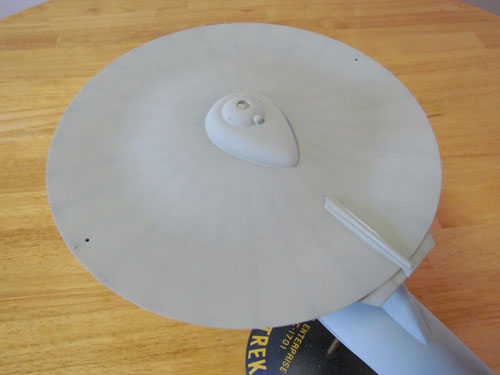
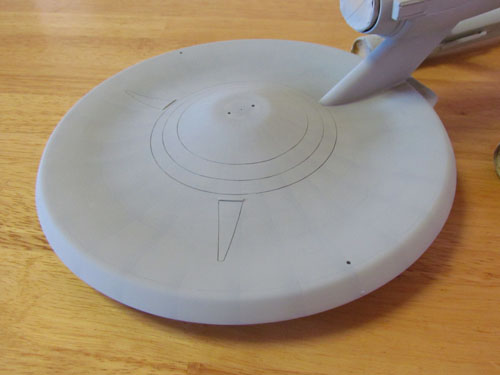
After the main hull color was painted I drew on the saucer grid with a pencil using the scaled blueprints, a straight piece of styrene sheet and a compass.
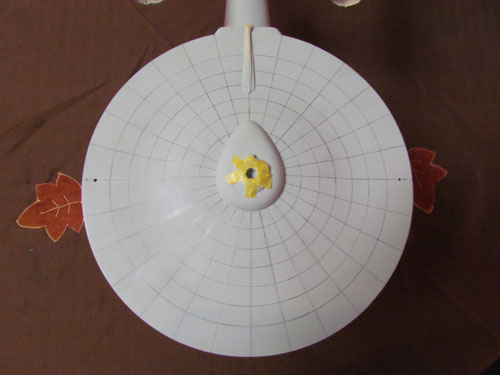
I mixed a darker shade of gray to pre-shade the grid lines and toned it down with the hull color.
I mixed some Testors Acryl US Navy Blue Grey, Pale Green and Flat White for the leading edge of the dorsal and used Testors Acryl Neutral Gray for the darker colors. The nacelle grills are painted Tamiya Chrome Silver and the ends of the Intercoolers and Control Reactor are Testors Acryl Neutral Gray lightened with white. For the triangles on the bottom of the saucer and the darker areas on the undersides of the front of the nacelles I mixed a darker, more neutral, variant of the hull color.
Weathering and decals…
Dark gray and green pastels are used for most of the weathering and rust colored pastel chalk for the ‘rust ring’ on top of the saucer.
I did my best to represent most of the look of the weathering of the 11 foot studio model while toning it back a bit for this smaller project.
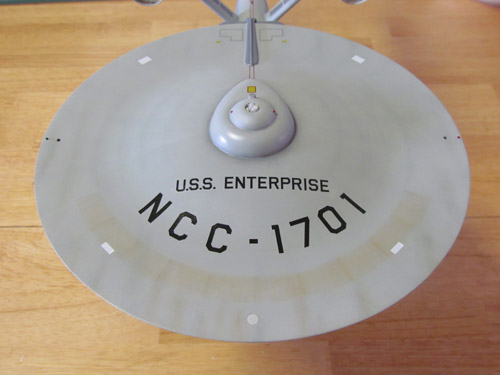
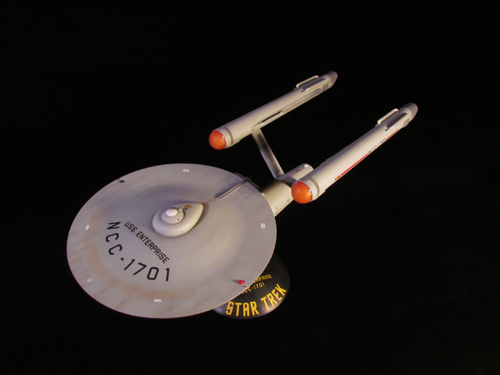
The decals that come with the Round 2 kit are very accurate. I did, however, separate the saucer’s U.S.S. ENTERPRISE/NCC-1701 decal into pieces. The ‘U.S.S. ENTERPRISE’ seemed to sit a bit too close to the ‘NCC-1701 and the spacing of the ‘U.S.S. was a bit too much compared with the 11 foot studio model. In addition I also separated the NCC-1701 into individual decals. This eliminated the clear film and due to the grid on the saucer I was able to place them according to the studio model’s placement. Other than this, the decals actually are very accurate. The below image shows the placement of the decals on the top of the saucer.
I sprayed Future floor polish over the model before applying the decals and sealed them with Testors Create FX acrylic flat clear, with a few drops of semi- gloss clear added to keep the surface from appearing chalky.
All in all I had a lot of fun working on this project. This is my first time building the AMT 18” TOS Enterprise and I’m glad I started with the Round 2 release. The smooth top of the saucer and the wonderful decal sheet really improved this classic kit.
I’d like to thank Jamie Hood and everyone at Round 2 for giving me the opportunity to share my build.
Michael Scarola
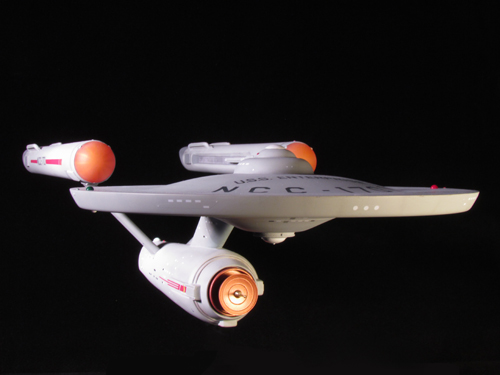
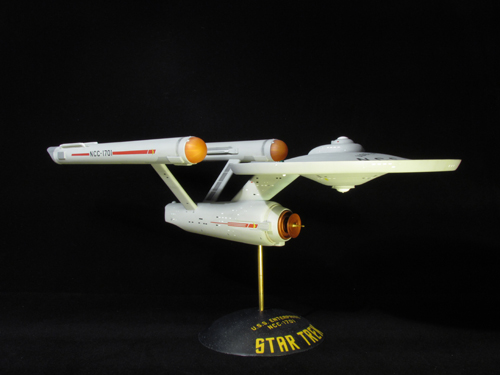
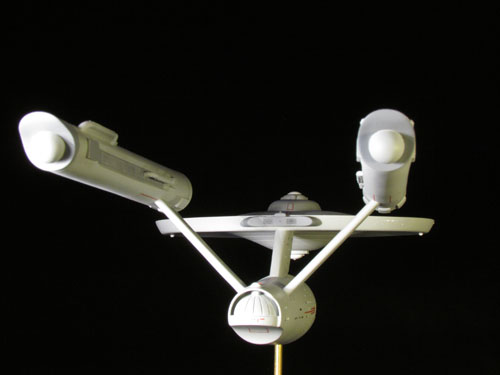
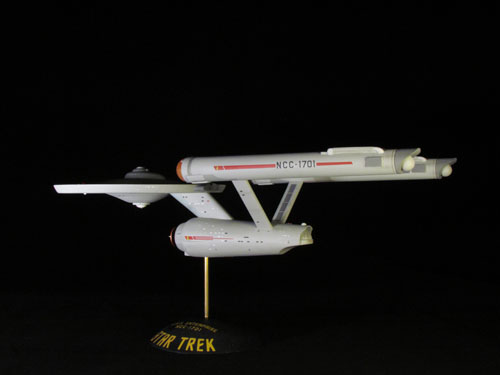
Take a bow, Mike. Great job. Have a gander at these beauty shots of the finished model.
Star Trek models: My Enterprising Journey Pt. 2
Here we are with Michael Scarola’s second part of his build process of our classic AMT U.S.S. Enterprise kit.
My Enterprising Journey: Building the Classis AMT 18” Enterprise – Part 2
The work continues…
Now that the saucer’s details and shape were worked out it was time to move onto the secondary hull. I started by lengthening the hull. The 3 main parts were glued together and the rear section, in front of the pylons, was cut off and the hull was stretched approximately 1/16”.
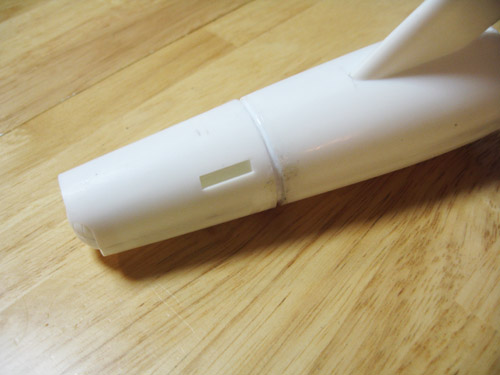
I used one of the AMT kit’s nacelle domes to make new landing bay doors by simply cutting it in half and scribing in some vertical lines.

Sheet styrene was added to the curve of the hull next to the hanger bar doors to achieve the proper shape. The front of the hull was built up with putty and the ribbed details on the deflector forks were added using pieces of .5 mm styrene rod placed side by side as well as some half round styrene rods above and below.
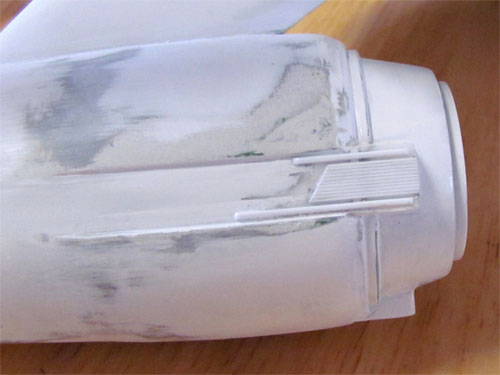
I combined the rear of the kit’s deflector housing with the front of a resin housing from JT-Graphics. The outer housing itself was puttied and re-shaped.
The nacelle pylons were narrowed and shortened to match the blueprints. They were attached at an angle slightly less then 90 degrees using a template I made from the blueprints. I strengthened the pylons with sheet styrene and 1/8” brass rods.
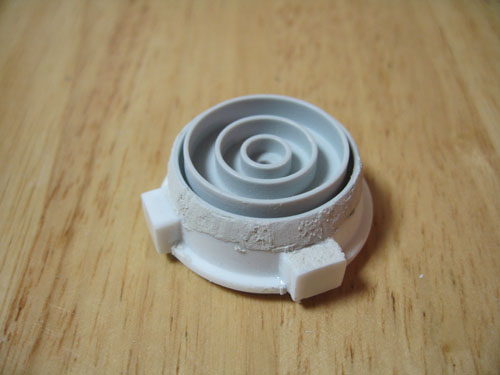
The kit’s nacelles were used and also modified. I cut off the grooves behind the bussard domes since I was using resin bussard domes from JT Graphics, which already these details. To create the taper of the studio model’s nacelles I drew a line with a pencil from the front corner of each half that goes to 2.5 mm at the rear.
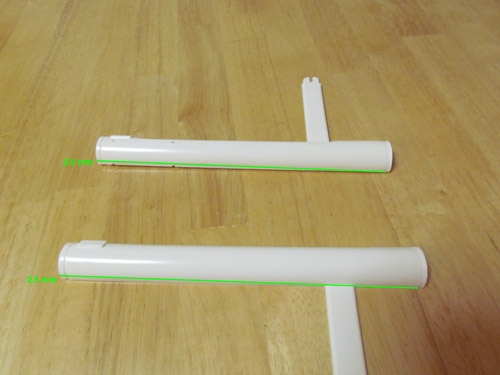
The above image illustrates where the cuts were made. Unfortunately I didn’t take a picture of the actual kit parts so I used nacelle halves from an older kit for figure 12’s illustration. It’s basically long skinny triangles that needed to be cut away. In order to make sure the inner trenches stayed centered on each nacelle the cut on both parts has to be made on the same side, as indicated in the picture. The 2 halves were heated with a hair dryer and rolled on a flat surface to create the taper towards the rear. When I glued the halves together I sanded, for what felt like days, to get them round and even.
I used a set of correctly sized end caps from Federation Models that come with their Surya resin kit. The bussard domes from JT-Graphics have inserts to simulate the fan blades but have other details that weren’t actually on the studio model. Instead I used a set of clear domes I had on hand and added the fan blades with some 1 mm masking tape, painted silver.
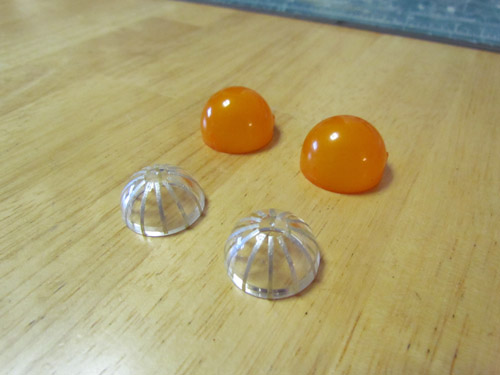
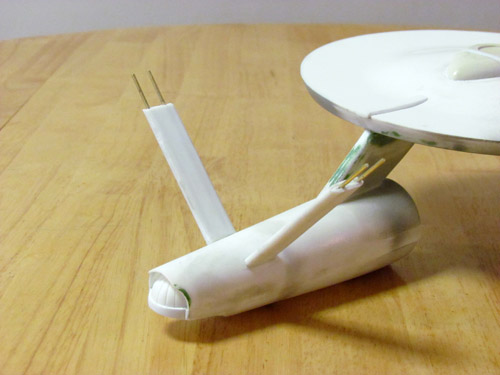
I used a set of JT-Graphics Intercoolers and Federation Models Control Reactors and rear vents to round out the nacelle’s details.
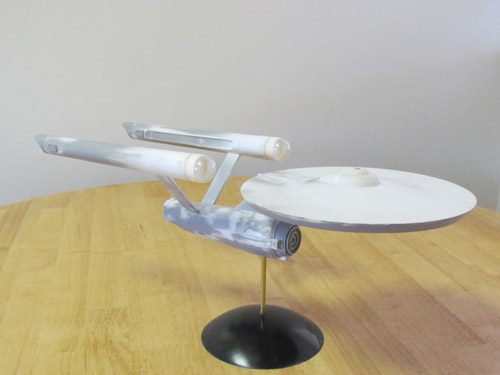
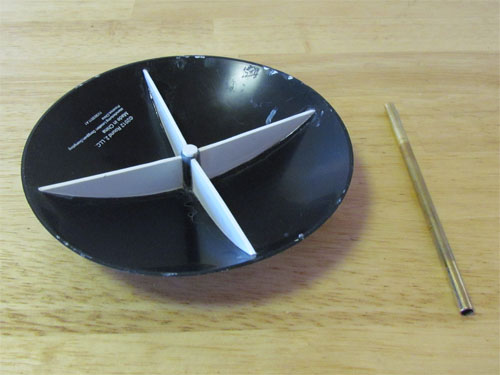
The above image shows the model almost completed sitting atop a Round 2 Dome Base, attached with a brass rod. I reinforced the dome base with 1 mm styrene sheet on the bottom. This keeps the Enterprise from swaying.
Having worked through all these modifications I was now ready to take a breath. The next round of fun would involve the hull color. With the Enterprise’s hull color being a big topic of debate over the years I knew it would take more then simply opening up a bottle of paint.
In my next and final installment I’ll cover the painting, weathering and the decals…
Michael Scarola
Polar Lights: Shedding Light On An Old Enterprise
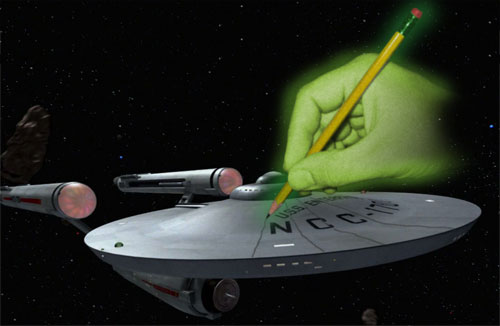
We have received some questions about the installation of the new lighting sets for the 1:350 scale U.S.S. Enterprise model kits so we put together a quick tutorial video that is available through our YouTube channel and our Collector Model Blog. Polar Lights brand manager, Jamie Hood, shows step-by-step how the lights should be installed into the model. This video covers some of the trickier spots that a modeler may encounter as well as some helpful hints to ease the assembly of either MKA005 Deluxe Accessory Set and MKA007 Lighting Kit. As with any of our model kits, we recommend reading all of the instructions completely before you begin any project, but this video should grant a great insight about the installation before the project is begun.
We’ve seen some excellent buildups with the lights installed. We hope this video assists those that have been holding back from lighting their builds. Enjoy!
Round 2 Models: Things Are Getting Exciting!

Have you ever had news that you wanted to shout to the world but you couldn’t? That’s kind of where I’m at right now. Things are getting exciting here in Round 2 Models-land. We’ve got a couple great shows coming up.
We will be setting up at C2E2, in Chicago, IL April 13-15. I’ve attended the show the last couple of years and I love it personally. The show focuses on comic books, movies and pop-culture of all kinds. We are looking at a show exclusive to sell at the show. We’ll see what we can do. Besides model kits, we’ll be displaying our other lines like Forever Fun seasonal products, Captain Action and Silver Screen Machines die-cast cars as well.
We are also gearing up for Wonderfest in a big way. I cant wait to unveil this year’s product announcements. I’ve stated that I don’t want to announce anything that we don’t have a sculpt or mockup for. I’m working hurriedly to be sure I don’t have to bite my tongue about anything. If all goes well, we will have more new kits out by the end of the year than just the 1:350 scale U.S.S. Enterprise™! I really, REALLY wish I could say more!
Star Trek Model Kits: The Great Debate
We made a promise not to discuss the development of our 1:350 TOS Enterprise Star Trek model kit outside of our 1701CLUB updates. This blog post won’t talk about it directly but it does address a significant concern among modelers that seems to have turned into a great debate. This post won’t be about what we will do or what we won’t do, but explains the kinds of things that we have to keep in mind when making decisions about our new kits.
Two words seem to strike fear into the hearts of model builders everywhere… GRID LINES. So, let’s ask the question. Why in the universe would we consider adding such a detail to a hyper-accurate model kit? I don’t have to remind modelers that until we came along, no AMT Enterprise model was ever built without a modeler having to slave over meticulously sanding the stupid things off the saucer… Wait, none of them were ever built without doing that…? Well maybe as kids we never removed them. There was no way to accomplish that at that age and get it to look right. With time, our skills improved and we found ways of improving things as best we could and every build any of us ever did came out looking great… Didn’t it? Well, maybe there were some cases where incredible effort was put forth but some builds weren’t quite as nice as the next. Is that all on the modeler? Or is the manufacturer responsible to some extent? How many kits were made back in the day with saggy nacelles? If it wasn’t one thing, it was another.
So here’s the quandary, do we appeal to a core demographic of the really amazing modelers out there and leave something like the top of a saucer smooth or should we consider adding VERY fine engraved lines that would really help out everyone else to make their build look as accurate as they can manage? What if we could do lines so fine that when viewed from an arms length look like they’re drawn on…
Let’s break it down further…
REASONS AGAINST:
1) it is not accurate to the filming model. The lines were drawn on with a pencil, not engraved.
2) Talented modelers are capable of drawing the lines on themselves.
3) … well… See reasons 1 & 2, I guess.
4) SEE REASONS 1 & 2! (Expletives mercifully deleted)
REASONS FOR:
1) The model kit should represent the TOS U.S.S. Enterprise… as in the one with Captain Kirk standing on the bridge and Scotty in the back screaming that he needs more time. The ship has a deflector grid on the saucer that falls between metal plating resulting in narrow valleys on the surface of the hull. (Or did Apollo’s green hand draw them on with a giant space pencil?). The filming model had some other wonky stuff that we wouldn’t want to copy exactly either. So, we aren’t completely beholden to the filming model, our mission is to create a representation of Matt Jeffries’ design in support of what was shown onscreen.
2) If handled correctly, the engraved lines would look just like penciled on lines.
3) Drawing concentric circles on a 14” curved saucer is not an easy task for anyone. More often than not, most modelers will struggle with it.
4) Star Trek has a wide appeal beyond the modeling market. Tons of Star Trek fans would be interested in building such a kit even if they aren’t modelers or even artists. If engineered well and thought through, the kit should allow them to be able to build an accurate representation of the ship for themselves.
5) If we don’t keep in mind that any kit could be someone’s first kit, we as model kit manufacturers wouldn’t be doing our due diligence.
6) Most modelers who really work over the details of a build to achieve their vision of perfection have the skill to eliminate the lines without much trouble. Or at least they would not have nearly as much trouble removing them, as another modeler would have with drawing them on.
All this is considered without a firm decision in mind at this point. We’ll see how it goes. 1701CLUB members will be the first to find out the answer.