Recommended Sites


Archive for April, 2016
Coming off the Shelf – Twice the Slam!

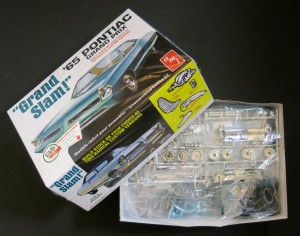
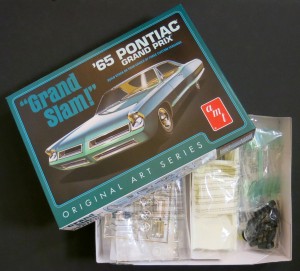
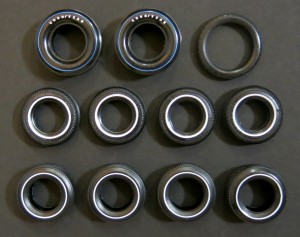
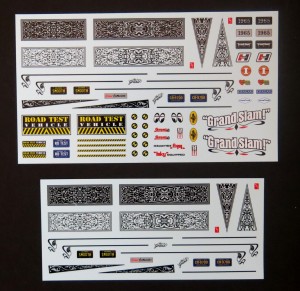 It’s time for a sneak peek comparison of 2 kits that share a common thread. And that would be the 1965 Pontiac Grand Prix, Grand Slam kit. Round 2 is proud to offer this kit in two tasty versions: one being a Retro Deluxe (RD) version, which is very similar to the kits original release with a few extra goodies. The other, an Original Art Series (OAS) release, features even more goodies such as an expanded decal sheet, Goodyear Blue Streak Drag Slicks, and a 12″ x 9″ frameable print you can proudly display on your wall.
A few key differences to note for all you builders out there:
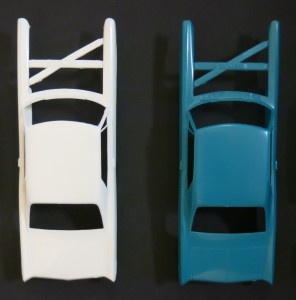
• The OAS release has drag slicks, where the RD version does not • The RD decals are very similar to the original release, while the OAS kit has an expanded decal sheet • The OAS is shot in white, the RD is shot in Aqua Pearl • The OAS includes a frameable print, while the RD includes a mini box.
There are other differences as well, but I’m going leave a little something out there for you to discover! The photos shown are from production samples we received at our office, which means, the kits are already “on the water”, and will be available in the not-so-distant future. So keep a lookout for these 2 beauties at your local hobby stores.
Hope you enjoy them, and I’ll see ya next month!
Star Trek Models: My Enterprising Journey pt. 3
Here we are with Michael Scarola’s third part of his build process of our classic AMT U.S.S. Enterprise kit.
My Enterprising Journey: Building the Classic AMT 18” Enterprise – Part 3
There have been many discussions and articles that talk about the color of the TOS Enterprise studio model. On screen it appears anywhere from white to blue to green-gray to silver. It’s been revealed by Richard Datin that the studio model was actually a light gray with a hint of green. Datin chose the WalMart Concrete color chip as a near perfect match to the Enterprise’s hull color.
I started my research with a WalMart Concrete color chip and found Tamiya JN Grey appears to be a little too green. I had access to Gary Kerr’s actual paint samples of the hull color and the color that appears on the leading edge of the dorsal and also a sample that was matched to the Master Replicas TOS Enterprise.
The mixture I came up with is 3 parts Tamiya JN Grey, 1 part Sky Grey & 4 parts Flat White. It looks neutral with a color shift towards green when viewed under indoor lighting and it even appears to shift a bit blue at times. It’s right in the ballpark of the 3 samples and is very close to Gary Kerr’s hull color, only lighter, which is a good thing for the smaller scale AMT kit.
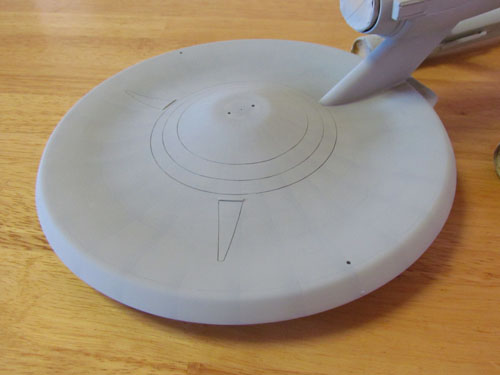
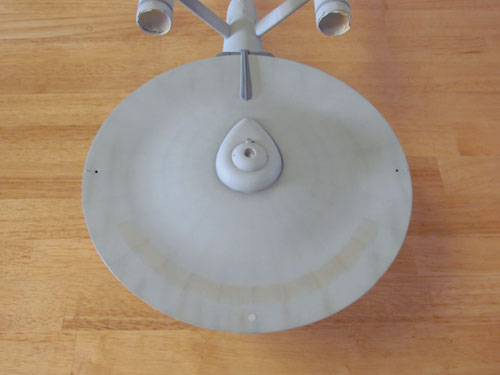
After the main hull color was painted I drew on the saucer grid with a pencil using the scaled blueprints, a straight piece of styrene sheet and a compass.
I mixed a darker shade of gray to pre-shade the grid lines and toned it down with the hull color.
I mixed some Testors Acryl US Navy Blue Grey, Pale Green and Flat White for the leading edge of the dorsal and used Testors Acryl Neutral Gray for the darker colors. The nacelle grills are painted Tamiya Chrome Silver and the ends of the Intercoolers and Control Reactor are Testors Acryl Neutral Gray lightened with white. For the triangles on the bottom of the saucer and the darker areas on the undersides of the front of the nacelles I mixed a darker, more neutral, variant of the hull color.
Weathering and decals…
Dark gray and green pastels are used for most of the weathering and rust colored pastel chalk for the ‘rust ring’ on top of the saucer.
I did my best to represent most of the look of the weathering of the 11 foot studio model while toning it back a bit for this smaller project.
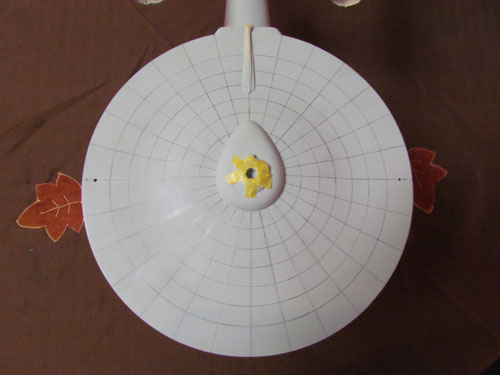
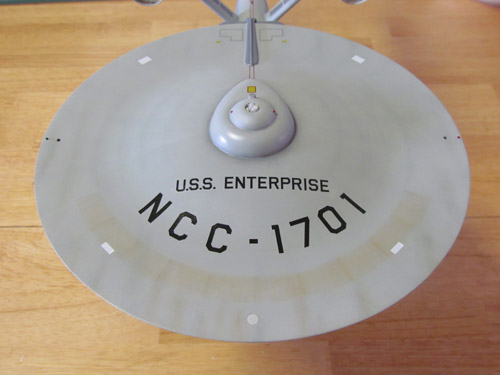
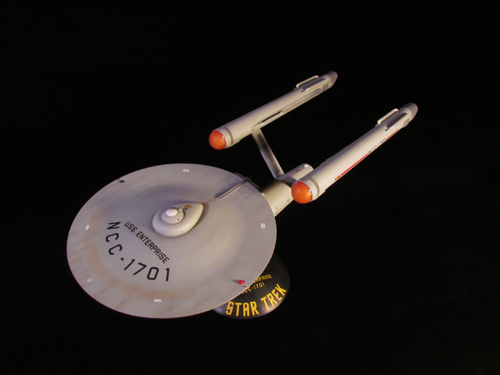
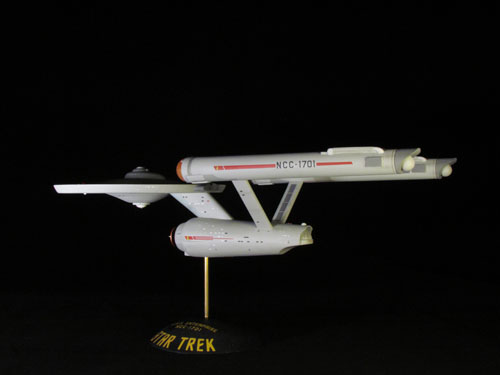
The decals that come with the Round 2 kit are very accurate. I did, however, separate the saucer’s U.S.S. ENTERPRISE/NCC-1701 decal into pieces. The ‘U.S.S. ENTERPRISE’ seemed to sit a bit too close to the ‘NCC-1701 and the spacing of the ‘U.S.S. was a bit too much compared with the 11 foot studio model. In addition I also separated the NCC-1701 into individual decals. This eliminated the clear film and due to the grid on the saucer I was able to place them according to the studio model’s placement. Other than this, the decals actually are very accurate. The below image shows the placement of the decals on the top of the saucer.
I sprayed Future floor polish over the model before applying the decals and sealed them with Testors Create FX acrylic flat clear, with a few drops of semi- gloss clear added to keep the surface from appearing chalky.
All in all I had a lot of fun working on this project. This is my first time building the AMT 18” TOS Enterprise and I’m glad I started with the Round 2 release. The smooth top of the saucer and the wonderful decal sheet really improved this classic kit.
I’d like to thank Jamie Hood and everyone at Round 2 for giving me the opportunity to share my build.
Michael Scarola
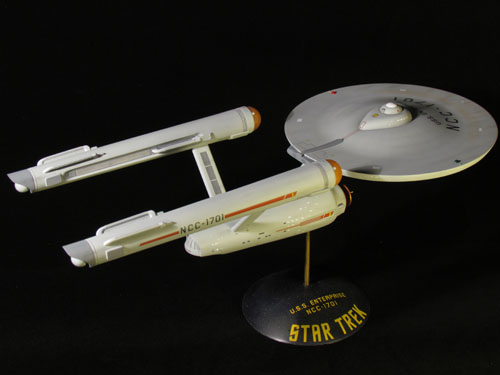
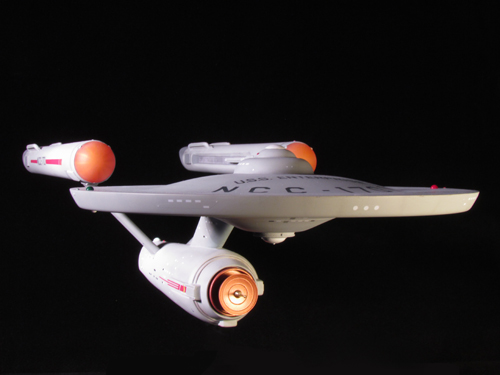
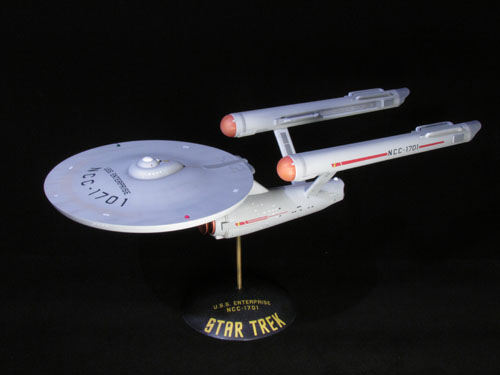
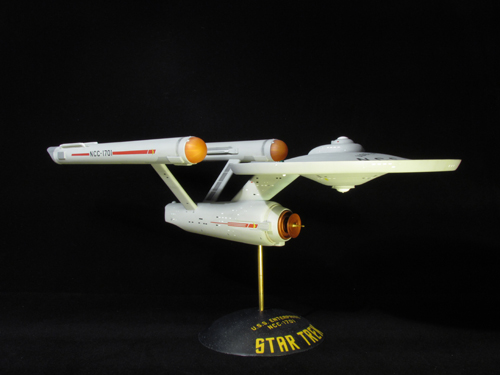
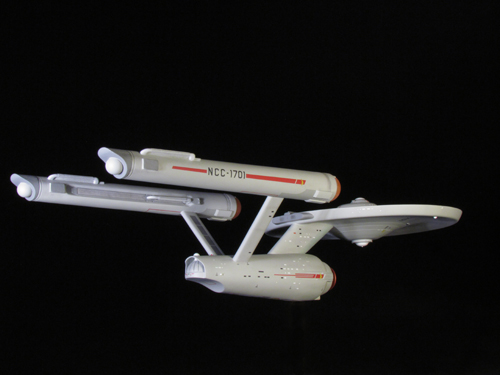
Take a bow, Mike. Great job. Have a gander at these beauty shots of the finished model.
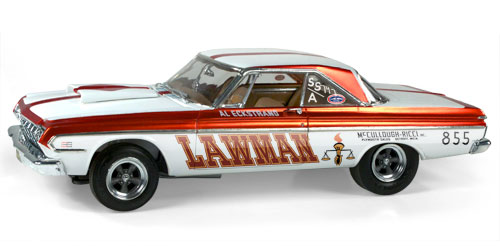
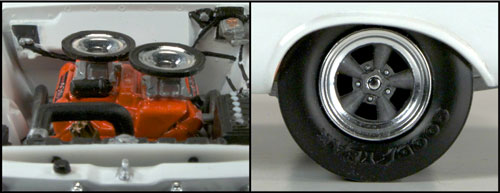
AMT Model kits: 1964 Belvedere Lawman NEW PARTS!
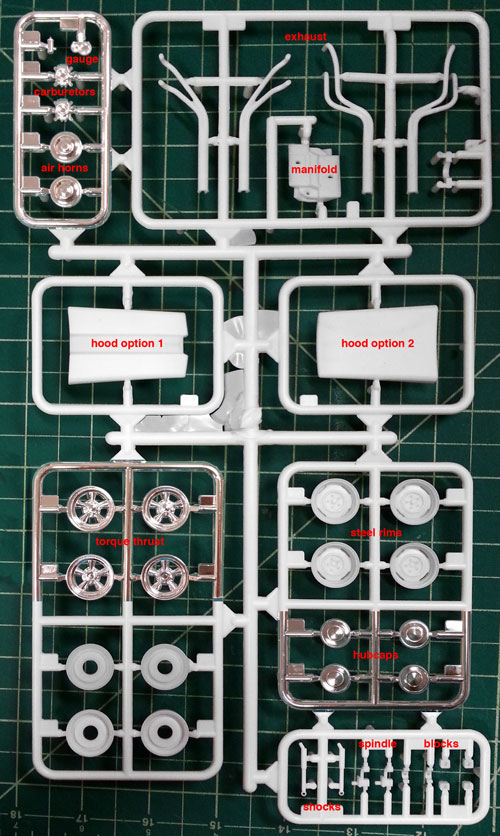
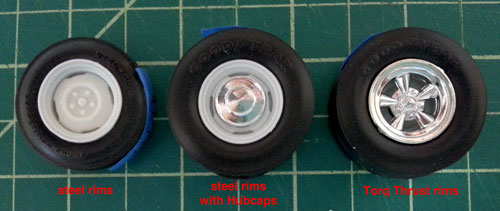
The long-rumored and anxiously awaited 1964 Belvedere 426 Super Stock Lawman will soon be here! With the release comes a few parts from new tooling. The shining features of the new tooling are the 2 all new sets of rims: a stock steel rim with an optional chrome hubcap and a Torq Thrust rim. New front spindles, rear blocks, and shocks will be included that enable the suspension to be raised or lowered, to achieve the proper wheel stance of the drag racer. The new parts will also include: racing headers, dual chrome air horns, intake manifold, chrome tachometer with oil gauge, and 2 different hood scoop options.
Accompany the new parts, the Lawman will have highly accurate decal sheet, updated instructions, chrome parts and vinyl drag slicks. The packaging will feature a full color tray and a new painting from Brad Leisure.
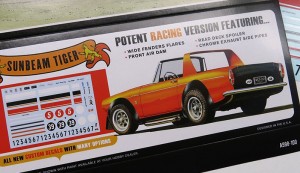
New Don Greer Art For AMT’s Reissue of the Sunbeam Tiger
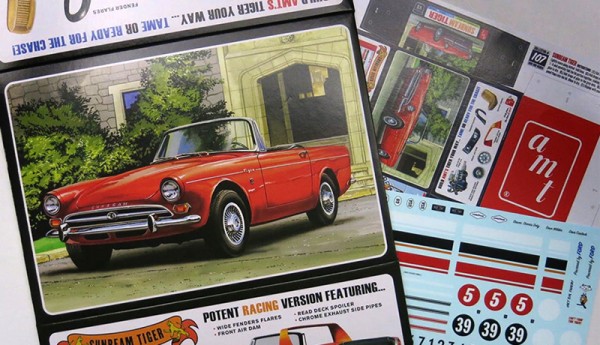
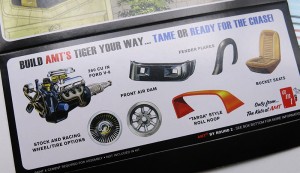
As many of you may have noticed, we’ve recently been fortunate enough to once again work with one of the original Kats from AMT – Don Greer. Don’s art graced many of the original AMT releases and we had him help us with the new release of the Sunbeam Tiger. With two new beautiful paintings, one stock and one in racing form, along with illustrations of the kits features (along wth all new decals), this new version will be one hot import!
Star Trek models: My Enterprising Journey Pt. 2
Here we are with Michael Scarola’s second part of his build process of our classic AMT U.S.S. Enterprise kit.
My Enterprising Journey: Building the Classis AMT 18” Enterprise – Part 2
The work continues…
Now that the saucer’s details and shape were worked out it was time to move onto the secondary hull. I started by lengthening the hull. The 3 main parts were glued together and the rear section, in front of the pylons, was cut off and the hull was stretched approximately 1/16”.
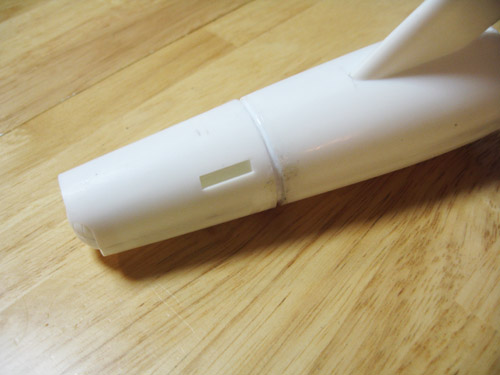
I used one of the AMT kit’s nacelle domes to make new landing bay doors by simply cutting it in half and scribing in some vertical lines.

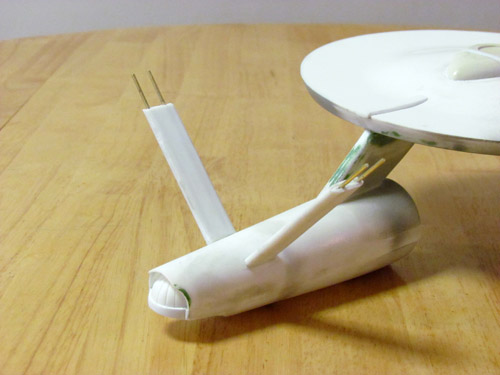
Sheet styrene was added to the curve of the hull next to the hanger bar doors to achieve the proper shape. The front of the hull was built up with putty and the ribbed details on the deflector forks were added using pieces of .5 mm styrene rod placed side by side as well as some half round styrene rods above and below.
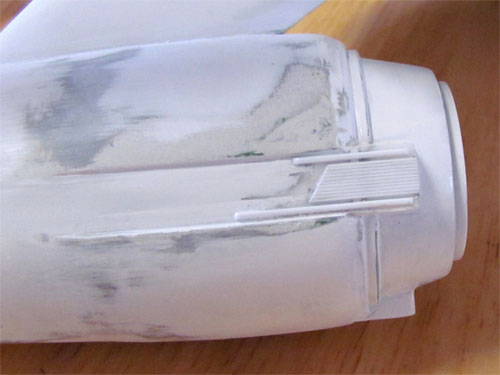
I combined the rear of the kit’s deflector housing with the front of a resin housing from JT-Graphics. The outer housing itself was puttied and re-shaped.
The nacelle pylons were narrowed and shortened to match the blueprints. They were attached at an angle slightly less then 90 degrees using a template I made from the blueprints. I strengthened the pylons with sheet styrene and 1/8” brass rods.
The kit’s nacelles were used and also modified. I cut off the grooves behind the bussard domes since I was using resin bussard domes from JT Graphics, which already these details. To create the taper of the studio model’s nacelles I drew a line with a pencil from the front corner of each half that goes to 2.5 mm at the rear.
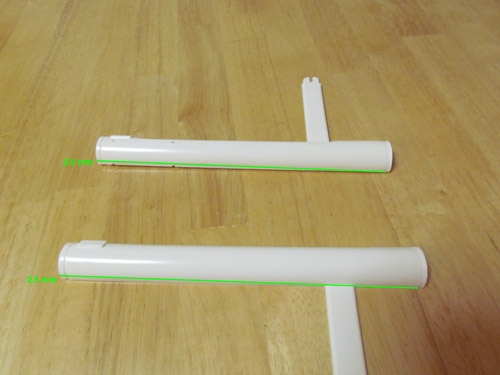
The above image illustrates where the cuts were made. Unfortunately I didn’t take a picture of the actual kit parts so I used nacelle halves from an older kit for figure 12’s illustration. It’s basically long skinny triangles that needed to be cut away. In order to make sure the inner trenches stayed centered on each nacelle the cut on both parts has to be made on the same side, as indicated in the picture. The 2 halves were heated with a hair dryer and rolled on a flat surface to create the taper towards the rear. When I glued the halves together I sanded, for what felt like days, to get them round and even.
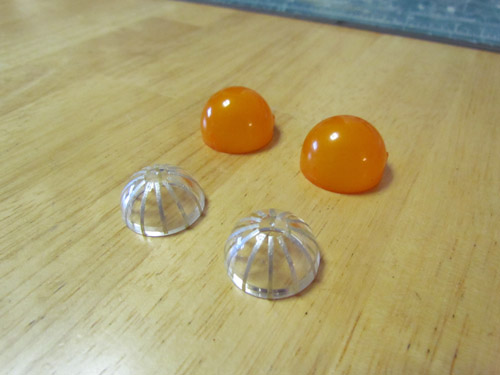
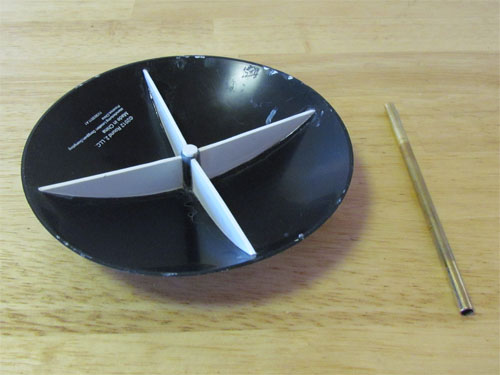
I used a set of correctly sized end caps from Federation Models that come with their Surya resin kit. The bussard domes from JT-Graphics have inserts to simulate the fan blades but have other details that weren’t actually on the studio model. Instead I used a set of clear domes I had on hand and added the fan blades with some 1 mm masking tape, painted silver.
I used a set of JT-Graphics Intercoolers and Federation Models Control Reactors and rear vents to round out the nacelle’s details.
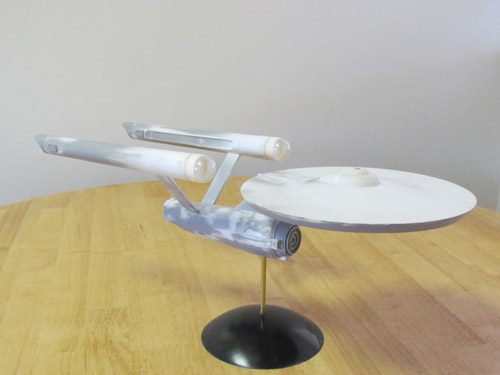
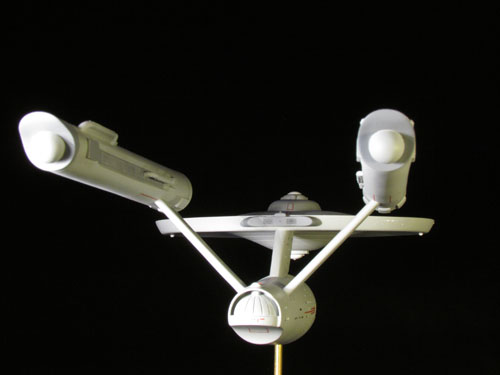
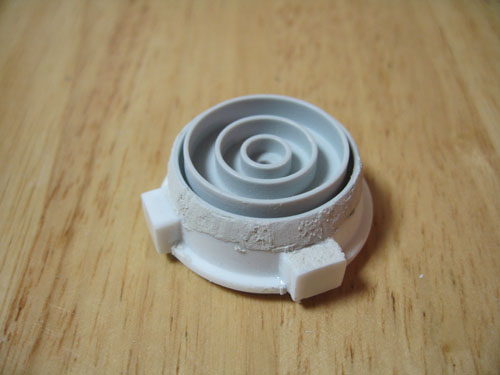
The above image shows the model almost completed sitting atop a Round 2 Dome Base, attached with a brass rod. I reinforced the dome base with 1 mm styrene sheet on the bottom. This keeps the Enterprise from swaying.
Having worked through all these modifications I was now ready to take a breath. The next round of fun would involve the hull color. With the Enterprise’s hull color being a big topic of debate over the years I knew it would take more then simply opening up a bottle of paint.
In my next and final installment I’ll cover the painting, weathering and the decals…
Michael Scarola