Recommended Sites


Archive for May, 2013
The 4-H car…Painting…
I am starting to learn what the H’s stand for…this is my son’s 4th year in 4-H modeling and each year become progressively more difficult. I have tried to help him find some of the best practices for completing these projects.
We live in an apartment for our first challenge was to choose a suitable place to paint. You should not paint where dust or other airborne particles may adhere to your work. Choose a clean, dry place, between 5 and 30 degrees Celsius to apply and dry paint.
We have a balcony which at least provided good ventilation, however he skipped the first instructions that were to wash the release agent and any other dust particles off the car and went right to work painting the car. (sigh). He also held the spray can about 3 inches from the car. Now I am not sure which of these factors caused the problem, but the paint pooled in spots on the car.
So, step 2 for my little modeler was sanding and stripping the paint off the car.
What he failed to realize is that Painting over particles will not remove or hide them, but trap them in place.
Now there are several kinds of paints you can use. We used model spray paint, some people prefer air-brushing. This is a little more costly (which is why we use the other)
You will want to mix your paint to a thorough consistency. Start by striking the closed container of paint sharply and repeatedly against the palm of your hand.
It may become necessary to mask adjacent parts from the part you wish to paint, so as not to accidentally get paint on that part.
When painting with a brush, always ensure that it is of appropriate size and that there are no loose or stray bristles. Brush painting should be reserved for small or isolated parts, or parts which require a certain finish to them. Applying paint with a brush leaves striations in the direction of brush travel, and must not be used for exteriors or large surfaces.
The 4-H Project: Cleaning the model
Our first step was to clean all of the parts. Since we learned from our 2012 experience, we knew that for the paint to stick evenly all parts had to be clean. Dust and oil inhibit the adhesion of paints and glues, as well as detract from the final appearance of the model.
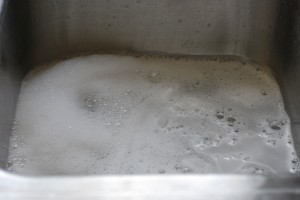
To remove dust and oil, we simply washed the pieces (still on the sprue) with warm water and a very small amount of detergent. We used the sink, however you may also wish to use a shallow basin and a strainer to ensure that you do not lose any small pieces down the drain. We let them soak for several minutes, agitating them occasionally. Taking the pieces out, you can leave them in the strainer to rinse thoroughly, the lay them out on paper towels and dry them thoroughly with a clean paper towel.
Some modelers suggest removing pieces and assembling prior to painting, however out 4-H leader suggests that is all items on a sprue will be the same color, you can paint them while still attached.
Small scissors or shears can be used to remove the parts from their respective sprues. Using a knife to remove parts is difficult, dangerous, and may damage the part. Only when the part is removed may you use a fine knife to remove any flash or excess sprue still attached, this is where we use the small nail clippers they are easy for him to handle alone and less dangerous than the sharp small knife.
The 4-H model…or starting it…
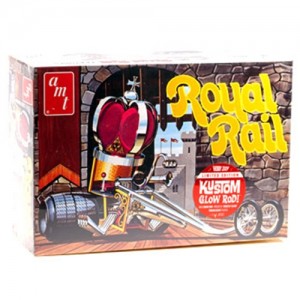
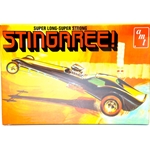
My son has selected the AMT Stingagree (http://www.autoworldstore.com/AMT_Stingaree_1_25_Scale_Model_Kit_p/amt38664.htm) which he will kitbash with pieces from the AMT Royal Rail (http://www.autoworldstore.com/AMT_Royal_Rail_ihobby_Exclusive_1_25_Scale_Model_K_p/amt630ihobby.htm). The Stingaree is described as a wild showrod-meets-dragster, which will be a perfect fit to kitbash with some of the wilder elements of the Royal Rail. But more on that later.
This year we are taking what we have learned over the last few years and combining the use of glue, paints, and decals to create a finished model – incorporating parts of another model.
In addition to the materials that are referenced above we have also purchased or at least gathered (and by we I mean I have purchased for my sweet 11 year old) the following items:
- Assorted paints (mostly greens – because he likes green)
- Plastic cement – several kinds including one especially for windows
- Tweezers and small nailclippers (these are great for trimming sharp bits from the sprue)
- Assorted elastic bands
- Modeling knife (this is my exacto knife – and used with my supervision)
- Small shears
- Masking tape – we do very little masking because the painting we do is pretty basic
- Paper towel
Some people would also include modeling putty and sand paper but we are also a little more basic. Now the rules say he could do any vehicle, spaceship, airplane, etc… but since this was the first year he has done a combination kit like this, I suggested something a little more basic. Our first few attempts were basic designs, snap together kits, then last year marked a new project where he had to both paint and glue.
The paint did not stick to the model, bubbled – badly. So when I started at Round 2 I set out to figure out just what had happened to avoid having it happen again.
1) So now that we have selected the model. This is not the kit he wanted, but we had to select one that was more advanced than some of his choices, and a little less exotic than others.
2) While we did not research these cars, we did visit the Auto World store to look for a model that we would like to do, that fit the requirements. We looked at the number of pieces, materials required to complete this project and the ability to modify this particular piece. Without the ability to see the step-by-step instructions – I think he made a good choice.
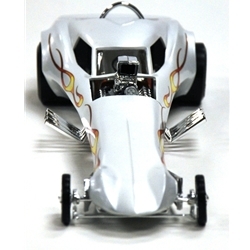
3) Next he had to look at the configuration. Configuration may include tires, accessories, the doors and windows open or closed, or even embellishments and exhaust pipes. In the case of the Stingaree, and the Royal Rail both offered many customization options.
Polar Lights models: Wonderfest is right around the corner
One of my personal highlights each year continues to be the annual Wonderfest show in Louisville, KY. This year’s show is coming up the weekend of May 18 & 19 and it seems to be shaping up to be another great one. Seeing all of the great product available and seeing the work of all of the great modelers out there is a rare treat. Most of all though, I look forward to seeing all of the familiar faces and the chance we get to have to talk about our kits, the hobby and what you guys think.
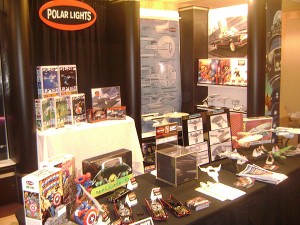
Even though we won’t be unveiling big news like the 1:350 TOS Enterprise, there will still be tons to talk about. We look forward to showing off our brand new buildups of our 1:144 C-57D, Robby & Altaira, Wolverine, the U.S.S. Enterprise bridge set and plenty more. We’ll give some info on development of the Galileo, Superman and all of the other all-new model kits we have brewing. We’ll have some surprising licensing announcements including hints at our plans for the ALIEN license. As always, we’ll have our annual survey ready to fill out to supply us with your feedback. We’ll be sure to fill in everyone that misses the show with our usual follow up youtube video of our booth and announcements.
We look forward to seeing everyone at the show!
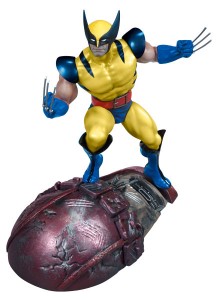
http://www.autoworldstore.com/SearchResults.asp?Search=wolverine&Submit=Search