Recommended Sites


Search results
Polar Lights models: Wonderfest is right around the corner
One of my personal highlights each year continues to be the annual Wonderfest show in Louisville, KY. This year’s show is coming up the weekend of May 18 & 19 and it seems to be shaping up to be another great one. Seeing all of the great product available and seeing the work of all of the great modelers out there is a rare treat. Most of all though, I look forward to seeing all of the familiar faces and the chance we get to have to talk about our kits, the hobby and what you guys think.
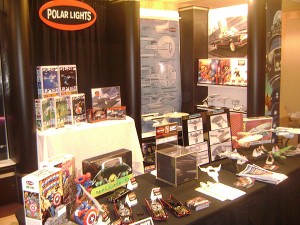
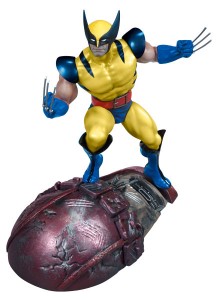
Even though we won’t be unveiling big news like the 1:350 TOS Enterprise, there will still be tons to talk about. We look forward to showing off our brand new buildups of our 1:144 C-57D, Robby & Altaira, Wolverine, the U.S.S. Enterprise bridge set and plenty more. We’ll give some info on development of the Galileo, Superman and all of the other all-new model kits we have brewing. We’ll have some surprising licensing announcements including hints at our plans for the ALIEN license. As always, we’ll have our annual survey ready to fill out to supply us with your feedback. We’ll be sure to fill in everyone that misses the show with our usual follow up youtube video of our booth and announcements.
We look forward to seeing everyone at the show!
http://www.autoworldstore.com/SearchResults.asp?Search=wolverine&Submit=Search
Round 2 Models: 1:350 TOS U.S.S. Enterprise Electronics
We were proud to finally release the 1:350 scale ST:TOS U.S.S. Enterprise late last year. Expecting that many modelers would want to take their kit to the next level by installing lights, we offered two products featuring a light kit specifically engineered for the kit, MKA005 Deluxe Accessory Set and MKA007 Light Kit. Offer this kind of product was a first for us, and a few hiccups have been reported along the way. The primary complaint has been about the round PCB boards that go inside the Bussard collectors. We would like to take this time to review the problems and solutions.
Problem #1- Round (Bussard) PCB boards either fail from the beginning or perform correctly initially, but fail in whole or in part soon after.
We apologize for any frustration this might have caused. All boards were tested twice before being packed to ensure all lights came on and worked properly. Due to all of the possible variables, it has been difficult to diagnose the source of the problem. We have not been able to reproduce these results in our own testing. With this in mind, we will honor requests to replace the boards through our normal part replacement service via the link located at the bottom of our website. In addition to the proof of purchase, we are asking for all failing boards to be returned when sending your replacement form. These faulty boards will be returned to our factory for further examination.
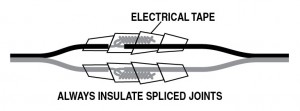
If you have not yet assembled your kit and installed the light kit, please keep this in mind. The heat shrink casing mentioned in the instructions of the light kits was omitted by the factory. We will mail this to anyone that requests it, but common electrical tape (or wire nuts or any other common electrical wire insulating method) can be used. In all cases, be sure to properly insulate (with tape or heat shrink casing, etc.) all splices, especially those that connect the round PCBs to the rest of the system. This must be done to prevent raw wires from touching which would cause the PCB to short out. This is very important to do to ensure the lights will work once your model is complete.
Further, if you are testing the boards or system before final assembly, make sure not to let any exposed wires or un-insulated splices touch while the power is on. Failure to do this may cause the boards and/or LED bulbs to short and destroy the system.
(insert fig. 1)
Problem #2- LED bulbs installed on PCB boards stand on their leads rather than being properly mounted flush to the board. This prevents proper assembly of the Bussard collector.
We apologize for any frustration this may have caused as well. All samples reviewed up until final production showed that all bulbs were properly mounted to the boards. This was a problem that occurred during production. Though they were all inspected twice for their functionality, they impact on the assembly was not foreseen by the factory.
If the parts have not been cemented together there is an easy modification that can be made to the clear bulb parts included in the kits that will solve this problem. Simply clip off 2mm from the pin on each bulb (plastic parts 142 & 143). The remaining section of pin will be enough to cement them into part 42 and allow enough clearance to accept the extra length of the LED bulbs.
If these parts have been securely cemented together, we will either replace the bad board, or we will replace all colored clear bulbs and part 142 to allow you to make the above modification for use on your model.
(Insert fig. 2)

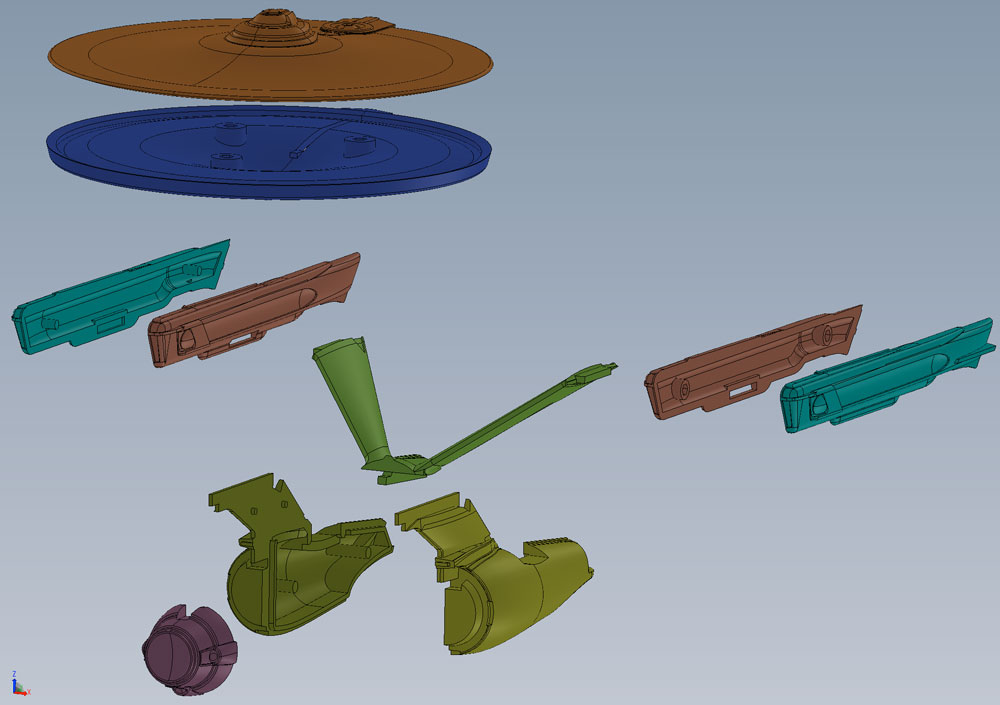
Lastly, We have gotten multiple complaints about two more problems with plastic kit parts in the POL880 (1:350 scale TOS Enterprise) and POL878 (Premiere Edition) kits themselves.
The most well-known is the problem with bent or warped shafts on the fan blade dome (part #140). For people building their kits without lights, this shouldn’t be a huge concern. We have replacement parts available for anyone that runs into this problem. We had the tooling modified to fix this problem as soon as we heard about it. So future production of the kit should not have the same concern.
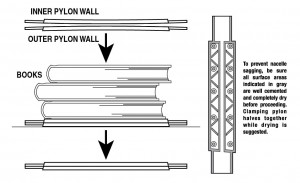
The other problem is that we have gotten several requests to replace pylon parts due to warping. However, we have not been shown examples where warping is so severe that replacement of the parts is warranted. We have found that cementing the long edges of both parts and placing these sub-assemblies under a significant weight such as a stack of books will eliminate warping in the final subassembly. Allowing the parts to dry under weight will ensure they will stay straight. If you think you have a such a significant amount of warping that you feel it can not be corrected, please use the “contact us” link on our website and we will respond to see photos of your parts to judge these extreme cases.
(insert fig. 3)
For anyone finding a problem with their kit (be it the 1:350 Enterprise or any other kit we offer) please note the part replacement guidelines on our website. Replacement part requests are addressed almost daily, and they are usually shipped within two weeks or less.
http://www.round2models.com/replacement/
Buick Opel continues the new models in color choices
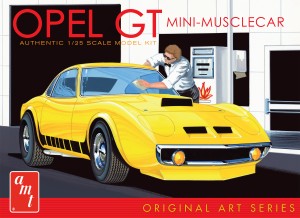
Round 2 is offering several popular 1:25 scale models in 2 colors. The series began with the Silver Screen edition 1957 Plymouth Belvedere – “Christine” available in Red or White. The newest release is the AMT Buick Opel molded in your choice of White or Yellow. Includes 9×12 frameable print, large format Original Art Series packaging featuring vintage painting from AMT archives, all new and expanded decal sheets, and 3 hood options allow for the car to be built drag, custom, or stock. Be sure to watch for the final car in this series a ’67 Shelby in Black or White.
Star Trek Models: TMP Cadet Series
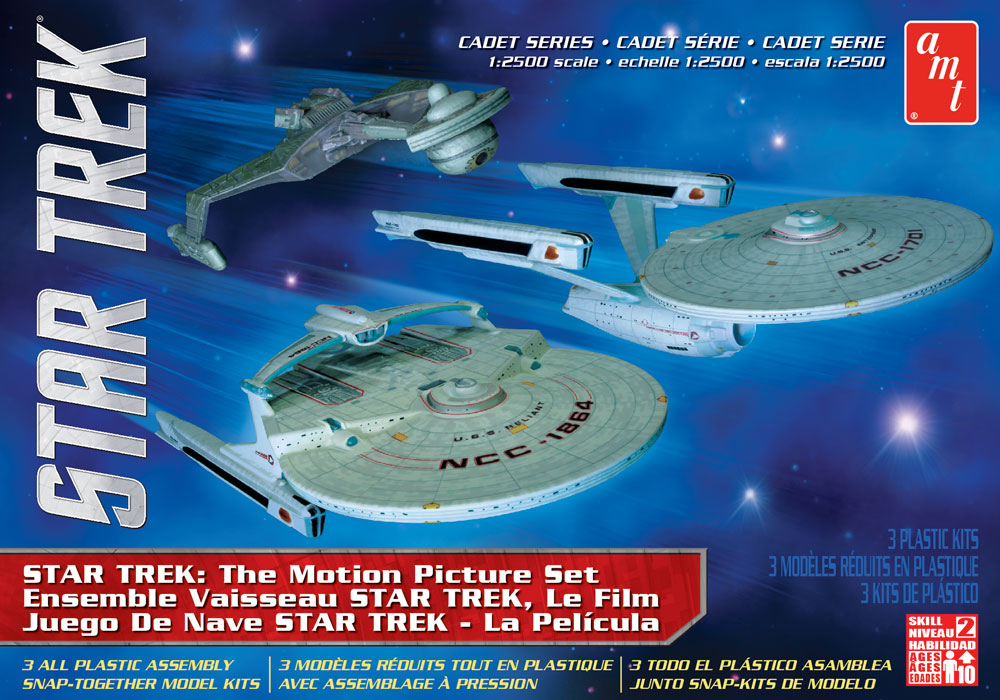
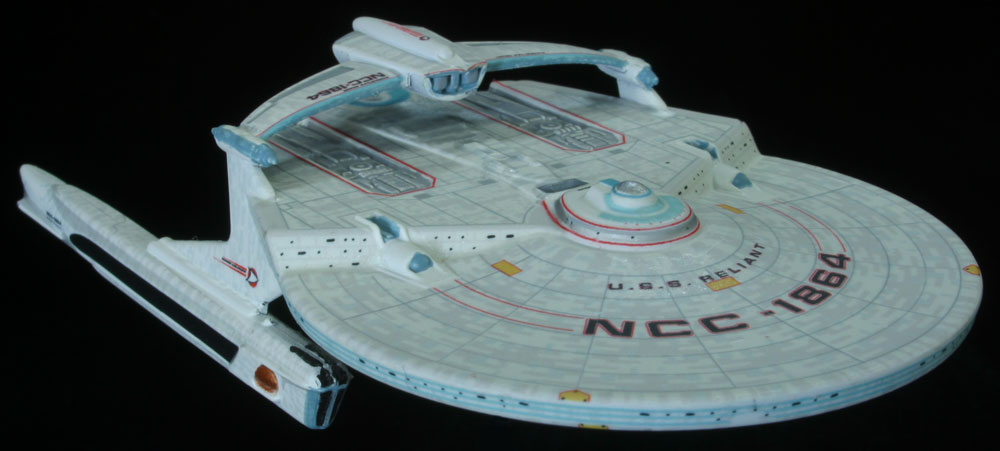
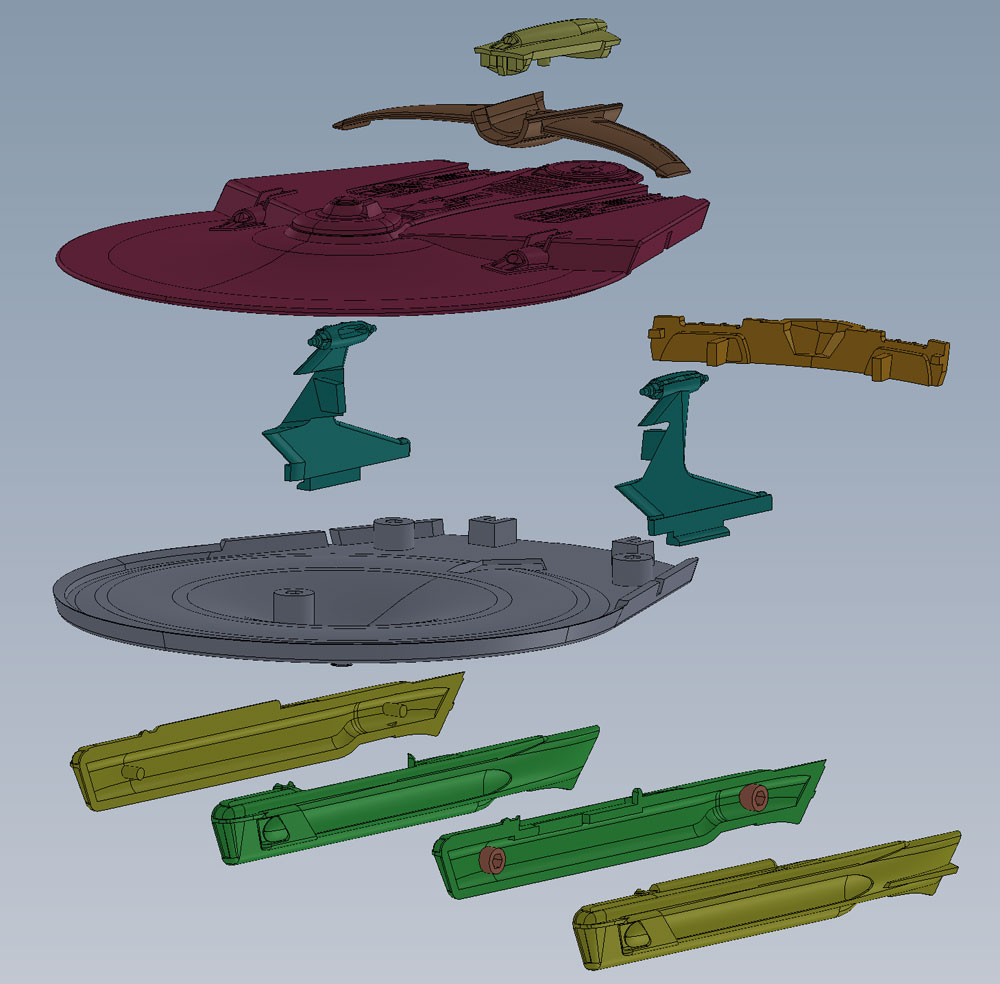
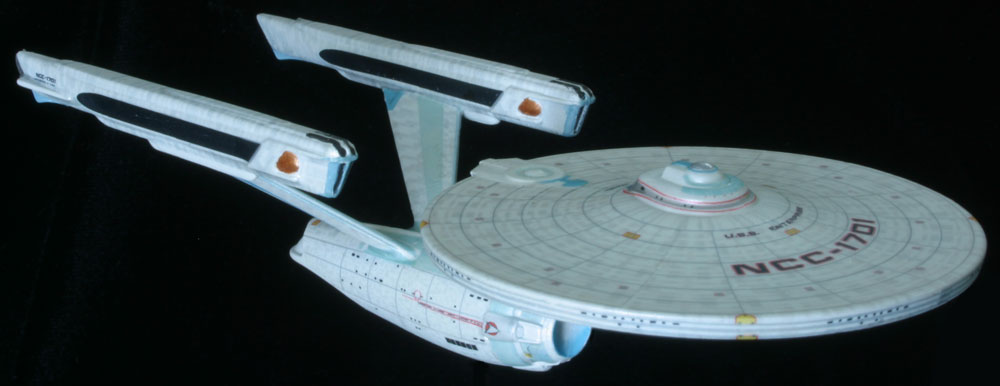
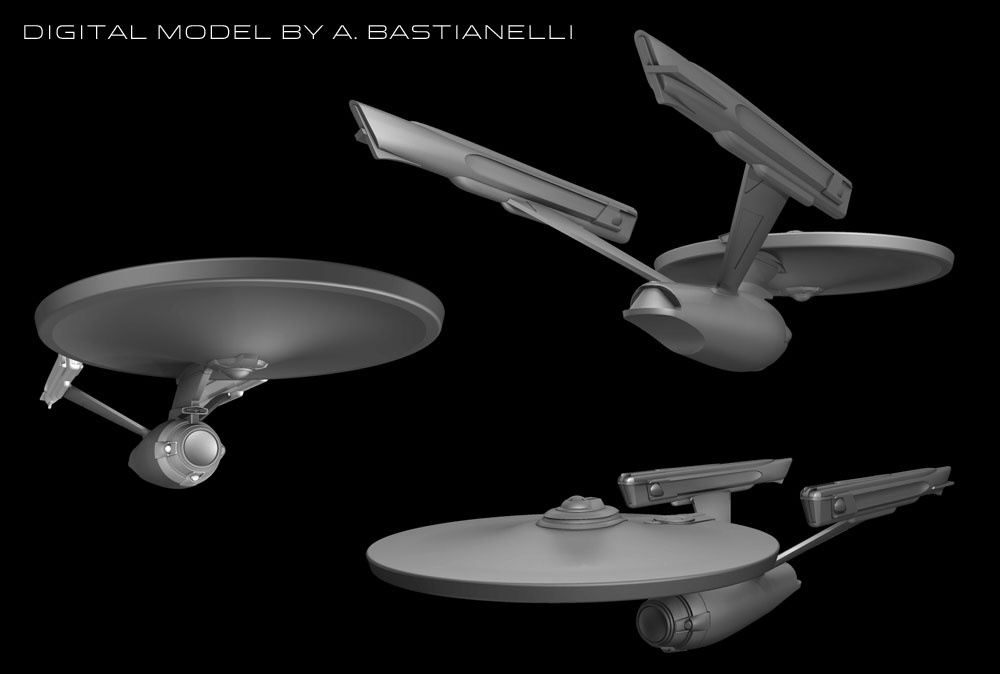
With the huge deal the big Enterprise has been, I don’t want to gloss over a few cool kits that might not measure up… (badumpump kish!) As mentioned back at Wonderfest, we are bringing out a new Star Trek: The Motion Picture Cadet Series set which includes a newly tooled U.S.S. Enterprise Refit, U.S.S. Reliant and Klingon K’t’inga Battle Cruiser all in 1:2500 scale. I want to take a minute to give these little kits their due.
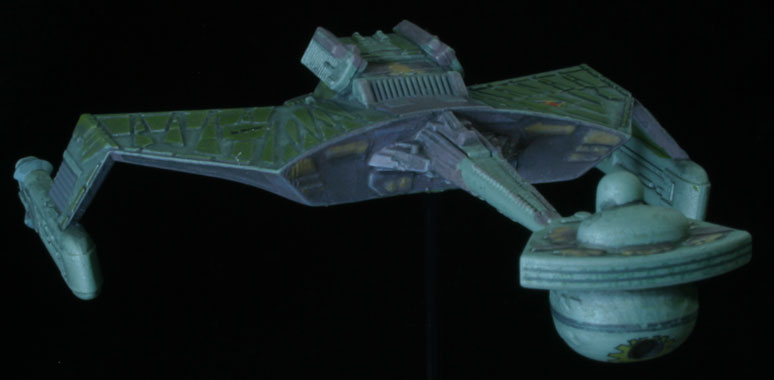
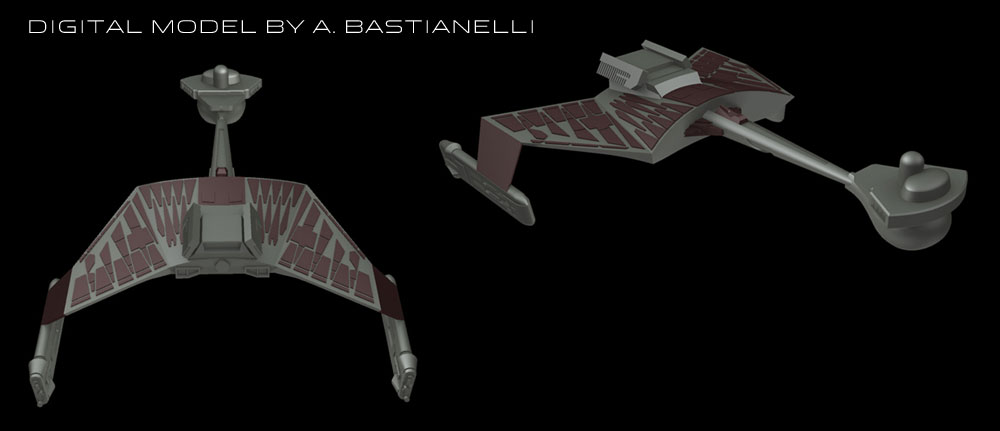
We had Angelo Bastianelli do the computer work on these to get us started. I worked with him to noodle out all of the details to get everything just right. Those files were sent to the factory where they were adjusted for production and parted out. We received test shots a few months back and we have had a few rounds of adjustments to get all of the parts to snap perfectly. As you can see by Jim Small’s work on our buildups, the ships came out great. As usual, the kits come with all the decals you will need to get al of the paneling details on the Enterprise and Reliant. Look for the kits to hit store shelves right at the turn of the New Year and keep an eye out for a TOS Cadet set in 2013 (more details on that later).

Round 2 Models: And the winner is…

Believe it or not, I’m still here working away on Round 2 Models of all kinds. Just like you I wish I could have posted sooner than this. Many people have been clamoring for a 1701 Club update. Of course so much time and work has gone by that I have a lot to write about. So much so that as I’ve been writing it, I’ve come to the realization that I will probably have to find a way to break it up into two reports. Besides the 1701 Club, many people are waiting with baited breath to hear what ship won the poll I talked about in my last blog post. More on that in just a bit…
I have a sliver of time this week where I think I can write up several blog posts showing progress on some of the projects I mentioned at Wonderfest. I’ve already got some test shots on the Motion Picture Cadet kits, a few versions of the Wolverine kit digital files and I’ve have reviewed he mockup for the Robby the Robot kit featuring Altaira. I should also be seeing the 1:144 C-57D mockup soon. I look forward to sharing some behind the scenes looks at these kits similar to what I’ve been sharing in 1701 Club updates. I’m not sure I’ll have time to get quite as in-depth as those reports have been, but there will still be plenty to share. Once I get them written, I’ll schedule them to release once or twice a week.
Back to the poll results… as you may know, we recorded video footage of this year’s Wonderfest presentation just like we did last year. We had hoped to get it finished and posted some time ago (like before the poll went live) but as things usually happen, other fires got in the way. That isn’t to say we haven’t been working on it all along. Modelman Tom is well known for his Youtube model kit reviews and he has been putting in all kinds of time on our video to make it extra-special and much more entertaining than last year’s edition. As production on the video has wrapped up, the poll has also come to a close. So like a Reese’s peanut butter cup, two great things have come together. So as they say… WITHOUT FURTHER ADO… Check out the 2012 edition of our Wonderfest presentation video to find out the poll winner!
http://www.youtube.com/watch?v=cIbgnXVOZDU
After you’ve viewed it, give us some feedback and let us know what you think.
Round 2 Models: How The Magic Happens (Episode 1)
I recently asked for some ideas to post about and it seems one of the most requested bits you want to hear about is how things work here day to day at Round 2 Models. I decided to keep a log of what I did over a four-day period. Why four? Because I got too far into one day without taking any notes.
Keep in mind that more than anything, my job is to “art direct”- give thoughts on the progress of a sculpt, assemble and review test shots, review a tooling plan to make sure every part is accounted for, create or advise an associate on a packaging design or instruction sheet, give management an update on product progress, assemble documents to generate cost estimates and figure out what we are going to do next and who I can find that would best help with that, write these blogs and generally just keep all of the balls in the air or make sure they get thrown into the proper basket complete and on schedule.
I fear this won’t seem like the exciting time you might imagine it to be. All in all, things may seem to happen at a snails pace. I can assure you I always have too much going on to make daily dents in my “to do list”. I’ll try to explain about some things along the way.
DAY 1
7:30 – Arrive at the office. I’m the third person in today. One other creative is usually here by the time I arrive. The other person is from accounting. Our day doesn’t technically start until 8:00. Most people are out by 5, but a devoted few tend to stay past that most days.
7:30-8:30 – Check email. This usually eats up most of my morning and it gets checked regularly during the day. Some days email completely distracts from actually getting the work done that I might have intended to do in a given day.
The majority of the email traffic is me answering questions or keeping balls in the air on various projects with a few factories and vendors (sculptors, digital modelers, etc). This particular morning covers hearing that pre-production samples of our upcoming Incredible Hulk are on their way. I’ll need to review them. If they look correct, the factory will produce the product exactly way I see it. I will need to note any corrections that might be necessary. I also reviewed the progress of laying out the 1:350 TOS Enterprise tooling. Answering emails such as these can be a huge time sink. I need to capture images and make notes of every problem I see. When reviewing a sculpt or mockup from the factory, this can take up the majority of a given day.
8:30- 9:10 – weekly product development team meeting. With a few people out, this one is relatively short. They usually take 1-2 hours. Our department (10 full time designers) meets to review what we are currently working on. It is a time for the Creative Director to present anything to the department he needs to. We get a chance to see and hear about what each of us are working on and give critiques and pointers where needed. We are each generally pretty isolated to specific lines. As you know, I am the primary line manager for Polar Lights. Another designer splits his time between my line and the automotive line. We have a part time intern assist on the Polar Lights line as well. On the automotive side, John manages that line up. We have one additional designer splitting his time between automotive model product and our new line of model rockets. Everyone else is spread over our Forever Fun, slot car and die cast lines.
9:10-10:10 – I’m back at my desk and continue responding to email.
10:10-11:45 – We have two people out sick in the department and Forever Fun has a huge bunch of package mockups due by the middle of the week for a large retailer. Mockups are basically fake packages. Most of them need to look as close to the final product as possible, which includes putting actual product in the package. It is a huge pain and takes a lot of time. We have one part timer who comes in and does nothing but mockups. With one of the missing people being one of the Forever Fun peeps and the other person being one that would normally pitch in on such a crunch, the effort is short handed. So the rest of us are enlisted to help out. For my part, I cut out a few of the more complicated patterns and assemble the boxes. It is a pain and takes a sizeable chunk out of my day, but we gotta do what we gotta do sometimes. This situation rarely happens, but we are all prepared when the call comes.
11:45-12 – check more email. This time I answer some questions for one of our sculptors for one of the projects he is working on. (details for which will be announced at Wonderfest)
12-12:45 – lunch. I run to a local Meijer supermarket to pick up lunch provisions to cover me for the next couple weeks. Other than this, I rarely leave the premises for lunch.
12:45-1 – You guessed it, check my email.
1-4 – I do some research for a few new projects we have planned. This mainly consists of researching online, checking with consultants and in one case finding the answers in a book I already had on my shelf. I won’t get into specifics, but basically I’m looking for reference images for one kit, a beauty shot of another ship to use for our sell sheet for another project, and determine the length of a couple ships. Among my search I stumbled cross Steve Neill’s YouTube series about his 66” scratch built Enterprise. That ate up a good 20 minutes just checking that out. Fascinating…
4-5:50 – I work on an RFQ (Request for Quote) for a kit coming out in the fall. This document will be sent to the factory for them to determine their cost to produce the kit. The RFQ pretty much covers every aspect of the kit from the parts included, color and packaging. If a test shot is already in hand, tooling revisions or problems will be recorded to gauge the difficulty and cost for necessary tooling work.
5:50 – I’m out the door and on the road for a 40 minute drive home.
Here are a few pics I snapped throughout the day.

A look at my desk the morning of day 1. It would continue to accumulate more mass for an additional week before I break down and come in on a Saturday to clean it up.

This is our mockup area in the warehouse. Mike G. (American Muscle and Custom & Premium) and Ken H. (model kits) stand at the left of the pic. Monica (model kits intern) and Jen (mockup contractor) are seated at the table.

This shows the mockups that are complete at noon. I estimate that this is about half of what is required for one retailer’s request.

This shows a package mockup that has had all of the straight edges already trimmed down.

This shows what it looks like after I trim out the window. The box will go on to be assembled with an acetate window installed and have last year’s product put inside to give the closest indication possible of how it will look on the shelf.

This shows an overall view of a vintage copy of the Star Trek Exploration Set. This photo gets installed in the RFQ to show what parts are needed and an estimation of their size.
Whew. That is a mouthful. I guess I’ll have to write up each day individually. So, to be continued…
Round 2 Models: Whadaya Want From Me?

A few weeks back one of this blog’s voracious readers asked what I was up to. Even a photo of my desk would be enough to sate him. I obliged and readers had fun pointing out objects of interest around my desk.
A couple weeks after that, I posted some of the steps we go through when we clean up box artwork and it seemed like a few people were genuinely interested in the process. I’m in a place right now where what I am working on is new and exciting stuff, but I can’t talk about it until we here at Round 2 Models make a formal announcement about these projects. Stuff that I was working on months ago is almost ready to go out on the shelf for sale. It is all stuff that while at one point, I was excited about, but now I’m on to the next thing.
My question to you, dear readers, is what kind of behind the scenes insight would you like to see on this blog? There are things that I do (nearly) every day that I take for granted that you guys might want to know more about. So, I’m throwing this out there. If there is something you are curious about or would like more behind the scenes dirt on, give me your questions/suggestions and I’ll work through them as time allows. Want to know more about my battles with Batmobile model development? I got plenty to share. Want to see some old control drawings from the AMT and Polar Lights archives? We’ve got some things in a file cabinet that I could pull out. The only things that are off limits are the 1:350 Enterprise and future product announcements. Those will come when the time is right.
Round 2 Models: Things Are Getting Exciting!

Have you ever had news that you wanted to shout to the world but you couldn’t? That’s kind of where I’m at right now. Things are getting exciting here in Round 2 Models-land. We’ve got a couple great shows coming up.
We will be setting up at C2E2, in Chicago, IL April 13-15. I’ve attended the show the last couple of years and I love it personally. The show focuses on comic books, movies and pop-culture of all kinds. We are looking at a show exclusive to sell at the show. We’ll see what we can do. Besides model kits, we’ll be displaying our other lines like Forever Fun seasonal products, Captain Action and Silver Screen Machines die-cast cars as well.
We are also gearing up for Wonderfest in a big way. I cant wait to unveil this year’s product announcements. I’ve stated that I don’t want to announce anything that we don’t have a sculpt or mockup for. I’m working hurriedly to be sure I don’t have to bite my tongue about anything. If all goes well, we will have more new kits out by the end of the year than just the 1:350 scale U.S.S. Enterprise™! I really, REALLY wish I could say more!
Round 2 Models: Muscling Through Packaging
A lot of our development team’s time is spent on our product packaging. It is a key marketing and sales tool and in some cases, it makes the kit much more desirable. If you read our blog regularly, you are probably familiar enough with our products to know what to expect from us in this regard. I figured I would show you some of the steps we go through and what we encounter as we work.
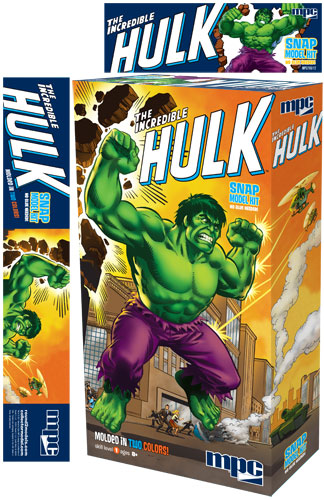
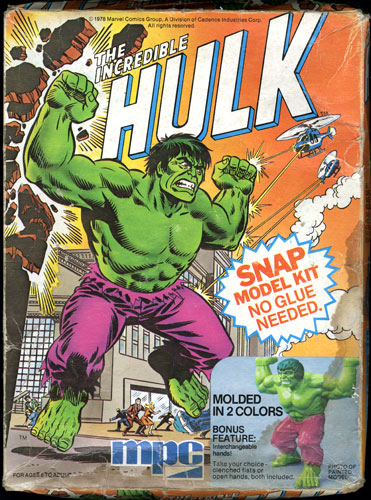
For this example, I’ll be using our upcoming release of the Incredible Hulk. In the case of this kit we started with what we had, a tattered copy of the kit released in 1978. The plan was to ditch the old packaging style completely and shift it more towards an Aurora style long box but keep a modern sensibility about it. Comparing the proportion of the art board to the long box style, I found we could center more in on Hulk and let the rest of the scene actually wrap around one side of the box to give the effect of “okay, here is the Hulk. He is mad” then as you turn to the side of the box, you get the reveal of “oh, this is what he is mad about”.
In order to start, the old box featured a giant violator that covered a major part of the background. An image of the buildup cut into Hulk’s knee. All of this is besides the fact that our box is nice and worn with plenty of cracks and stains in the image. The decision was made to break it down to just the line art and recolor it as I had done on the Spider-man and Captain America kits. This would give it the updated look I mentioned. The instruction sheet featured the same line art in pure black and white so I figured this would be a great head start. The problem was that the art on the instructions did not perfectly match the box lid. It wasn’t a complete redrawing but a few embellishments had been made to the artwork. A few lines were thicker here or there.
Once I broke it all down and mixed and matched the parts of the line art I wanted from the two illustrations, I set to filling in the gaps created by the violators. The only clue I had to the contents were an overturned car and smoke coming from it and who knows what else. There were also a few building tops peaking up from the behind the legal line on the instruction sheet. I found the look of the TV news style helicopters to be a little ridiculous and decided to embrace that a little bit. I decided to shift their color scheme to a more military look and drew in one of General Ross’ “Hulk-buster” tank on the ground to give him something to really get angry about. Filling in the rest of the cityscape background was logical to complete the rest of the scene.
So here it is, a sneak peak at the upcoming Incredible Hulk packaging. (All images are currently under licenor review and are subject to change) we will feature a build along article by Mark McGovern covering both the MPC Incredible Hulk and Spider-man kits on our website when we approach the release dates.


Round 2 Models: Shine On
I hope everyone had a happy Thanksgiving. The holidays come quicker every year, don’t they?
We, at Round 2 Models, continue to see what we can do to improve our product wherever we can and one thing we’ve been keeping an eye on is the appearance of our chrome parts. I don’t usually deal with as many chrome sprues as John does with the car stuff but back when we were working on the Pilgrim Observer, I made sure to pay special attention to the chrome parts in that one. There is a fine balance we need to strike to hold the details and also keep a nice shine on the parts. Compounding our concern is that the nature of applying the chrome and gloss coat is environmentally sensitive. (heat, cold and humidity, etc all have to be carefully controlled) We have done our best to strike that happy medium for keeping detail and also having a nice high gloss shine.
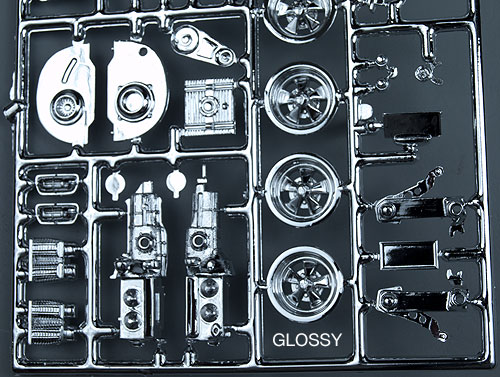
As I compared the old Pilgrim Observer vintage example to the fresh new test shots, I found that the detail wasn’t quite as nice but it was sufficient in that if you didn’t compare the two side by side, the new ones still looked pretty good. The new ones were very shiny though. Actually, they were too shiny for my taste. I think such high gloss on chromed plastic looks a little too “toy-etic”. Besides, the nature of the gloss, itself, hides or at least camouflages details and I really picked up on that. The gloss had greatly lessened with age from the vintage example and I personally found them much more appealing. They looked more scale accurate and I didn’t think any ‘70s era space agency would go through the expense of chroming parts to a high gloss just for the sake of looks. The parts might have looked like bare metal be it stainless steel or aluminum but not chrome plated. In any case I settled for what we had and let it go.
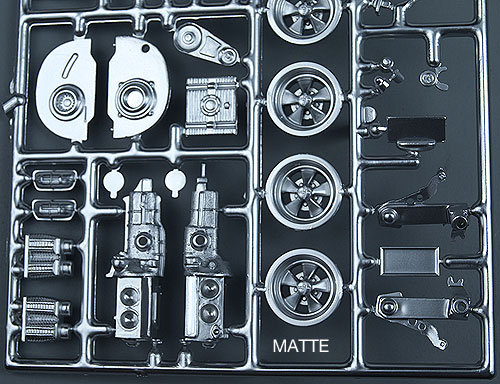
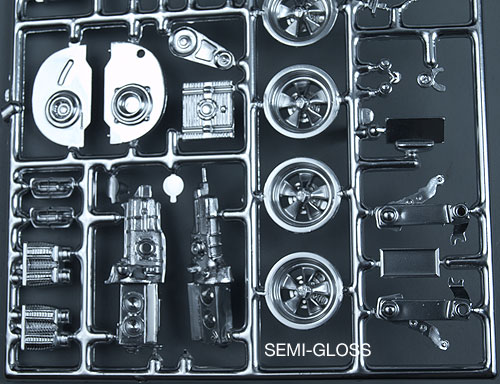
Fast forward a year or so… I’ve begun taking a look at the AMTronic kit and I was wondering if we absolutely HAD to use this high gloss coat on the chrome parts. So, I asked the factory about it this time to see if they could do a semi-gloss or flat finish on the chrome parts. They said “sure” and ran a few examples. I really like the results. The semi-gloss finish looks scale accurate. They look almost like the aged vintage sample we have on hand. The detail is all nice and crisp. The matte finish copy is also very intriguing. It really looks like brushed metal or aluminum at scale. I am very excited by the possibility of using this finish on the retro-futuristic AMTronic.
I passed the idea along to John and showed him the examples. He really liked how they looked. He agreed that the result was more scale accurate and showed detail very well, but he was concerned that if we included what looked like 30 or 40 year old chrome parts in our kits that some modelers might not appreciate it as much as we do. I felt that was a valid concern as well.
In the end we figured we’d show you guys and get your feedback on the idea. By no means would we want to use these finishes in every case but sometimes an aluminum wheel is more desirable than a polished chrome one. So, take a look at the photos and tell us what you think?