Recommended Sites


Archive for June 18th, 2019
Space: 1999 Models: New 1/72 scale Eagle kit Pt. 5
Welcome back! Your eyes do not deceive you! This continues our guest series reviewing the new 1/72 Eagle test shots. Enjoy!
Engines of Construction.
By E. James Small
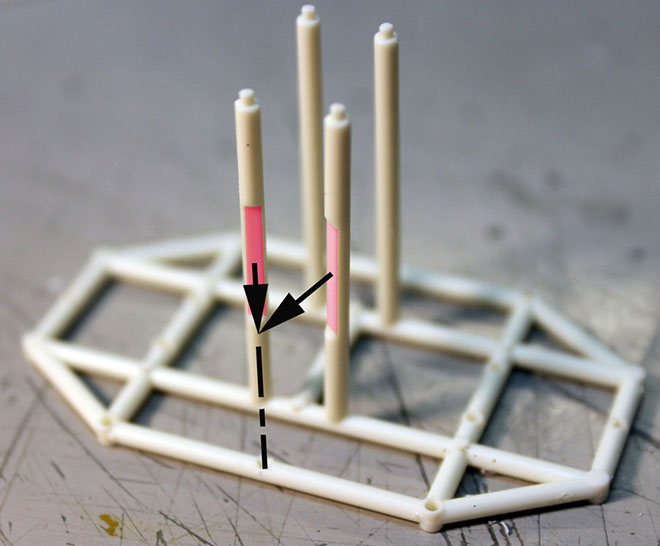
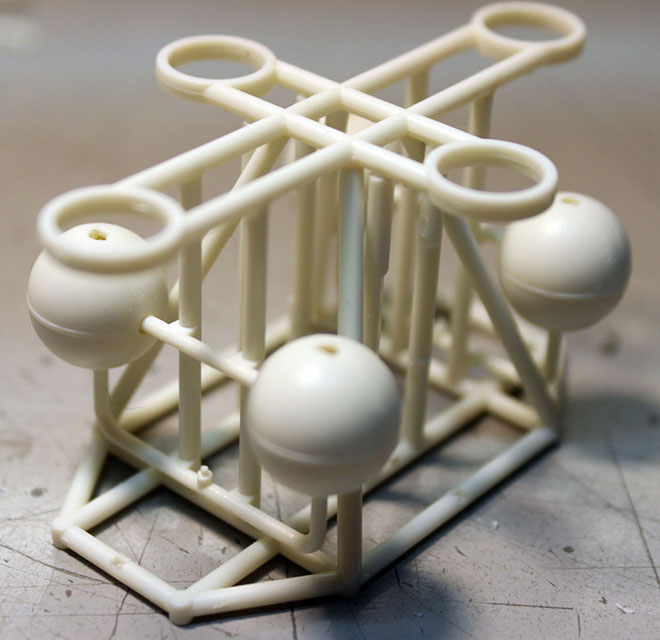
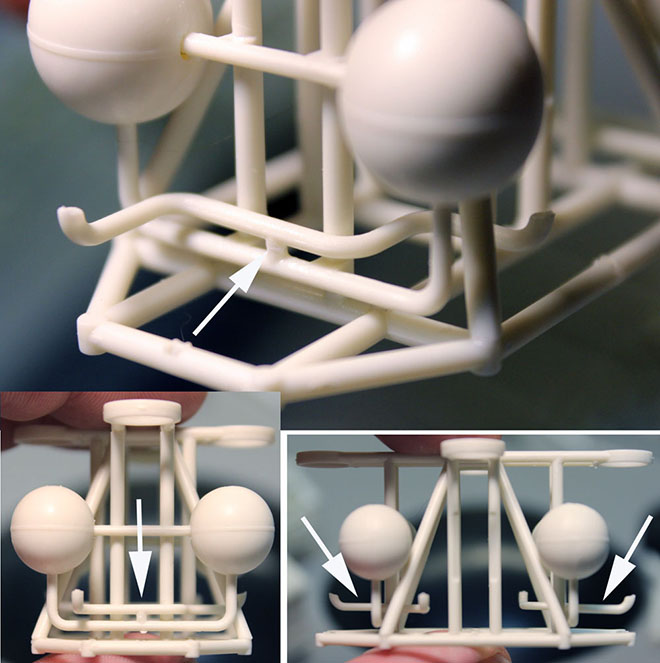
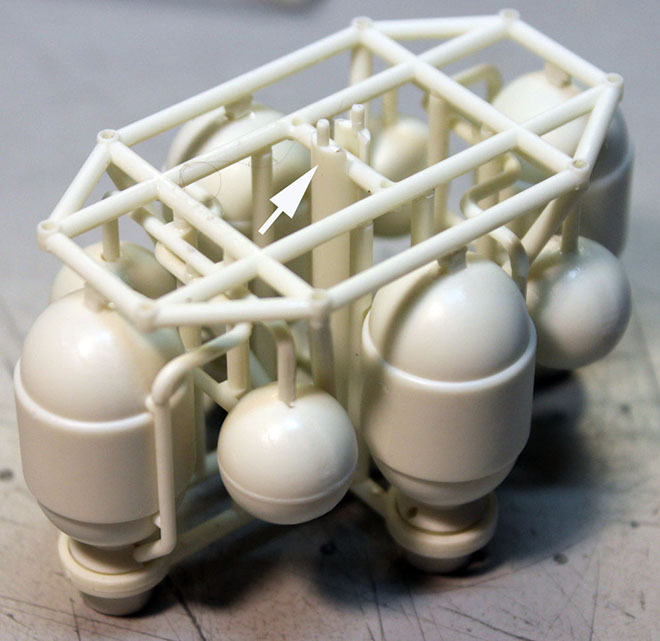
For many people, doing this engine assembly might be the trickiest part with all the piping and so forth, but if you follow this procedure, you will find it actually pretty easy. First grab the octagonal engine mounting main frame and the four supports with flats as shown. Glue them in place, making sure the flats (tinted red in this photo) point toward the centerline of where the top and bottom engines will be mounted. See arrows.
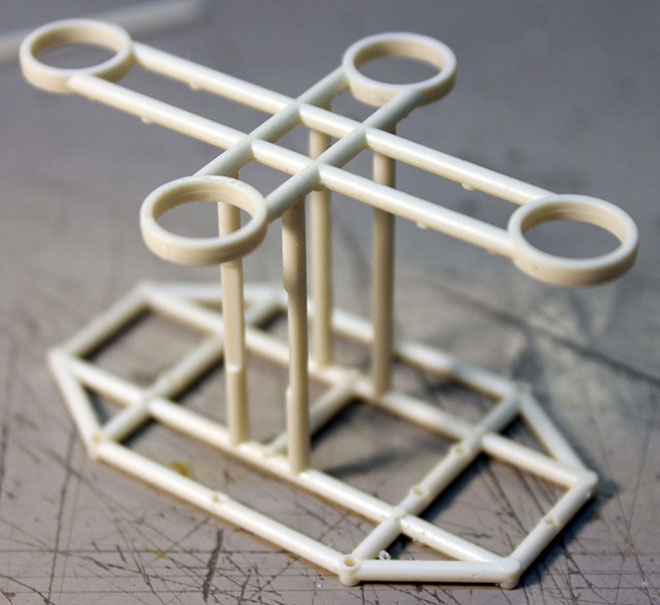
Next glue the cruciform section in place.
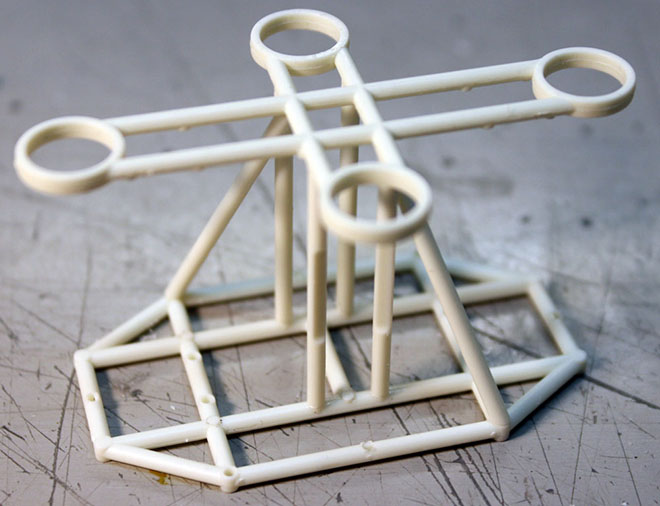
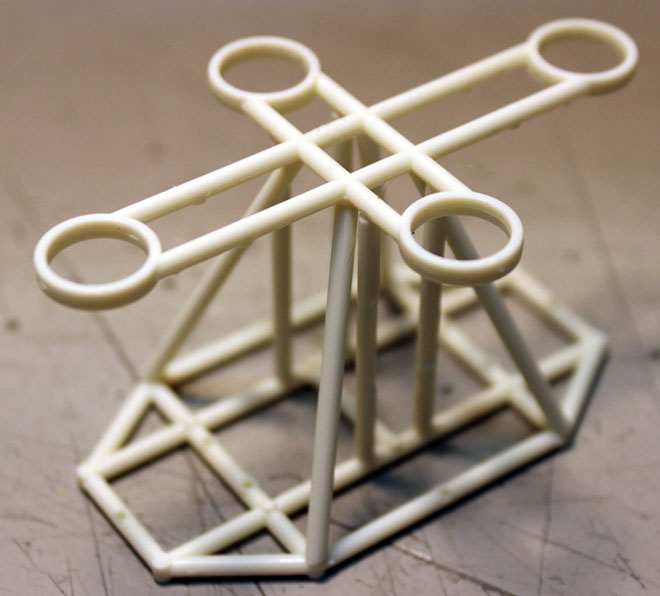
Then with the glue still soft, cement in the four angled braces as shown. Do two opposing corners first, then the other two. It’ll do a lot of wobbling around on you as you do this, but you will find that once all of the braces are in place everything will self-align. Put the unit down on the table as shown and press down gently on the center of the cruciform to weld everything together for a strong bond. Make sure the cruciform is not twisted in relation to the main frame when you sight straight down on it.
Next assemble the sphere halves onto the sphere frames and then glue those assemblies in place between the main frame and the cruciform as shown. It’s easier to put the end onto the main frame first, then swing it up into place in the cruciform. You can flex the parts just enough to allow the pins to clear.
Now, grab the longest of the squiggly pipe parts and glue them to the main frame as shown exactly in the picture. It’s the same on both sides. Tweezers will help a lot here. Pay close attention to the orientation of the parts, exactly as shown. Just glue the center down on the pin in the middle and make sure you sight it all up and keep the tubes level and parallel as shown. Allow to dry.
Now you can put the main engine bottles into place. Push the back ends through the cruciform hoops first, then swing the front pins down and cement them to the main frame. Line up the piping so they fit with the previously placed squiggly pipe sections and glue the joints together.
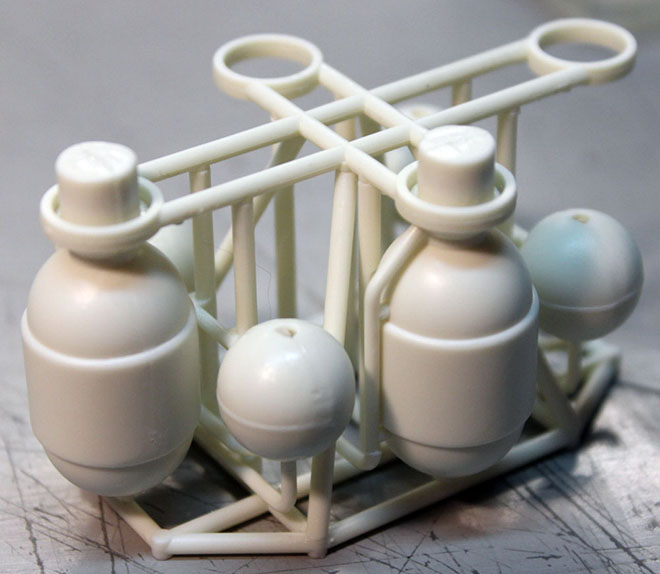
Glue on the remaining piping that goes from the spheres to the back of the engine bottles.
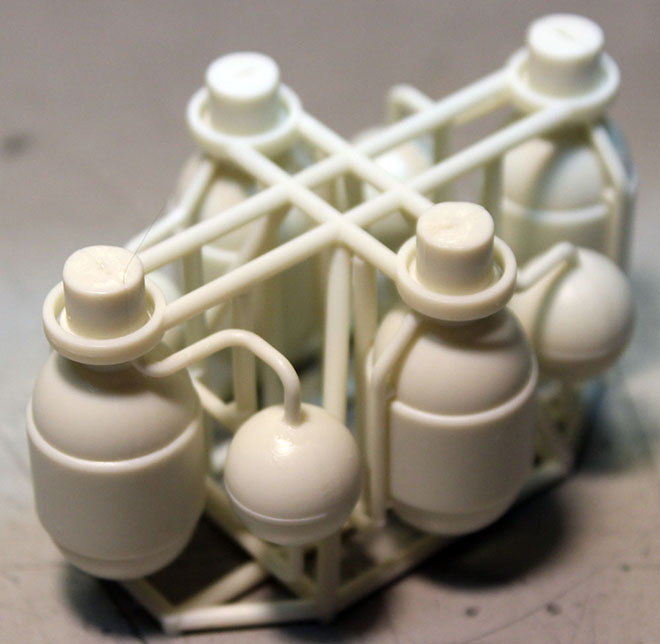
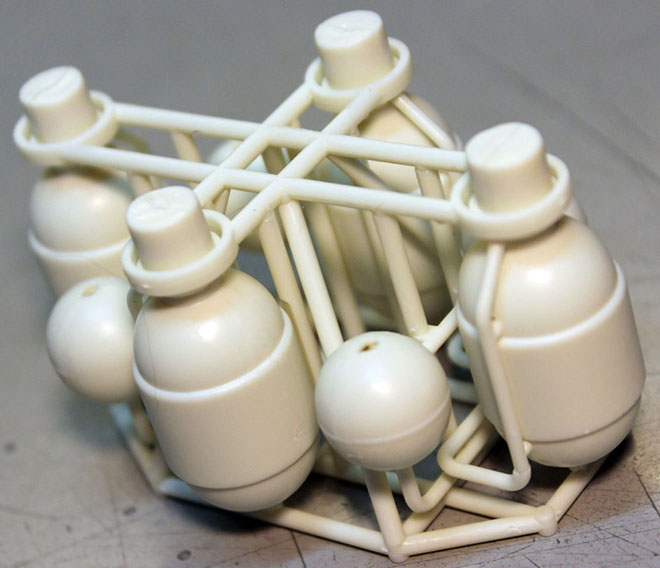
Now you can also put in the center pipe that goes from the center of the cruciform to the main frame. Make sure it is centered and seated as shown. You can offer the assembly up to the rear of the cage assembly to make sure it all lines up before the glue dries.
And you’re done that section! That wasn’t so hard, was it? You can either glue it to the back of the cage assembly now, or you can leave it of and paint it all as a unit. Enjoy! More to follow…