Recommended Sites


Space: 1999 Models: New 1/72 scale Eagle kit Pt. 5
Welcome back! Your eyes do not deceive you! This continues our guest series reviewing the new 1/72 Eagle test shots. Enjoy!
Engines of Construction.
By E. James Small
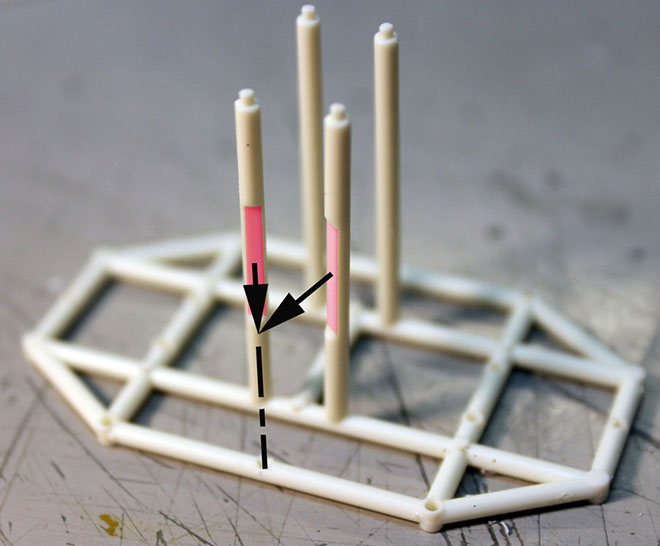
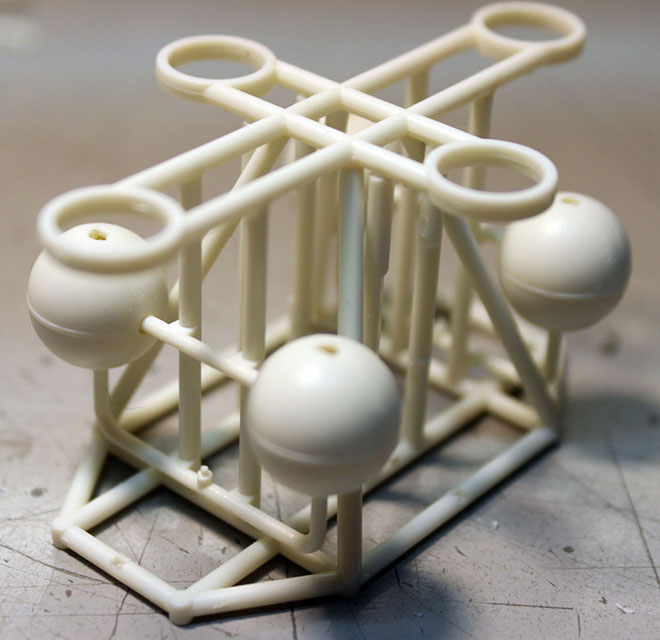
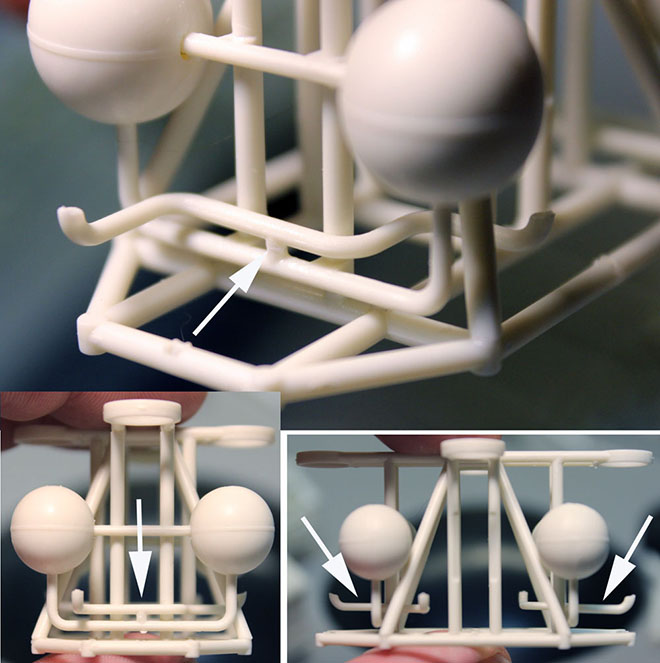
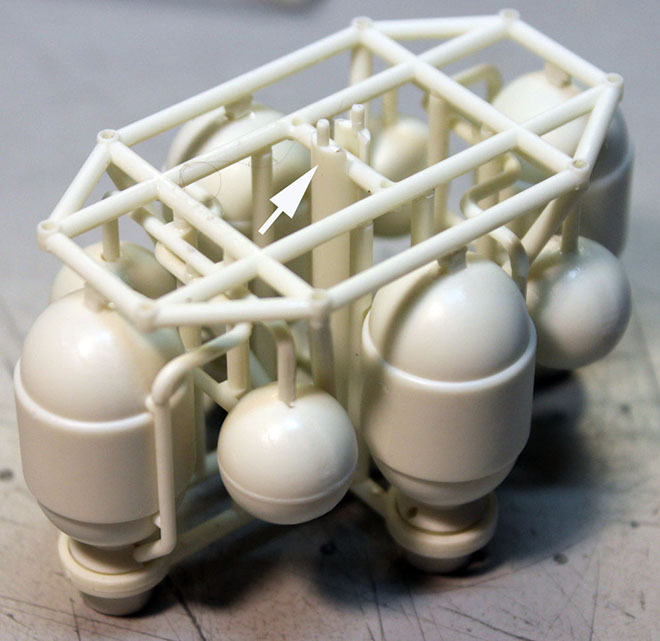
For many people, doing this engine assembly might be the trickiest part with all the piping and so forth, but if you follow this procedure, you will find it actually pretty easy. First grab the octagonal engine mounting main frame and the four supports with flats as shown. Glue them in place, making sure the flats (tinted red in this photo) point toward the centerline of where the top and bottom engines will be mounted. See arrows.
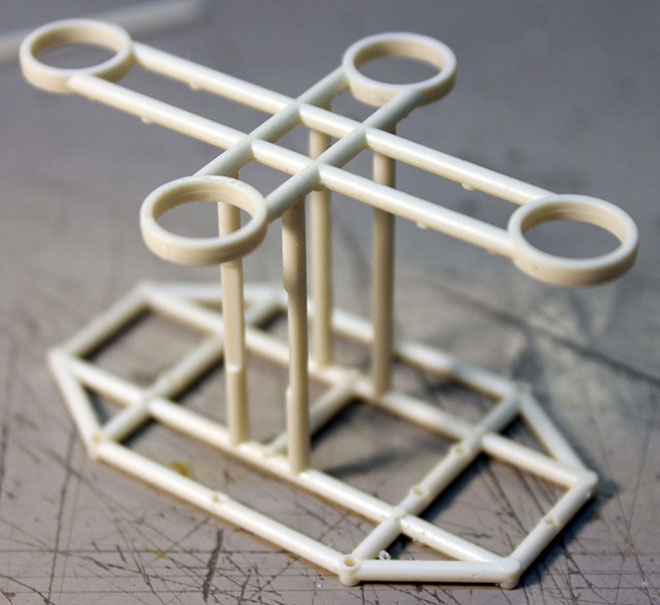
Next glue the cruciform section in place.
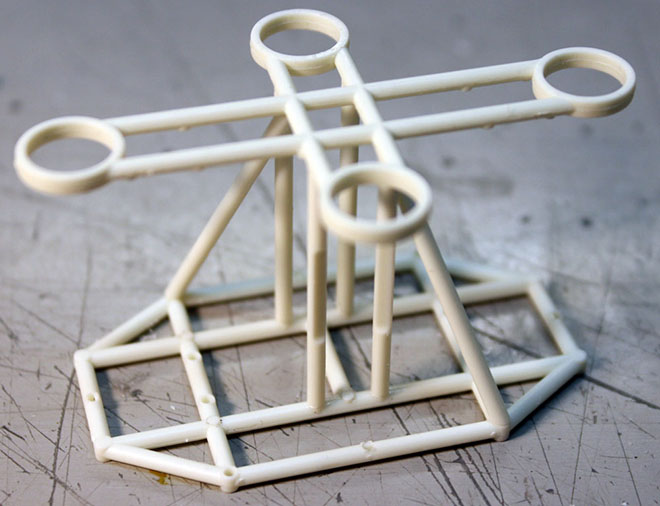
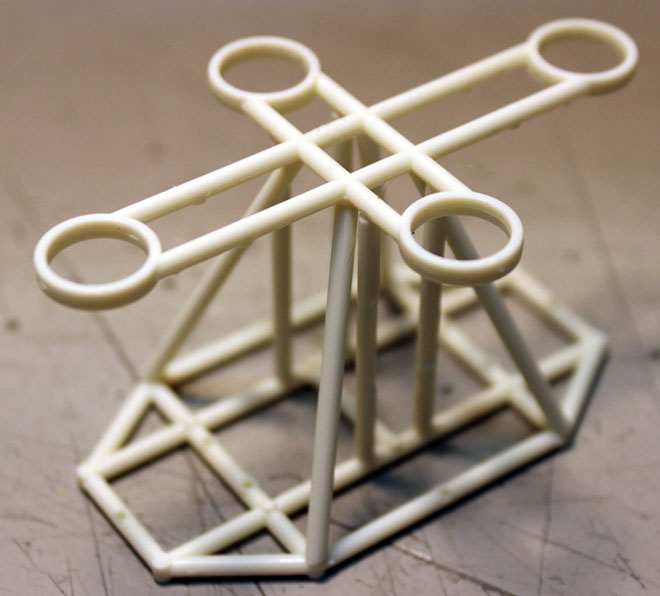
Then with the glue still soft, cement in the four angled braces as shown. Do two opposing corners first, then the other two. It’ll do a lot of wobbling around on you as you do this, but you will find that once all of the braces are in place everything will self-align. Put the unit down on the table as shown and press down gently on the center of the cruciform to weld everything together for a strong bond. Make sure the cruciform is not twisted in relation to the main frame when you sight straight down on it.
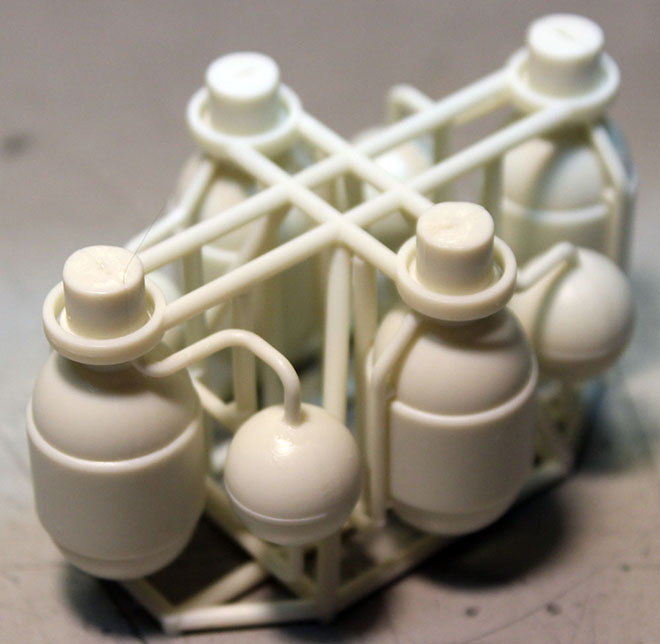
Next assemble the sphere halves onto the sphere frames and then glue those assemblies in place between the main frame and the cruciform as shown. It’s easier to put the end onto the main frame first, then swing it up into place in the cruciform. You can flex the parts just enough to allow the pins to clear.
Now, grab the longest of the squiggly pipe parts and glue them to the main frame as shown exactly in the picture. It’s the same on both sides. Tweezers will help a lot here. Pay close attention to the orientation of the parts, exactly as shown. Just glue the center down on the pin in the middle and make sure you sight it all up and keep the tubes level and parallel as shown. Allow to dry.
Now you can put the main engine bottles into place. Push the back ends through the cruciform hoops first, then swing the front pins down and cement them to the main frame. Line up the piping so they fit with the previously placed squiggly pipe sections and glue the joints together.
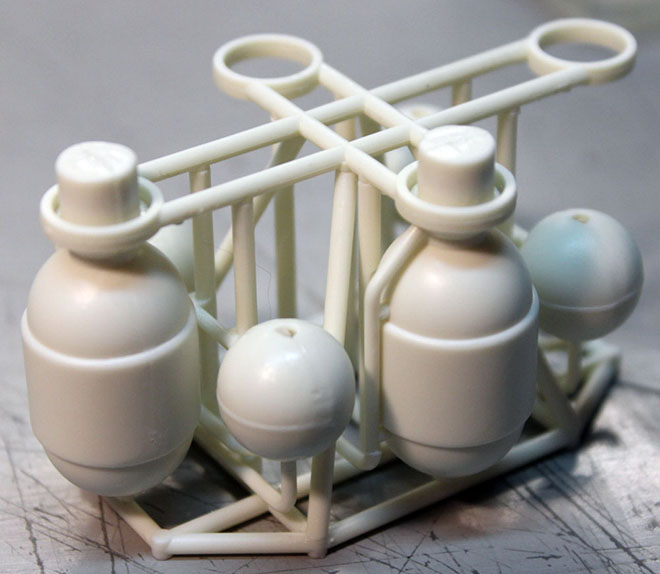
Glue on the remaining piping that goes from the spheres to the back of the engine bottles.
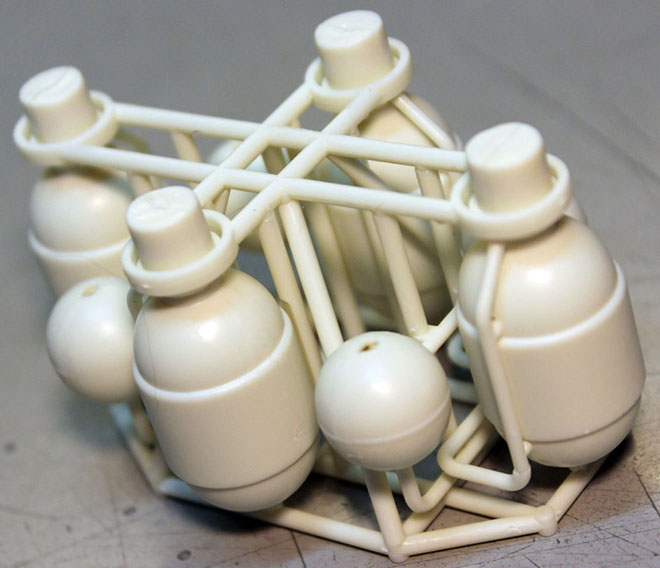
Now you can also put in the center pipe that goes from the center of the cruciform to the main frame. Make sure it is centered and seated as shown. You can offer the assembly up to the rear of the cage assembly to make sure it all lines up before the glue dries.
And you’re done that section! That wasn’t so hard, was it? You can either glue it to the back of the cage assembly now, or you can leave it of and paint it all as a unit. Enjoy! More to follow…
For the next re-issue of the classic Enterprise kit how about a “Doomsday Machine” edition to commemorate the U.S.S. Constellation with newly tooled tiny Planet Killer and “battle damage” component inserts that can be placed on the model with a guide where/how to remove sections of the plastic on the kit rather than having to alter the basic model.
Similar to the “Tholian Web” edition that commemorated the U.S.S. Defiant.
Hi Mr. Small. This Eagle will be a fantastic kit to built. No need scratchbuilding almost the entire ship to look like the studio version. If I’m refering to the studio Eagle 1, the cruciform should be surrounded with a round tube, as seen on this picture:
https://photos.google.com/album/AF1QipNB3KRneNtcK_wbewGrle95-2KsSERkfgDNR1Oc/photo/AF1QipNKw4rOoE8dIq2FtEj0D5hS5Qv0LxiItCmYbeq7
Can this little detail be fixed before production? If it’s too late, not a problem to fix this by ourself… Thanks for the updates…
Your link doesn’t seem to be working. The tube around the cruciform was added after production on the show began. Our model represents how the Eagle looked at the beginning of production. We might add that part in some day like we are doing with our 22″ Eagle 2 release.
This is an amazing thread to follow. It was wanting to build an Eagle again that brought me back to the hobby after 20 years and I recall getting advice from Mr Small based on the long OOP authentication kit and which after almost 2 years of work and a lot of investment resulted in a scratch (engineered?) Eagle in 1/72 or thereabouts, complete with interiors, working gear, detachable pod and all manner of silliness. But I was always ready to trade up to a properly engineered, modern IP kit which is what we have here. Or rather, trade up for 10 of the above which is my plan. Can’t wait to see the painted article. Thanks for doing this!