Recommended Sites


Search results
Star Trek Models: (not a U.S.S. Excelsior, but a) Galileo Shuttle update
I was actually going to make this a lead in to a longer Star Trek models post that also included an update on the U.S.S. Excelsior since I’ve received the first set of test shots. My point in doing that was to deliver positive news along with what will be a disappointment to some of you. Instead I’m just going to rip off the band-aid lay out the situation with the Galileo Shuttle. No forward progress is being made to engineer the kit. I doubt this will come as a huge shock to anyone. I hope my directness and openness on the subject is appreciated. It pains me more than anyone to make a statement like this.
I won’t drop that bomb without giving some kind of reason. Basically it comes down to timing and the budgetary limits of a company our size that offers such a wide range of products that we do. Sci-fi model kits take up a relatively slim slice of the pie when considering our automotive and military kits, die cast cars in several scales (including the recently re-acquired Johnny Lightning brand) along with other endeavors. Priorities have to shift when opportunities arise and for now we aren’t in a place where we can commit to the kit. Sometime we can invest in something grand, and sometimes other lines get to do something else instead.
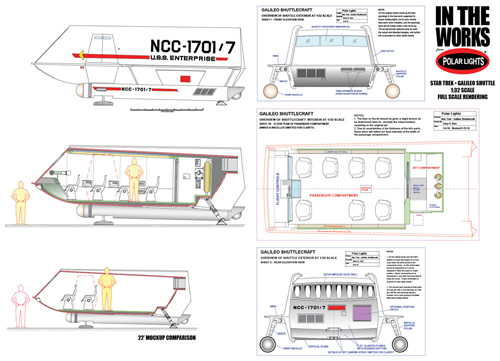
You may ask why we’ve steered away from this one while producing others instead. That’s a fair question and this is where timing kind of comes into play. Initially, there was a bit of a delay in getting completed plans of the ship. Gary Kerr is our most trusted consultant on all things Star Trek, but when we first dug into the project, his plans were very preliminary and just captured the basic shape which we used for the basis of the shuttle in our 1:350 kit. By the time he turned them in, they consisted of over a hundred pages of crystal clear information. That took some time to do and while he was hard at work drawing up the plans we did other kits. Keep in mind it is easy to think about the old AMT kit and imagine that we could just do an improved version of that, but you know our reputation of doing a new kit right when we do one. At scale, the ship measures 11” long and over 7” wide. In that old kit one wall provided the interior and exterior. That won’t work for a kit that is intended to be accurate. it requires separate interior and exterior walls, floor, ceiling, roof, etc. So once parts get laid out on a tool, it essentially becomes the equivalent of two kits! I studied ways to cut back or compromise, but ultimately they would have seemed like a shortcut or cheat. The savings in doing so were negligible. One factor that actually worked in our favor was that when combined the 1:1000 Romulan BoP and U.S.S. Reliant were more manageable financially and they gave us more marketable kits at a lower price point. They also tied directly to other kits of the same scale. If we had done the Galileo those kits may never have come to market.
Why do the Eagle and not the Galileo? That qualifies as a textbook “tough decision”. Ultimately we decided that the Eagle gave us the basis for three variations along with many potential add-ons and accessories while the Galileo could pretty much only exist as itself and therefore limited us with what could be done with the tooling. On top of that, sales on the Space:1999 license proved that the market was hungry for a new kit and that seems to indeed be the case. That isn’t to say one license won over the other. We still have a lot we can and want to do with the Star Trek license!
So why say this now? I could have said something a few months ago, but I was knee deep in other matters. Plus, I still have hope and an idea to be able to do the kit sooner than later. I just wanted to clear the air with everyone that really wanted a straight answer on it. So the straight answer is we aren’t doing it right now, and they way things look we won’t be considering it for a while. I DO want the kit to happen and like I said, I have schemes and ideas, but it is time to move on for a bit with the intention to work back around to it. So what will we do? We’ll see. I’ll show you when I have something to show. Onward…
MPC Models: The Eagles Have Landed
Word of our new MPC Eagle kits landing in modelers hands started trickling in late last week. Orders are still in the mail to some, so stay patient if yours hasn’t arrived yet. I just wanted to take a quick minute for a quick post. Let’s start with some “bad” news…
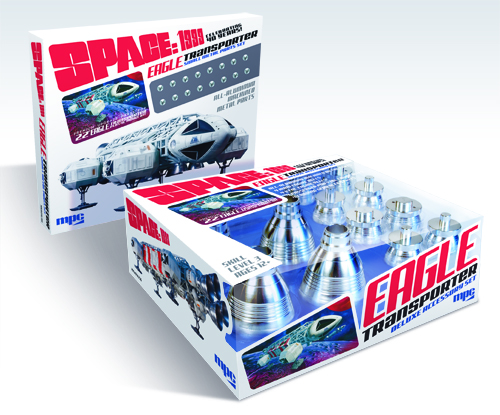
The metal accessory parts are at least a month behind. The factory is making sure that they weed out and metal bells with visible flaws. At the price the sets will be going for, we want them to be flawless. Only a few people have seen them first hand. I actually don’t have a full set myself other than the one installed on our buildup. But everyone that has seen them will attest to how magnificent they look.
Speaking of flaws… with as much energy as we put into the kit, nothing can be considered perfect. I’m going to be up front and fill you in on the handful of things to keep an eye out for if you are a discriminating modeler.
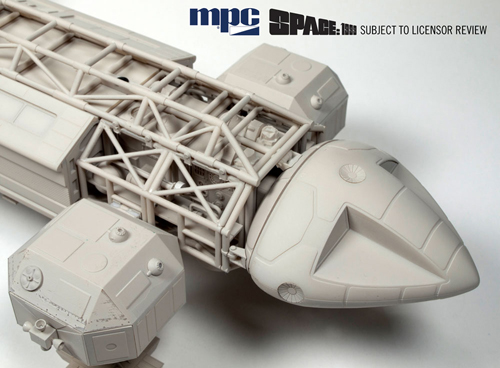
- One point the factory misinterpreted in their final clean up was the presence of two “teeth” on the trailing edge of the command module halves. The presence of them would allow the main pod shell to grip onto the back wall without the need for cement. Unfortunately these were removed on accident and are not present on the first production run of kits. This has already been corrected on the tooling so subsequent production runs will have this feature.
- During the tool polishing stage, the factory got a bit carried away on the port windshield part causing a bit of a wave in it which gives a bit of distortion when looking through it. The tool is being reworked to correct this as well.
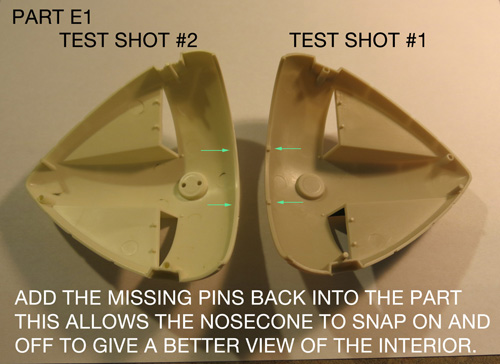
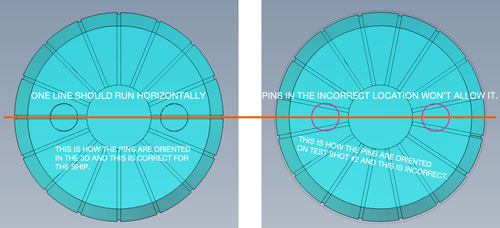
- There are pins present on the back side of the CM sensor dishes. These pins are oriented at an incorrect angle. This will get fixed later on too.
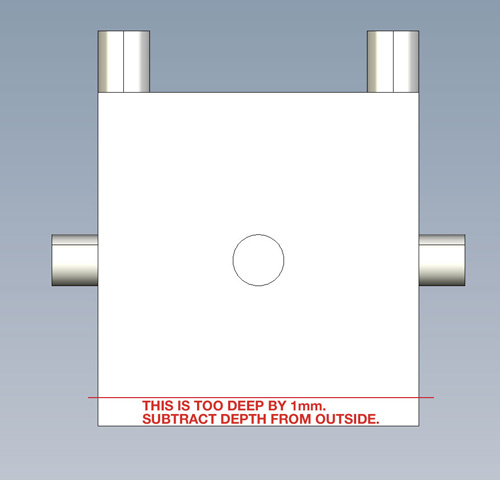
- Two errors were present in the data we sent to the factory that was used to create the model. Correcting these problems was problematic as it would require substantial tool work for the very slightest amount of change. the first error is the depth of the RCS thruster housing. They are 1mm too deep.
- The second error was not noticed until just recently. The nozzles on the loose Gemini domes should have been either A) been fudged a bit so one part could be used in every application or B) had lefts and rights made on the tool. Sadly this wasn’t the case so now the “lean” (the angle is fairly slight) in the wrong direction in some cases.
- Lastly, The screws that are included in the kit are not “self tappers” so you will need to use a drill bit or another instrument to create a hole in the top of the passenger pod roof. Don’t make it too big obviously…
In the big scheme of things these are all very small things. But I figured I should stay as straight forward as I always try to be.
Now some good news… that some might think is bad…
I mentioned that we were making corrections where reasonably feasible on the problem areas I mentioned so the kit is more “right” when we do subsequent production runs. As of this writing we are very nearly sold through (that means from our warehouse, not necessarily at the retail level) on the first batch of Eagle kits. A second batch was already on order some time ago, but we don’t expect those kits to arrive until later this month. In fact, we’ve placed a third order to follow behind that one as sales have been very brisk. So, that means if you want yours soon, but you haven’t ordered one you should do it now or you may end up having to wait a bit until more fill the distribution lines.
Further good news is that our friends over at Sci-Fi Fantasy Modeler have launched their digital publication program. Be sure to check them out to get some free digital content now, while new stuff like the Eagle special will be coming soon. I also understand they will be making back issues available digitally as well. So check them out and keep an eye out for more from them. Read the yellow section at this link to find out more details.
http://www.scififantasymodeller.co.uk/English/welcome.php
Not to introduce brand confusion (read the title closely) we got word this morning of a new sci-fi oriented website that looks pretty promising so far. Check out the link below and look for the 1:350 scale U.S.S. Constellation article. Looks pretty great.
While I’m talking up websites/forums/online modeler gatherings I wanted to mention a fan group on Facebook that has been very supportive of the Eagle kit. If you aren’t already a member, do a Facebook search for “Space: 1999 Props & Ships” to see what Todd Morton and a ton of other kind S:1999 fans from all over the world are talking about.
Lastly, we know a lot of people have been asking why our own model kit website hasn’t been updated recently. Fear not. Attention has turned to developing an all-new website that will host all of Round 2’s product lines. It is a complicated endeavor that a limited few of our staff have been handling for several months. There is still a lot of work, redirecting and updating to do before we start using it. Round2models.com as you know it will stay active until everything is up and running on the new site.
Onward into 2016…!
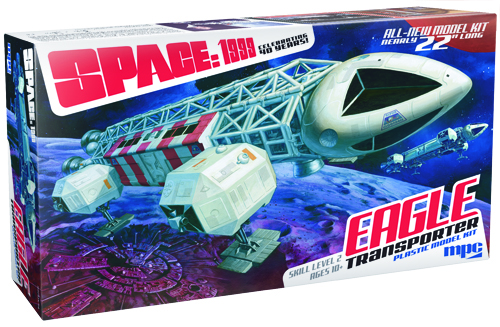
Space:1999 Models: 22″ Eagle update
UPDATE: Kits are due to ship from China by the end of November. No promises that they will land in modelers’ hands by Christmas, but may still reach many of you by the end of the year.
Nearly everyday I get an email or note requesting more info on our exciting new MPC Space:1999 Eagle kit. Quite a bit has happened since my last post and I’m overdue on an update. So here you go. Let’s see… where to start…
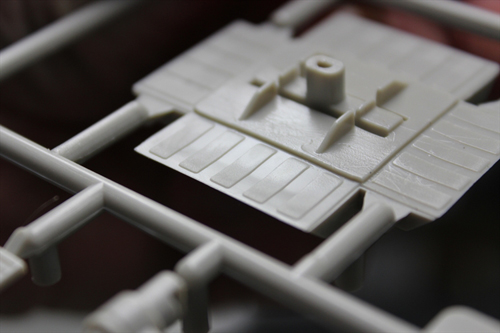
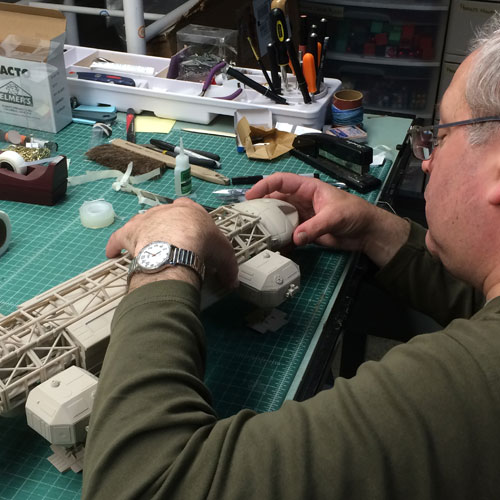
The parts- We’ve received two rounds of test shots. You may have seen comments from Jim Small or Jay Chladek online about the first set of those. I’ll admit I’m holding back a little bit on this one in order to save something for Sci-Fi Fantasy Modeler’s Eagle special where I’ll be contributing an article. Btw, to pre-order your copy click right here! I’m doing my best to balance the distribution of info between here and there.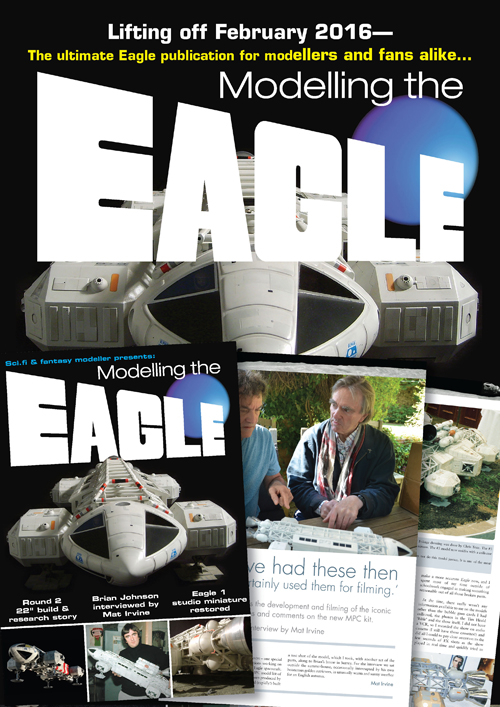
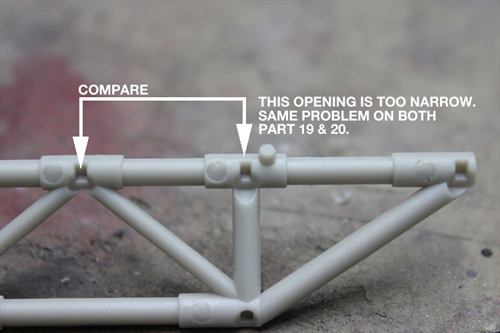
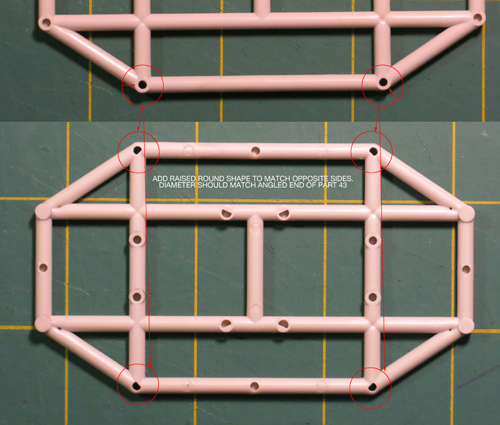
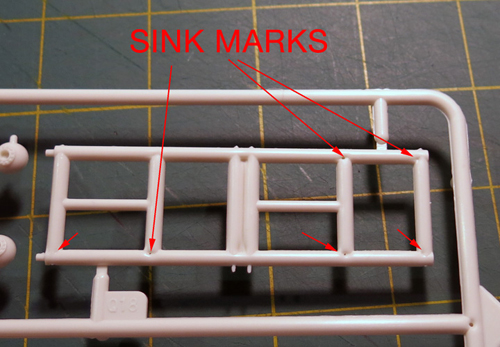
I guess I’ll start by saying that beyond flaws in the surfaces of parts caused by the tooling process that there was not a whole lot to be addressed. There were minor fit issues here and there with pins missing, sink marks etc. All were to be expected in a preliminary test shot. Other than that, the kit really assembled nicely once I wrapped my head around a few of the sub assemblies. It is one thing to see all of the parts and understand how the end product is supposed to look and see what assembly “theories” worked out and which didn’t. Even not noticing very slight differences between some of the frame tube parts caused problems in my first attempt. Keep in mind none of the parts get numbered until the next step. A few lessons were learned, but all for the better and the initial build went together satisfactorily.
I always ask for 10-12 initial test shots for plenty of testing and distribution to consultants and select media outlets. Most might think “ooh, 12 sets!” Well, they go pretty fast once you start handing them out. I kept three. One got assembled, one was used to retrace steps in the build to document trouble areas in the parts and one was kept intact for our archive. Three got sent to Jim Small to use for our buildup. That allowed extra parts for immediate replacement for the build and the ability to build a rescue pod in addition to the standard passenger pod. He was also due a copy as a consultant on the project. Our other consultants Daniel Prud’homme and Chris Trice were also sent one copy each. A set was sent to Sci-Fi Fantasy Modeller for upcoming issues. Two sets were sent to Mat Irvine to take along for his SFFM interview with Brian Johnson. One set was awarded to Jay Chladek for winning in the JerseyFest model competition. Let’s see… ten fingers and couple toes… Yep, that was all of them.
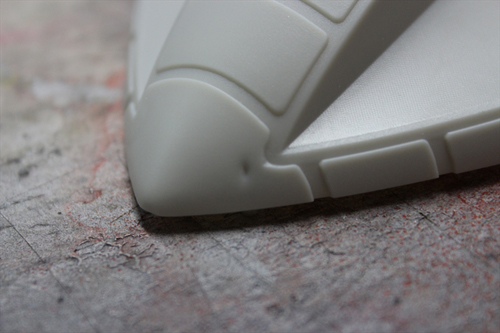
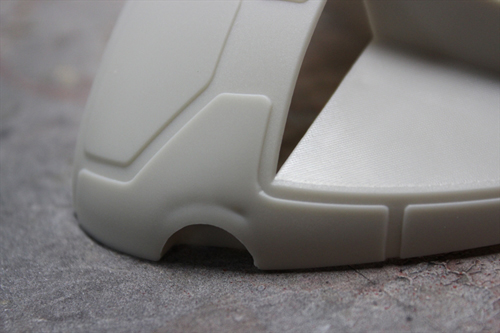
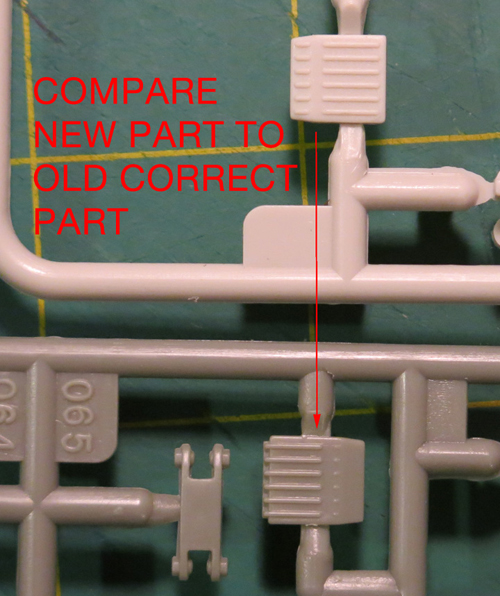
Back to the parts themselves, I mentioned we received a second round (only two sets this time) and most of the problems were resolved, but they never all get taken care of even at this stage. There were still about ten points to correct. The biggest problem to overcome was sink marks in the tops of the landing footpads. The parts were originally solid, but had to be broken into two parts each. This required a bit of rearranging other parts on that particular sprue to make room for the second sizable piece. The change resulted in more problems. In some cases, the factory’s work takes us a step backwards and this case was no different.
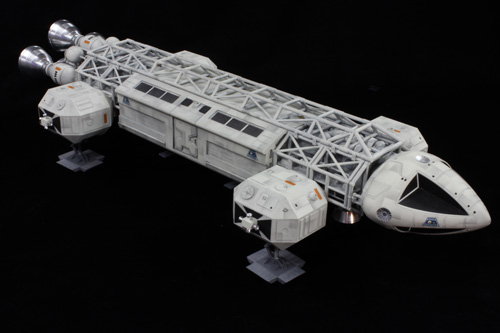
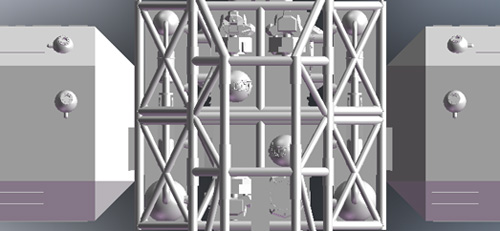
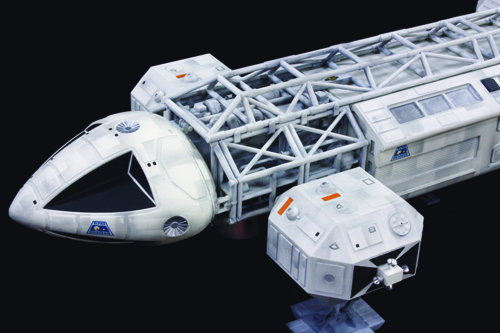
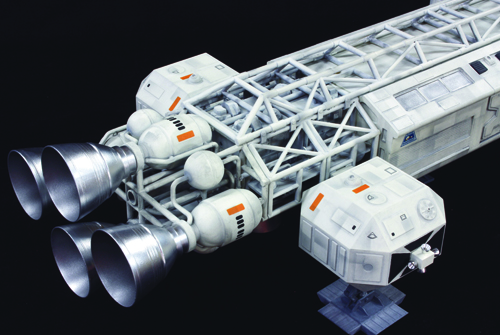
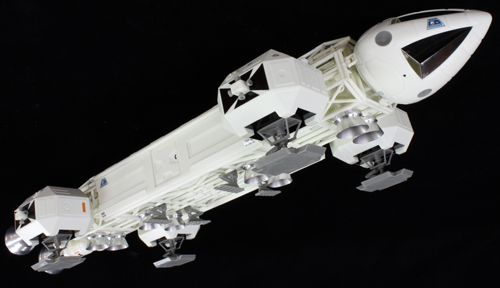
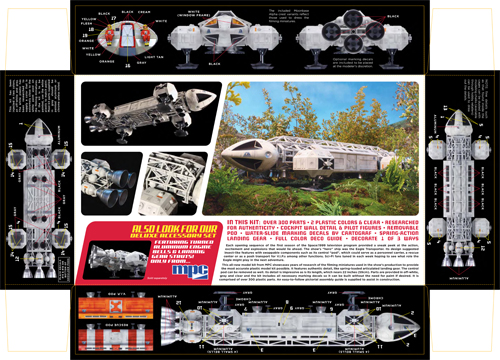
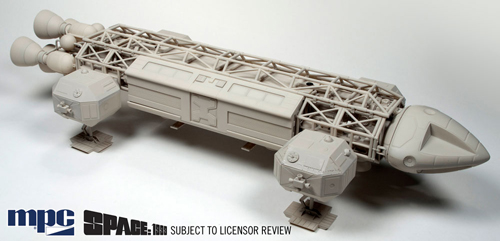
One of the features of the kit is that we are injecting it in two colors, “eagle” white and gray with windows supplied in clear plastic. This means that if one wants to, he can build the ship without having to paint it. I’m of the mind that is looks a little toy-like in this state, but adding the metal engine bell accessories helps, and just a little chalk dust added to the corners and crevasses would supply a superb look without painting in full. Here is a pic of Jim’s “naked” build with the larger metal bells installed.
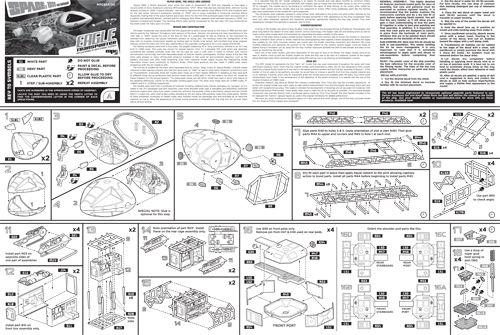
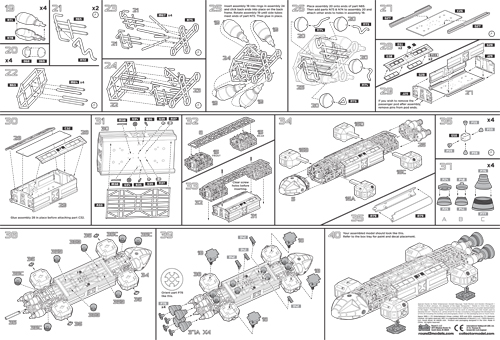
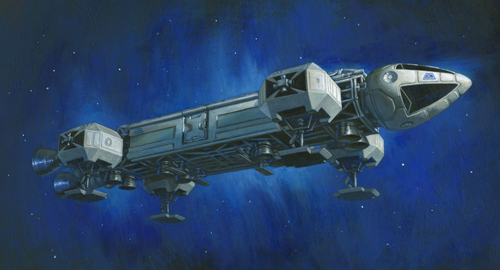
Packaging- By the time test shots arrived, we were racing the clock to get everything finished. The instruction sheet needed to be revised to take practical assembly into account, decals had to be test fitted and refined, the test shot needed to be built into a respectable model for the packaging and publicity and I had the extra task of finishing the box lid illustrations. In most of the designs I was considering, I had a second Eagle in the background. I decided to paint that one separately and would later drop it in as needed in photoshop. This served two purposes. The angle I used for it lent itself better on the box ends. So I would need it larger than it appeared on the box face. Secondly, it allowed me a practice painting to exercise my languishing skills and to check my planned technique. If I couldn’t manage this “baby Eagle” as I like to call it, I was sure to fail at the much larger painting. I’ll post more on the illustrations and process on those another day, but I have to say I felt a bit wounded by some of the comments I saw out there when one of our distributors released a sales image of the box face. Everyone is entitled to their opinion and let’s face it you guys love this ship more than I do even in the very intimate role I’m playing in this. I know very few people could have known the hundreds of hours spent on the design, art and package. In the final push, I spent every waking hour for three straight days working on the larger painting. Time heals all wounds though and I feel much better now. Btw, usually when working on freelance gigs and even when I’m doing semi-mindless photoshop here at Round 2 I listen to podcasts more than music. One thing I used to pass and measure the time on this project was finding “books on tape” for free on youtube. My “reading list” was… 2001: A Space Odyssey (I get it now), Starship Troopers (I was struck by how closely the movie stayed to the book while still failing in its portrayal of the material), the first 1/3 to ½ of Stranger In A Strange Land unabridged edition (I didn’t really grok it so I moved on), 1984, A Brave New World and Treasure Island. I feel very well read now…
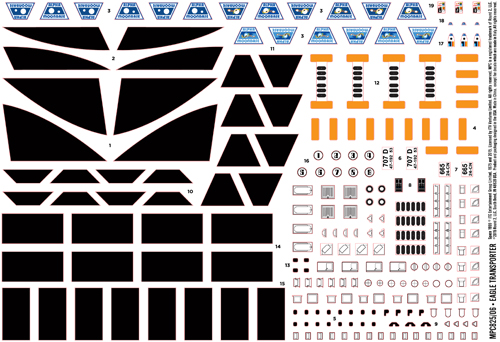

Other stuff- I was very hesitant to reveal all of the news I made in my last Eagle post because it all felt too good to be true and that any of the deals I mentioned could fall apart at any moment. And I’m sorry that I have to report that one of them did… for the moment. It seems the ability to move decals from Italy into China for pack-in is disastrously problematic without the proper red tape taken care of. This is something that is being worked through presently and we full expect to be able to use Cartograf decals in upcoming Polar Lights, MPC and AMT kits by mid 2016, but unfortunately it just can’t happen in time to include them in this release of the Eagle. We currently and will continue to include them in our Hawk and Lindberg branded kits. The move to change to Cartograf has sent a clear message to our current Chinese decal suppliers and stepped up attention to quality has been ensured. I have tested proofs of the Eagle decals and they performed admirably and responded to the use of setting solution. More updates on the inclusion of Cartograf decals will come when definitive info becomes available.
On the plus side, Mat Irvine’s interview with Brian Johnson seems to have gone off without a hitch. Since the interview Brian has delivered a special behind the scenes treat for Eagle connoisseurs, a rare photo of the Eagle model crew along with a full listing of everyone that worked on them!
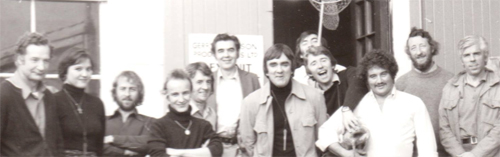
Pictured from left to right: Alan Barnard, Sallie Beechinor, Terry Reid, Guy Hudson, Brian Eke, Cyril Forster, Brian Johnson, Andrew Kelly, Terry Pearce, David Watkins, David Lichfield, Terry Schubert
Not pictured: Harry Oakes- DoP, Frank Drake- Cam Op, Les Bowie- Pinewood FX, Alan Bryce- Pinewood FX, Fiona Latto- Sec, Martin Bower- models
AGM Aeronautical General Models- Larry Barr & Wag Evans- 2nd 44” filming Eagle
Mary Robbins (Anderson), Nee Curtis- Sec 2nd Series 1999
Wrapping up- Okay, that’s about all comes to mind at the moment. Have a happy Thanksgiving!
Oh… you ask when will the kit come out? It is November and that was the release date we’ve published, isn’t it? Yes, well, despite our best intentions November is not to be. Currently, it looks like kits should arrive in the nick of time before Christmas. No promises as always, but the honest truth is that is how it looks at the moment. I’ll post an update when I hear they are being loaded onto a boat. Until then… build a deluxe 12” Eagle Deluxe Edition or Moonbase Alpha. As always, Happy modeling!
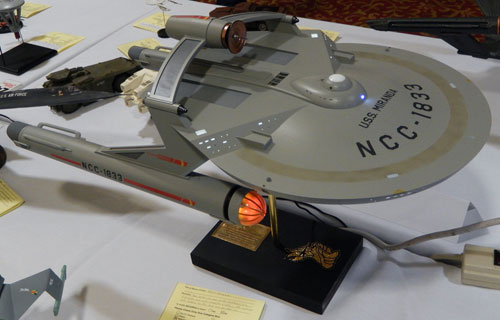
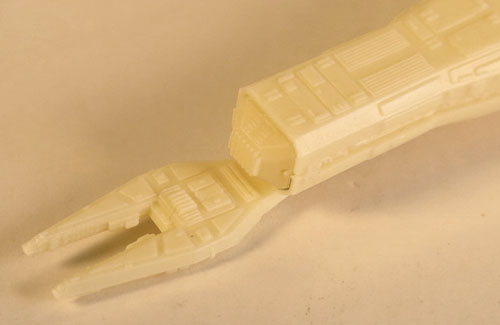
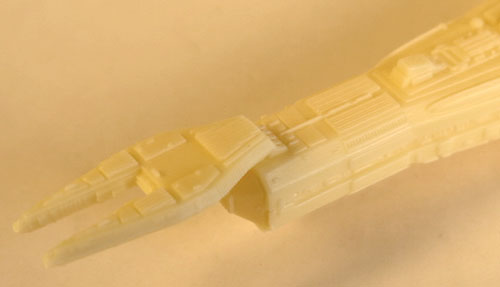
Star Trek Models: U.S.S. Excelsior new part preview
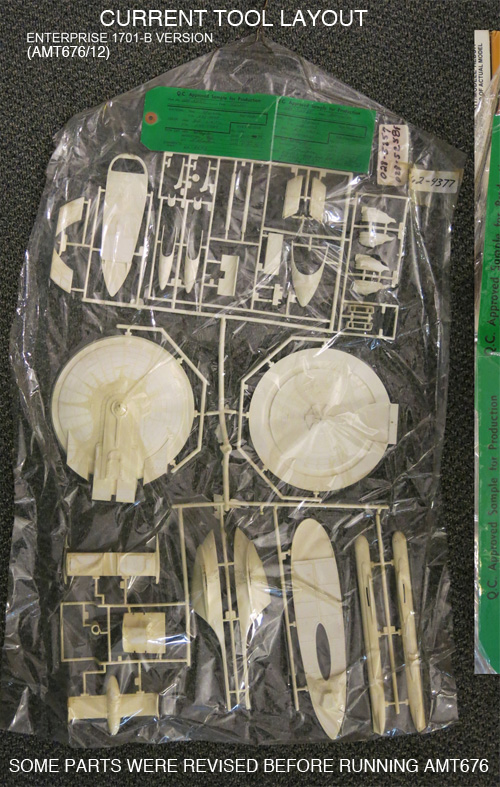
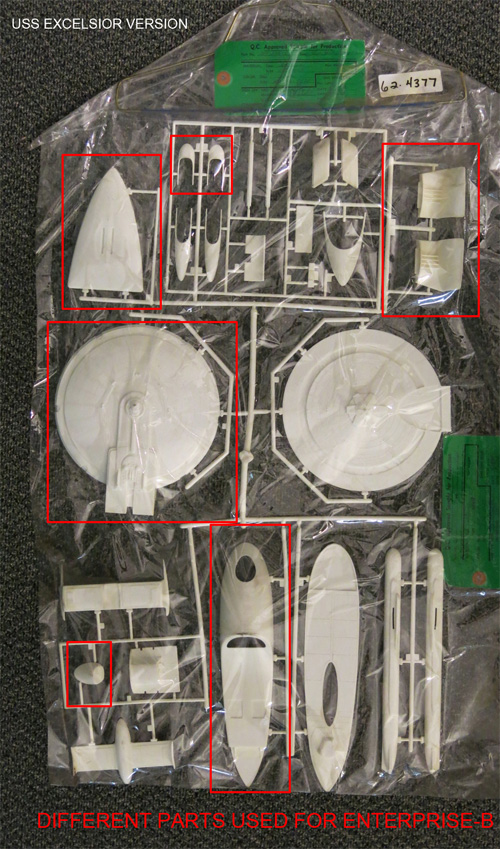
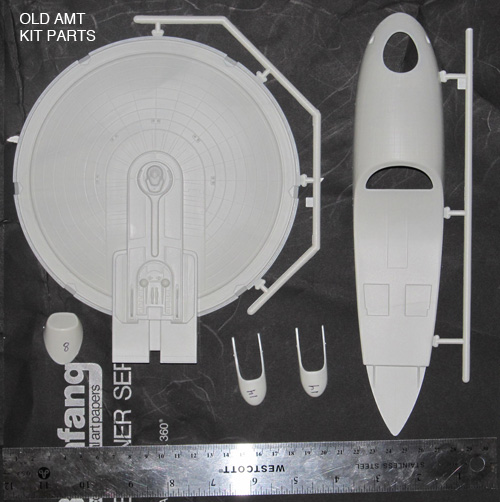
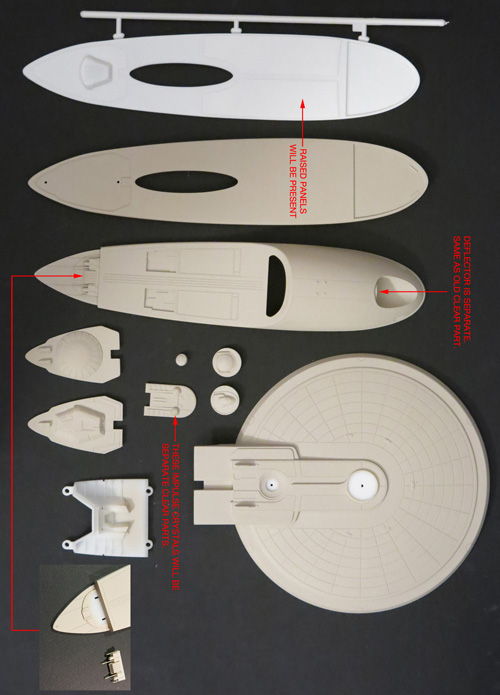
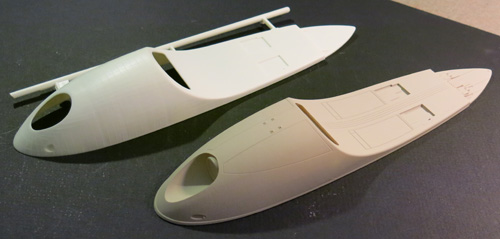
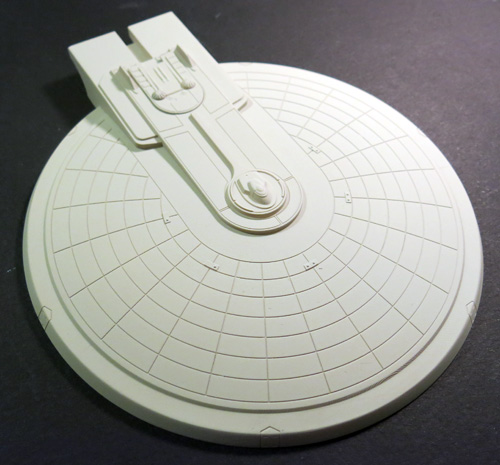
At long last, here is the promised sneak peek at the new parts that have been brewing to create our upcoming release of the U.S.S. Excelsior from Star Trek. The short history on the old AMT tooling is that the inserts that are needed to transform the U.S.S. Enterprise-B kit into the Excelsior have been lost. So we have had to recreate the missing parts. Like most of our work on new Star trek kits, the CAD work was done by Angelo Bastianelli. If you never picked up our reissue of the Enterprise-B a few years back, we made a few corrections on that one. Most significantly, we completely redid the lower saucer and curved the back wall of the neck. Some might ask if we are just recreating the parts from the old Excelsior kit. You know us by now. We approach these kits like the Six Million Dollar Man. We make them better than they were before, better stronger, faster… Okay, maybe just better, but you get the point.
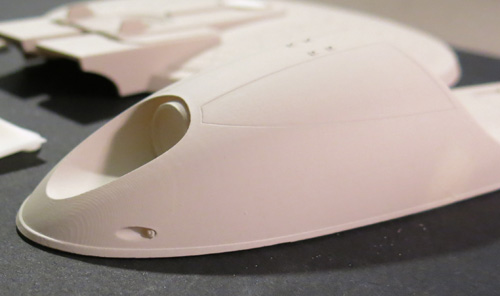
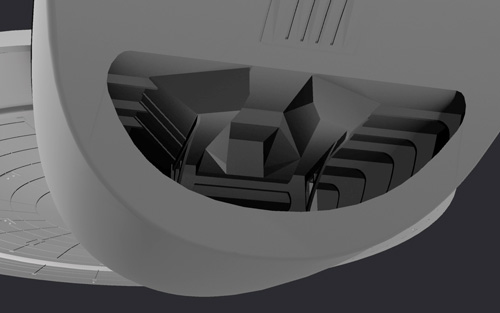
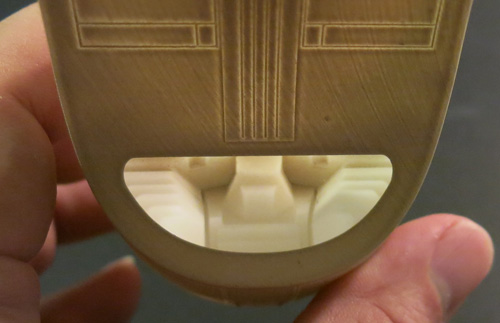
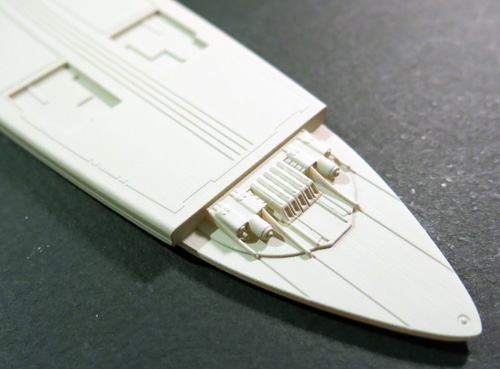
With this edition, we examined the shape of the lower hull carefully, but found that the shape of the old part was proportionally accurate. Without necessarily meaning to, the new one is relatively close to the shape of the old one. We’ve decided to implement a slide mold this time though so the deflector trench will no longer be a separate part. That also allows us to get the weapon details a little better on the sides of the hull. We are completely redoing the inner “gut” detail of the hull based on Gary Kerr’s research into the model kit parts used when the filming miniature was built. A few compromises were made to allow us to inject the part with minimal fuss, but few will pick up on the differences. The look of the “whalebone” is more accurate now with that detail being split between the inner bay part and the outer hull part.
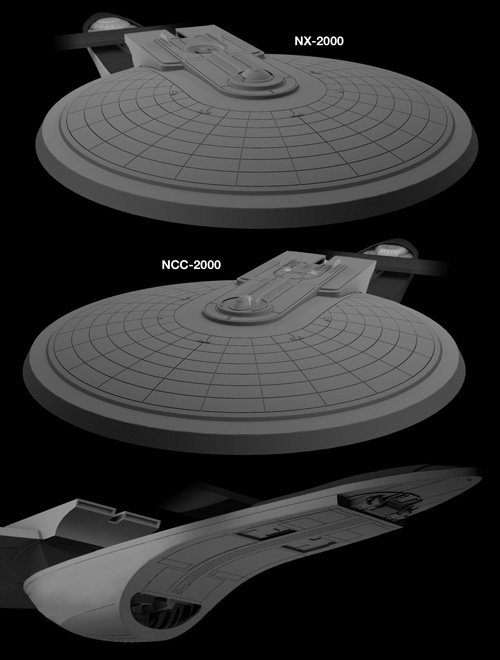
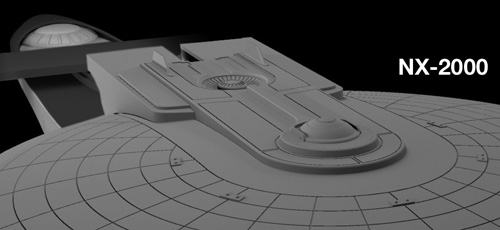
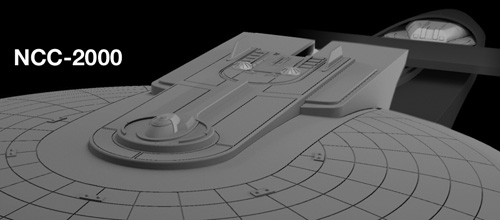
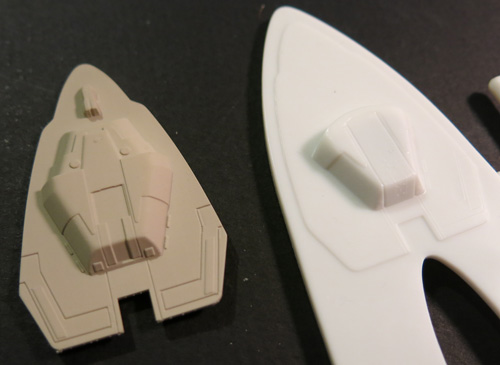
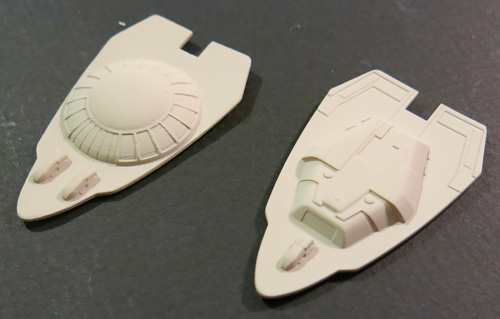
We had to recreate the top of the saucer as well and this was probably the most significant undertaking. The old part was kind of soft on details, so we made sure this one is up to snuff and a substantial upgrade will be the ability to use parts to build the ship as either the NX-2000 as shown in STAR TREK III: The Search For Spock or as the NCC-2000 as commanded by Sulu in STAR TREK VI: The Undiscovered Country. That means the bridge dome, impulse crystals and hangar bay will all come with swap-able parts. Speaking of impulse crystals, they will come as clear parts regardless of which version you choose.
Here are a whack of photos to take a gander at. I’m sure you’ll pick up on some of the other fun details and features I haven’t mentioned. Right now, it looks like the kit will be out in May.
For those hungry for more Eagle updates. I hope to have another post about that out next week.

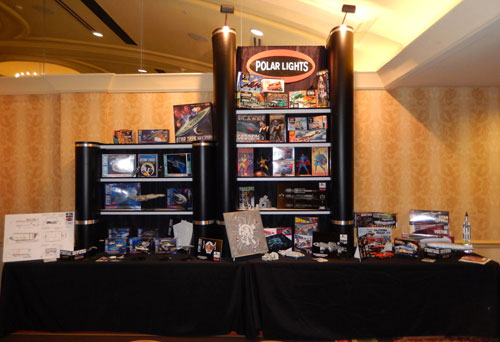
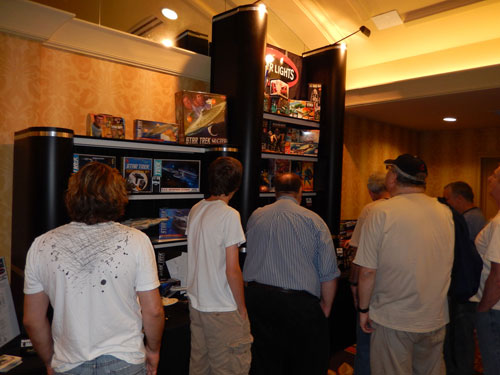
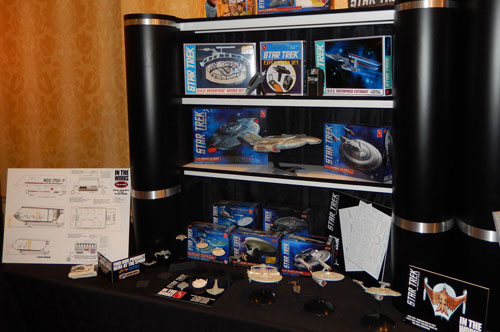
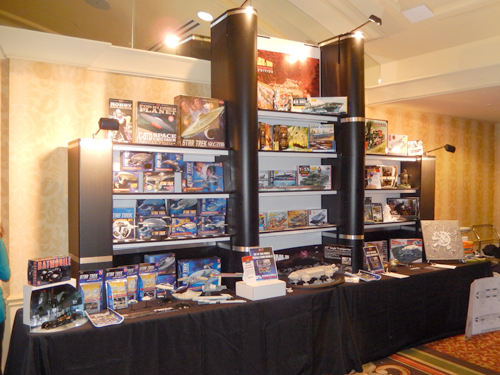
Round 2 Models: Wonderfest 2015 Highlights
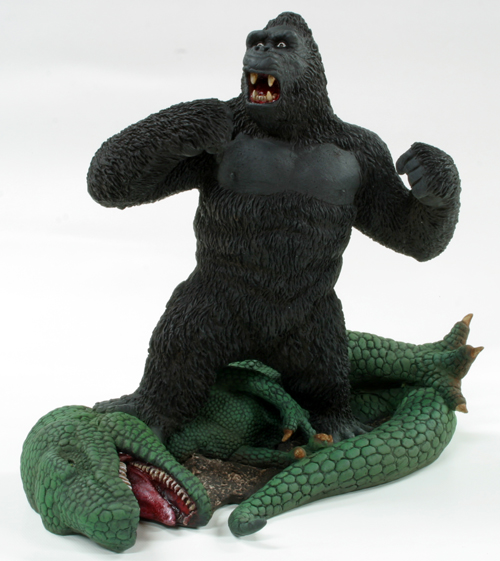
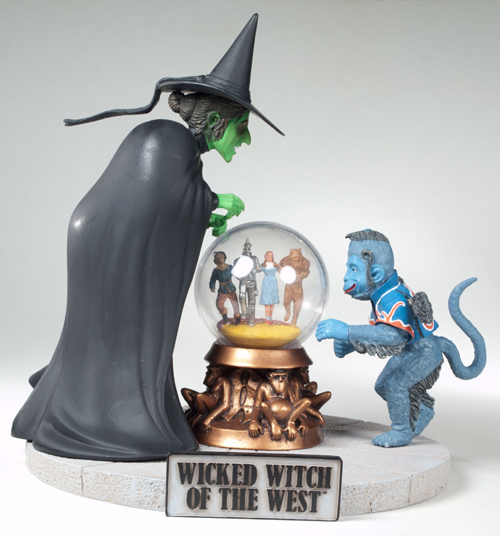
So what else did we show besides the Eagle? How about the fact that we have “un-cancelled” the King Kong kit we showed a couple years ago? Circumstances changed and we were able to bring the kit out after all. Along with that, we also showed our Wicked Witch of the West kit that will be released in resin, but will have a few plastic parts. Both models got great reactions from the figure-modeling crowd.
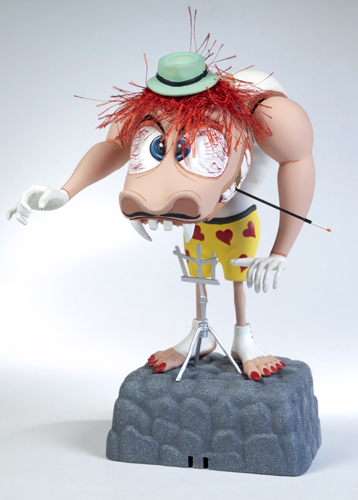
Another pair of kits we showed will be coming in 2016 from our Lindberg brand. Some may or may not remember one of them, The Mad Maestro. He was a whacky kit that had one release back in 1965. He was a motorized figure kit. The effect was that of a vibrating bobble head. Unfortunately, we couldn’t get his motorized action to work under the deadline of the show. We’ll see what needs to be done to fine tune that aspect of him.
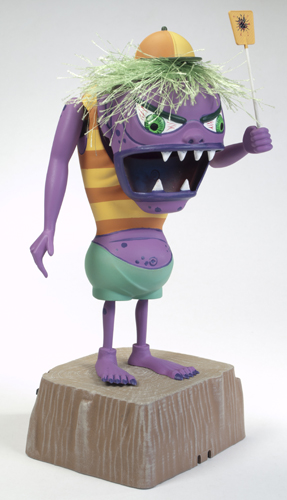
One of the most mysterious things we’ve uncovered in any of our tooling vaults is another motorized figure that uses the same kind of works as the Mad Maestro. The thing is, we can find no trace of the kit having ever been released. We don’t see it in old catalogs. We don’t know what it was called, so it is kind of difficult to research. We are actually asking anyone with any kind of information on him to let us know. In the meantime, we’re trying to figure out what to call him.
We have plenty more in the works than what we showed, but I’ve adopted a “don’t talk about anything before we have a mockup or test shot to show for it” policy. Hopefully, this will avoid the pain and anguish that we all feel when a kit doesn’t make it to production as previously announced. I will say that one kit we hope to get done by the end of the year is a Star Trek kit that we get quite a few requests for.
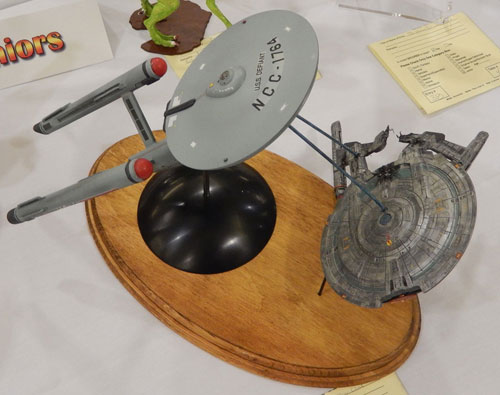
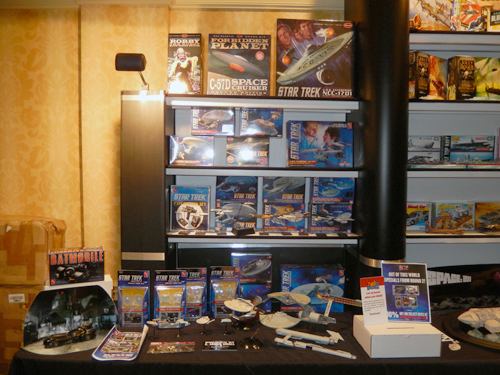
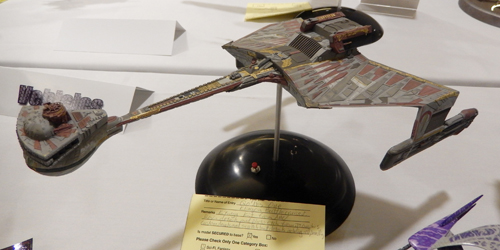
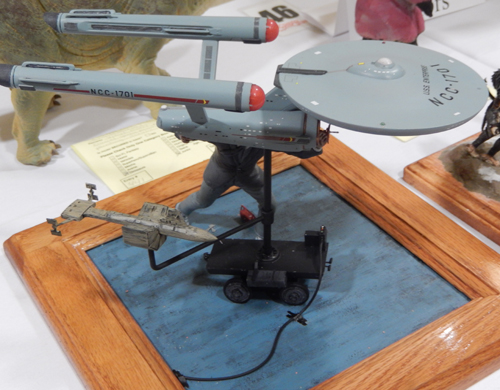
As in the past couple years, we sponsored an award in the model contest for the best use of a Round 2 model. We give two awards, one for and adult and one for a junior/teen. Take a look at our facebook gallery to see all of the models we found that used one of our kits (that we could figure out anyway…). This year’s winner for the adult category went to David Windham for his “Qo’Nos Oue Klingon Battle Cruiser”. The Junior/teen winner went to Alex Tabor for his diorama entitled “These are the Voyages” which featured a look at the behind the scenes filming of the 11’ studio model for Star Trek: The Original Series.
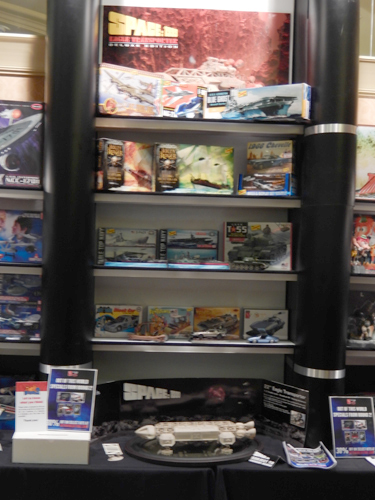
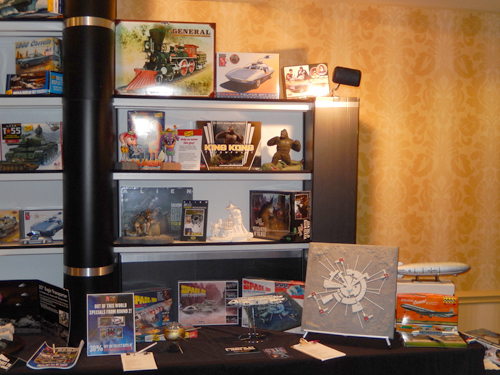
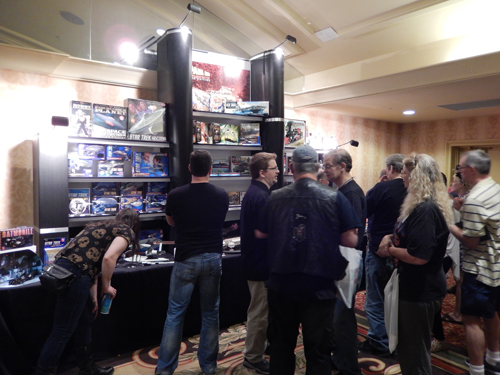
If you want more info on anything shown in the booth pics, just leave a comment and I’ll give more details.
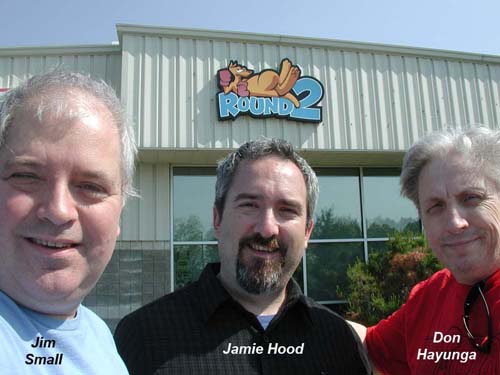
Round 2 Models: More from Wonderfest 2015
As mentioned last post, this show will always be pretty memorable to me. I had the pleasure of hosting Jim Small and his pal, Donald Hayunga, who stopped in to visit Round 2 then accompanied us for the rest of the trip. Once they wiped their chins after seeing our repository of archived model kits, I put them to work on a few prep items for the show including touching up the Eagle mockup which had been slightly damaged on its way here from China. We then headed out a day early to take a trip to the National Museum of the U.S. Air Force in Dayton. I was a bit let down with this year’s trip there as we purposefully went on Friday to see the restoration wing and Presidential aircraft which is only available to be seen on that day, but security levels prevented visitors form going on the base where the hangars are. It looks like the fourth wing of the museum should be finished next year and all of those aircraft will be moved into the new wing.
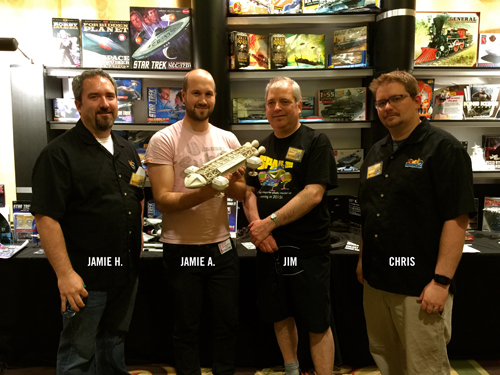
With the extra help, set up went quickly and afterwards, we had dinner with a couple Space:1999 Facebook fan page managers Todd Morton and Gordon Moriguchi. Somehow, they had sneaking suspicions that we might be announcing the Eagle at the show. It was a pleasure to meet the guys and hang out at the show. We had visitors to the booth like Star Trek gurus Gary Kerr and Rick Sternbach, but the Eagle fans were especially excited when Gerry Anderson’s son, Jamie and BSG production designer Eric Chu stopped by to pose for pictures with the Eagle mockup.
I’ll touch on some of the other stuff we had on display in a future post, but I didn’t want to take too long before addressing one question that came up a couple times. A few kind folks wanted to know what’s happening with the Galileo Shuttle model kit. The honest truth is that we are looking to put it out in 2016 as part of the 50th anniversary celebration of Star Trek: The Original Series. Is waiting for the anniversary the only reason for the delay? No. As with all delays, there are many factors involved that would include “business” in that that kit is not our only concern company wide. Other unrelated circumstances and opportunities pop up and sometimes we have to take advantage of them. In other ways I can honestly say “life & death” have gotten in the way a little bit on this project on many levels. I don’t feel it is appropriate to get into any of the details. Can I promise that the Galileo will come out in 2016? I am not in the position to promise anything. I can’t predict the future. I can only proceed and work and fight until I’m told not to. Why do the Eagle now and not do the Galileo? When we examined all of the costs and possibilities, we felt that the Eagle was the better kit to do right now. As I’ve said before, I really appreciate everyone that has been reasonable about this. To those that have gotten a bit… testy… about it, well… Thanks for your interest too.
Round 2 Models: Wonderfest 2015 Space:1999 Eagle Announcement
This year’s Wonderfest will be one to remember for me I’m sure. It may rival the shows where we announced or showed our 1:350 scale TOS U.S.S. Enterprise. The trip was fun all around. Instead of doing one long post about the show, I’m going to split up some topics through a few posts and I’ll put them up over the next few weeks. (no… really… I mean it this time. I’ve already written them. I just need to “publish” them…) I’ll cover the “big news” in this one.
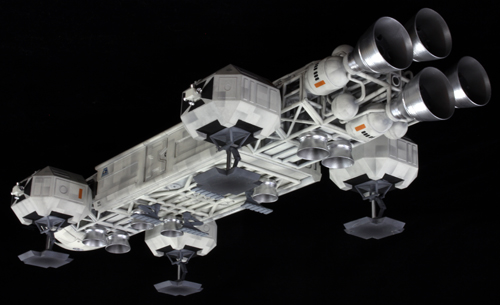
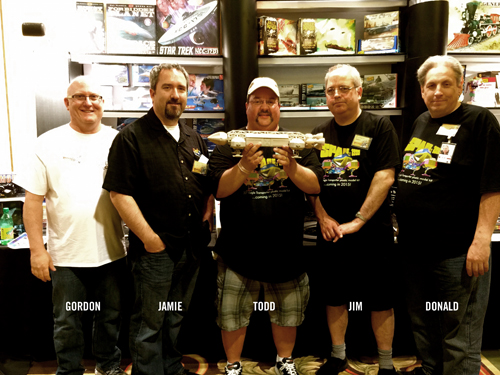
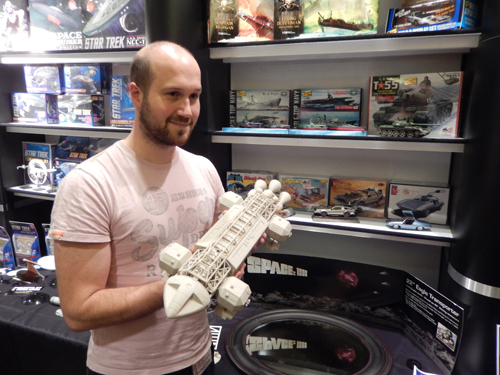
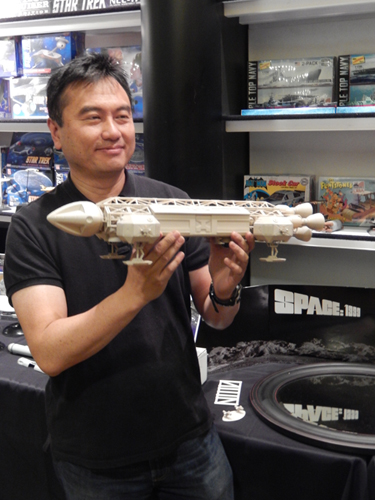
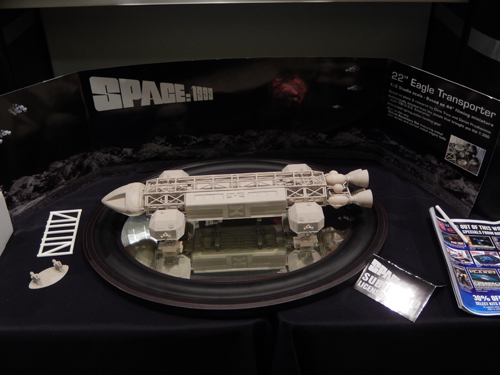
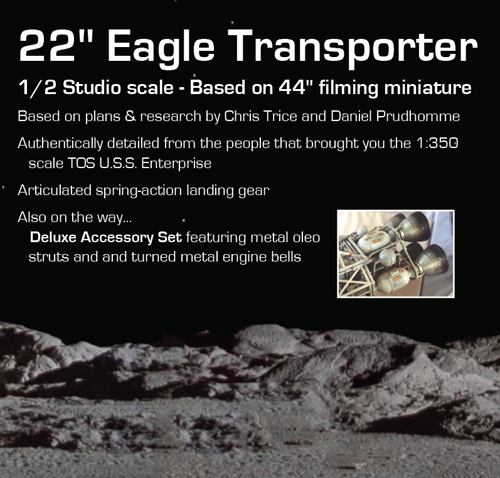
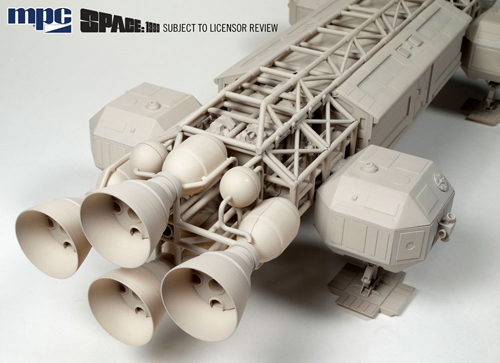
I think most attendees were (happily) surprised to see the main attraction at our booth this year was a mockup of our upcoming Space:1999 Eagle Transporter. It’s a bit shy of 22” long and is based on the 44” filming miniature. Our team of consultants on the kit is comprised of Jim Small, Daniel Prud’homme who supplied the CAD model and Chris Trice. The model features spring-loaded landing gear and comes injected in white and gray with clear windows. The only interior details will be the pilot figures with a back wall in the nosecone. The retail price is targeted at about $100, but that will vary by retailer. I understand some have already started taking preorders. I’ll post more pics of the mockup later on.
One other thing to mention… Some people get confused when they see “subject to licensor review” like they saw on the little sign next to the mockup. In some cases, we put that statement on there voluntarily and sometimes it is required by the licensor. The true meaning of that can vary, but it essentially means what it says. The licensor has the right to review the product and can ask for changes from what you see. It has nothing to do with “permission” to make a product. The licensor is aware that it is being developed, and the rights to manufacture it have already been resolved through the licensing agreement. In an ideal world, the licensor would have had a chance to review it before we put it on display, but in this particular case the mockup arrived on my desk about a week before the show. Since I was busy prepping for that I never had time to properly photograph it to send to the licensor for their approval of it.
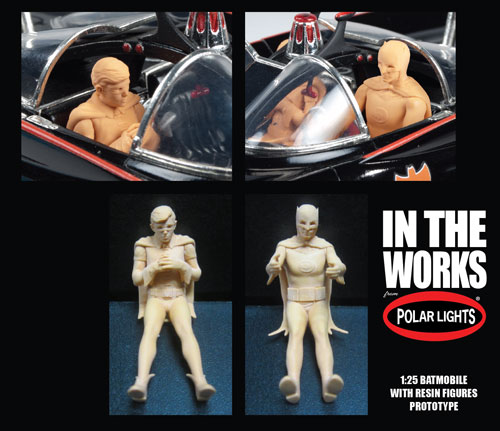
Round 2 models: 1989 Batmobile
Hi guys. I know it has been a while since I have posted. My only excuse is my usual one of just not being able to find the time. Still, I feel guilty for not finding at least something quick to show you. So, I’m going to try to at least do a quick post every couple of weeks. It will be a sign of life at least. Wonderfest is coming up and I didn’t want to miss making the point that we’ll be there once again to meet face to face to talk about any of the sci-fi products we offer.
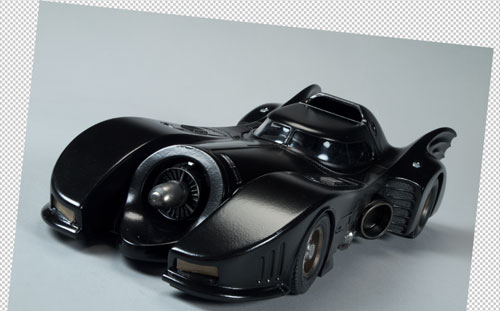
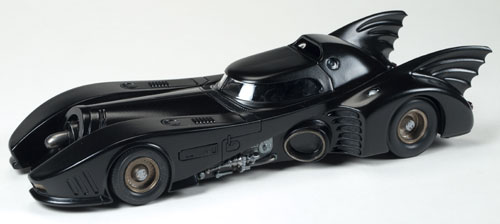
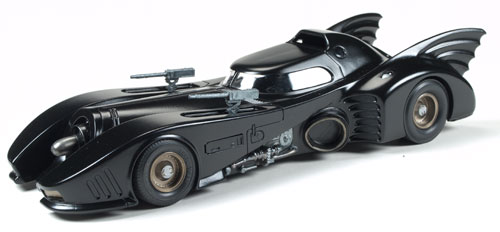
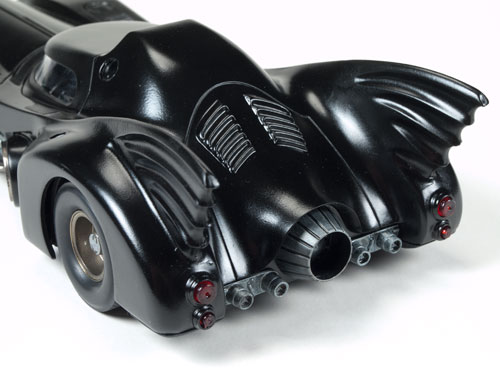
I recently got in a time pinch (can you believe it?). Our usual go-to car modeler, Mike Wherry, got buried in a small rush of buildup work and I was in need of a buildup of the AMT1989 Batmobile which will be coming out later this summer. I gave the kit a quick look and did a little poking around on the net to see what others had done with it. Eventually, I got to the point where I thought to myself, “Ya know. it isn’t a really complex kit. The car is all shades of black with some steel accents. Maybe I could build it myself and I could have it done in a couple weeks.” So I did.
When I was a kid, I usually built cars and I left the hobby behind after getting frustrated with assembling engines that I never truly understood and with getting runs in the body paint. My younger brother on the other hand loved to chop tops and do mods to his cars. I couldn’t compete, so I built a couple jets and a couple of my dream cars before moving on to other things. The first Burton Batman film came out in the summer after my senior year in high school, and as a Batman fan I was a completist. So I bought and built an ’89 Batman kit when they first came out. So, as I was thinking about this build, I had vague memories of that one in mind. I remembered having to fill the seams in the tail fins and that there was a pull out turbine engine (only to relearn later that the pull-out feature was added to the Batman Returns edition which I would later buy). As you may know, I rarely build models to completion, but I fully understand the concepts and techniques used to build and finish them. The materials available these days and my ability to airbrush would give me a huge advantage over my younger attempt.
How did it go, you ask? Well enough for what I needed it for. I ran into the same problem I had as a youngster in that I got a little impatient with the spray paint (in this case a Testors lacquer). The first coat went down the best, but it didn’t cover 100% and my seams were still showing through. The second coat had runs and orange peel, so I sanded a bit and hit it again and a bit of orange peel remained, and some details started filling in, but it covered well enough and figured I could help the surface irregularity in Photoshop when I used it on the packaging. I’m sure that more practice with a rattle can would have gone a long way. If I had all the time in the world, and really wanted to do an outstanding job, I would have decanted the paint and ran it through my airbrush to get much better control.
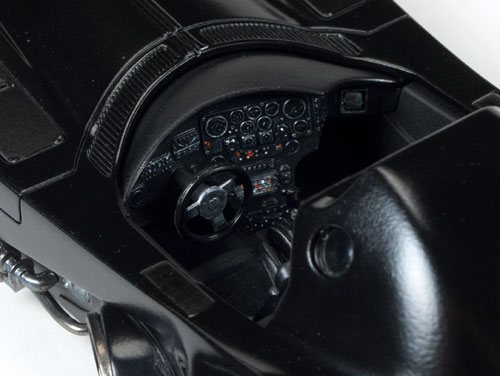
The interior turned out well enough though. I left the seat unpainted black plastic as I felt the sheen and color looked like vinyl or black leather. I hit some bits with flat black for contrast and try brushed the dials lightly enough to have them stand out, but not look heavy handed. I decided to hide most of the chrome to make it look more like the real thing. It was good enough to do the job, but I have nothing on the skills of someone like Mike Wherry.
It wasn’t until I was finished with my build that I realized that the last model I ever built and painted to completion was the same kit. Two builds nearly 25 years apart, and having done none (in styrene at least) in between. Anyway, I figured I would share the fruits of my labor. I’ll see if I can dig out my old build. I’m sure I’ve still got it in a box somewhere.
The first pic shows an unaltered pic of the buildup. The second shows how I plan to incorporate it into the box lid (pending licensor approval). The rest of the pics show a few other angles of the buildup.

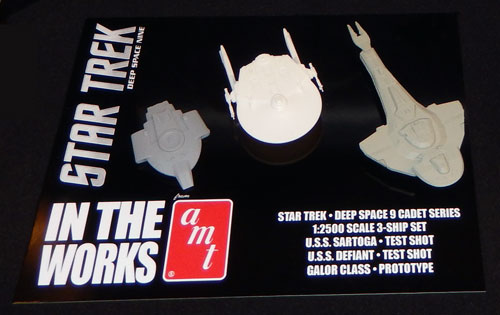
Star Trek Models: First look at Cardassian Galor-class Cadet kit
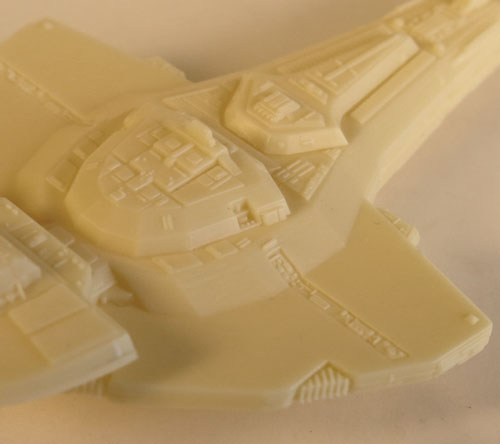
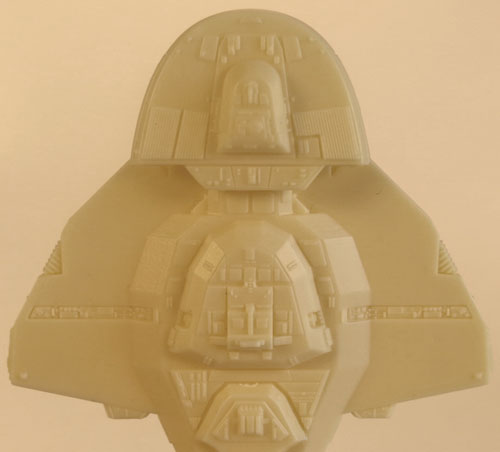
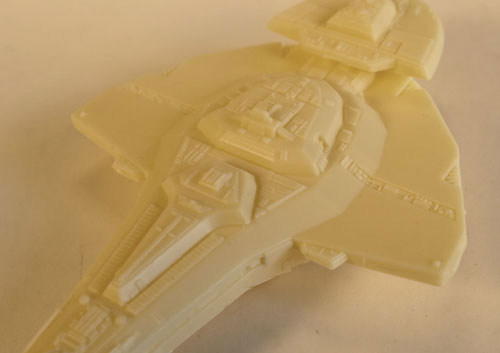
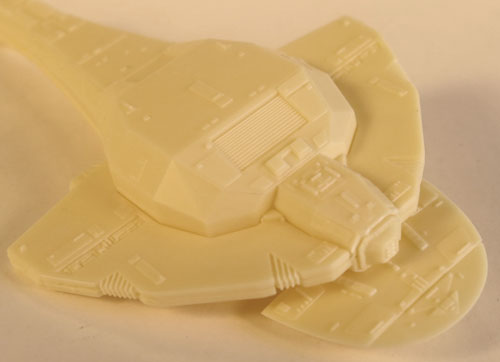
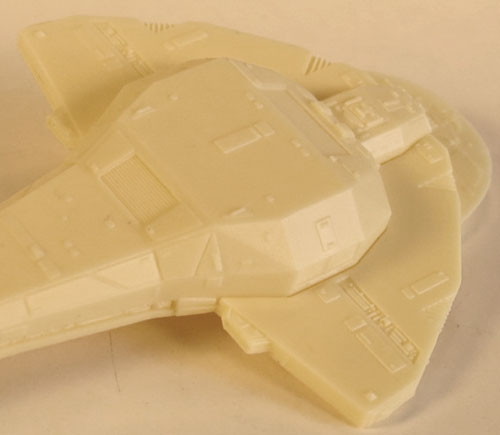
Back in May we announced the coming of a STAR TREK: Deep Space Nine themed Cadet Series 3-ship set featuring the U.S.S. Defiant, U.S.S. Saratoga and Galor-class ships. We showed the mockup at Wonderfest, but we wanted to take a minute to give a first look at the Cardassian Galor-class model test shot.
Somehow we really tend to luck out with first test shots for cadet kits in that they usually tend to snap together pretty well on the first go and the Galor was no different. The only faults I found was that one of the connection pins had been short shot and the front edge of the wings tended to open a gap. I have to say the detail is pretty great for a 5 ½” long plastic kit.
Enjoy the pics!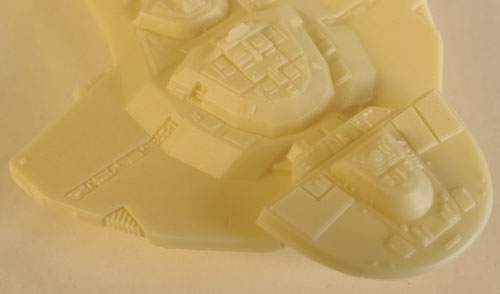

Round 2 Models: Wonderfest 2014 roundup
Another Wonderfest has come and gone once again. I have to admit that though this year’s show didn’t sneak up on me it seems like the time needed for planning for it gets pinched more and more every year. In such great haste, mistakes are bound to happen. Luckily they were small and no one got hurt. (What is it with me and Star Trek ship name spelling…?)
More than anything else show attendees want to see what we have coming next. In light of recent events (which I’ll get into later) I’ve decided it is best to wait on getting too far ahead of ourselves with product announcements. So, we focused mostly on things that are coming very soon, but we still slipped in a few things that we feel confident enough to talk about.
On the Star Trek front, we had…
The U.S.S. Reliant 1:1000 scale snap kit which will be out very soon. I received production samples the day I returned from the show. This means the kit is about 4-6 weeks from hitting store shelves.
The next new kit on deck is a 3-ship Cadet Series set that focuses on Deep Space 9. It features the U.S.S. Saratoga, U.S.S. Defiant and Galor-class ships. As usual the set will include full decals for all three ships.
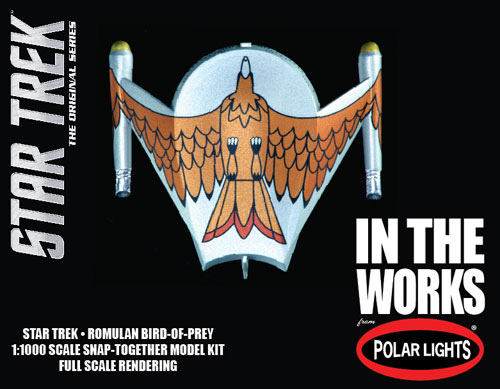
New to our 1:1000 scale ship lineup of will be the TOS Romulan Bird-of-Prey. The ship is a personal favorite of mine. We are just getting started on it, but we hope to have it out in about a year.
Also coming in 2015 will be a reissue of the U.S.S. Enterprise Cutaway. We are just now starting to examine the kit to see what changes we might make to it. I wouldn’t expect anything terribly extensive, but we’ll see if there is anything “logical” we should do to improve it from previous releases.
Lastly, though it may not look like much as far as our display goes, we’ve completed the overall plans for the Galileo shuttle kit. So we can now begin the mockup process.
Next, Space:1999…
We showcased our new reissue of the Moonbase Alpha kit. It features an all-new four-part vacuform base. I know dealing with the vacuform base in the past was kind of a hassle, so we’ve done what we can to make it as easy as possible to assemble and hide the seams. The new base was necessary to present the entire layout of the base including five all-new launch pads that feature optional docking extensions and new in-scale Eagle transporters. The travel tubes are included as separate pieces where the original release had them embedded as part of the base. New decal artwork rounds out the improvements. These are supplied for the launch pads as well as the computer terminals for the command center interior.
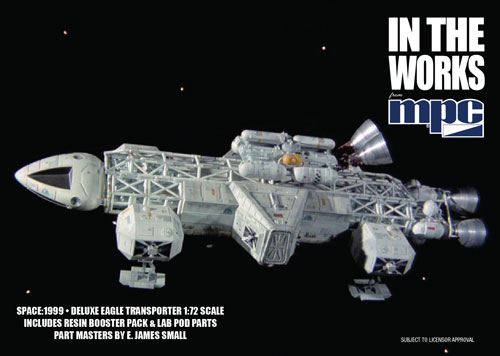
The next development for license is a Deluxe Eagle Transporter. This kit utilizes our existing Eagle kit, but now includes resin parts for the laboratory pod and booster pack.
For the Alien license…
We showed our RP of the resin XO Kane kit which was a little worse for the wear having been sent around the world and back. The #1 question we got at the show was “when will this be available?” We hope to announce a price and release date for the kit soon.
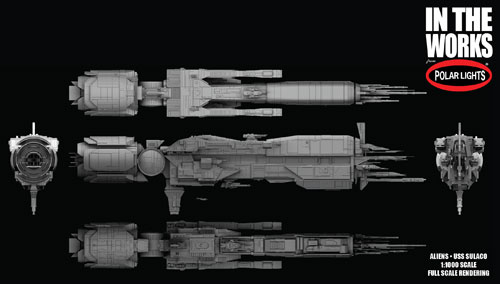
We also showed the CG work done by Angelo Bastianelli on the USS Sulaco. His work has since been approved by the licensor so we’ll be moving to the next step on the ship. I hope to get the kit to market in 9-12 months.
Best of the rest…
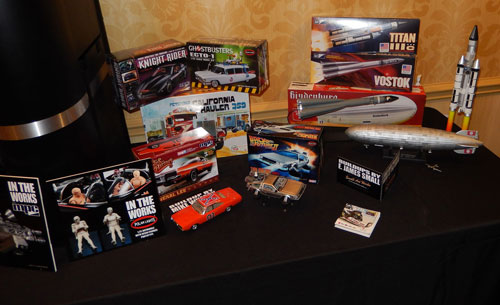
We presented our Back to the Future II Time Machine and all-new General Lee snap-together kits along with a reissue of the Hindenburg. All should be out later this summer. We gave a preview of new Lindberg reissue box art that shows our approach to using vintage art and design cues in a fresh way. Everything else on display is available now from your usual hobby retailer.
Along with the compliments on our product, we also fielded questions about a few projects that were conspicuously absent. After “When will Kane be available?”, the next most common question was “So, what happened to the Wicked Witch kit?” Please believe me when I say there isn’t purely one reason, but a pile of reasons that made us reconsider releasing the kit. The final decision was hotly debated here and was a painful one to make. Unfortunately the Witch wasn’t the only kit we have to talk about… Sadly, I had to inform those that asked that the King Kong kit which we’ve shown images will also be cancelled as will the Marvel Comics Thor kit and 1966 Batman & Robin 1:8 scale figures. None of these decisions was taken lightly and I can assure you every one was fought for to continue.
I’m loathed to end a blog post on such a down note, so back to other aspects of the show…
For the past three years Round 2 has presented awards for the “Best Use of a Round 2 Model Kit” in the Wonderfest model contest. This year’s competition had a record number of entries with well over 600. As usual, the level of quality in the buildups was amazing. We present our award for three categories Adult, Teen and Junior. This year’s adult winner was David Lewis who used one of our 1:350 scale TOS Enterprises to build his vision of a TOS-era Miranda-class ship. It was a beautifully built model that featured lights as well as interior details like an arboretum and dual shuttle bays. The junior division winner was Alex Tabor whose diorama presented his vision of the TOS U.S.S. Defiant making waste of a mirror universe Enterprise era ship. Unfortunately, we ran into the same problem we had in the past two years as no buildup was entered in the teen division that had used one of our kits. We’ll have to reconsider next year’s awards and probably do one award for junior/teen. Alex walked away with both junior and teen prizes which featured three 1:1000 scale Star Trek kits (child award) and a pile of kits including the Man In Space rocket set, 1:144 scale C-57D and an Enterprise-E (teen award). David walked away with a $100 coupon for autoworldstore.com. Congrats to the two of you. Also, I want to send a special shout out to Mark McGovern who we have build our own “amazing figure models” who took away the big award for Most Amazing Figure sponsored by Amazing Figure Modeler magazine. His work on the Absorbing Man was truly “amazing.”
As always, it is great to see everyone at the show. We always walk away with the clear message received that we are doing all right by everyone there. I personally have to say that it is my pleasure to be there. I always leave with a sense of renewed vigor for the tasks awaiting me when I return to the office.