Recommended Sites


Transforming the Classic MPC Eagle Kit – Part 2
Here is the second in a series of articles by Michael Scarola showing the steps he has taken to accurize a 12″ MPC Eagle.
My Eagle 1 build continues…
The 4 shelves that go inside the cages were each made from 2 pieces of .5 mm styrene sheet glued together.
The details were matched and scaled down from the Eagle 1 blueprints using 3.2 mm, 2.5 mm, 1.6 mm & .4 mm styrene rods as well as rounded sprue ends and the round domes from the ends of the nacelles of a Polar Lights 1/1000 TOS Enterprise kit.
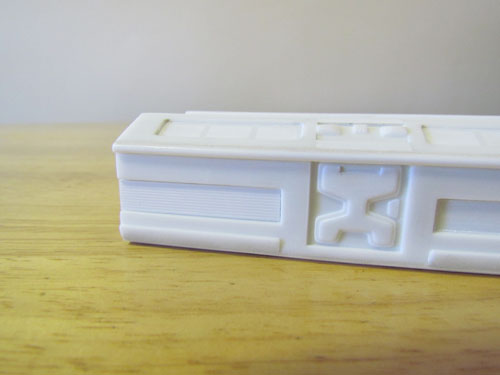
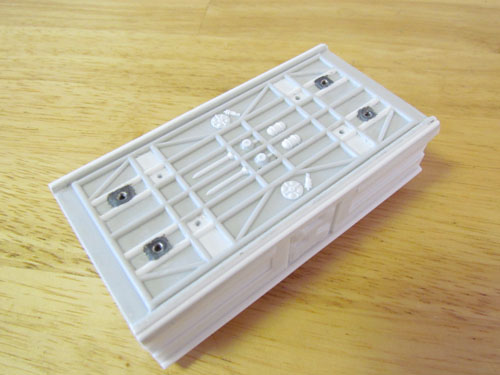
The MPC kit’s passenger pod has some nice detailing so I decided to use as much of it as possible. I started by scratch building new front and rear bulkheads. Three layers of sheet styrene were used with the various shapes and door details cut out…
…and Evergreen V-Groove sheet (.025” spacing, .020” thick) was glued into the side channels.
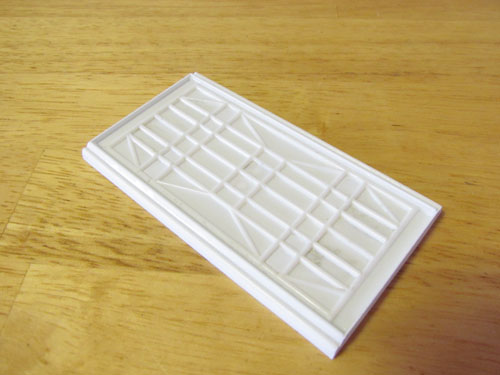
The top has neodymium magnets underneath for attachment to the spine. I made the eves with layered .5 mm sheet styrene and 2 mm round rod at the edge to give them the rounded shape.
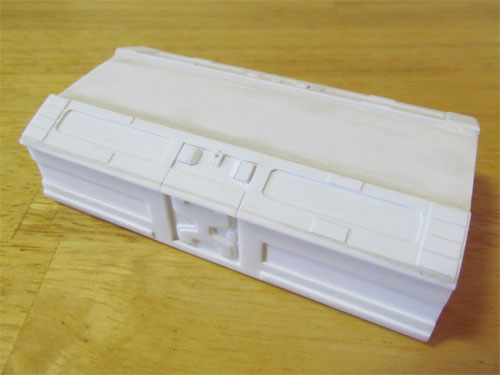
The ‘Gemini’ kit details in the center of the eves were replicated with Evergreen Metal Siding (1 mm thick, .75 mm spacing) as well as the center details taken from the MPC kit’s passenger pod.
I removed the built in thrusters from the kit’s passenger pod bottom…
…to make way for a set of aluminum thrusters. The footpads were removed and replaced with ones I scratch built…
…and all missing pipes were replaced with 2 mm half round rods. Various styrene rods (3.2 mm, 1.6 mm, 1 mm, & .5 mm) and styrene sheet were used to scratch build the details.
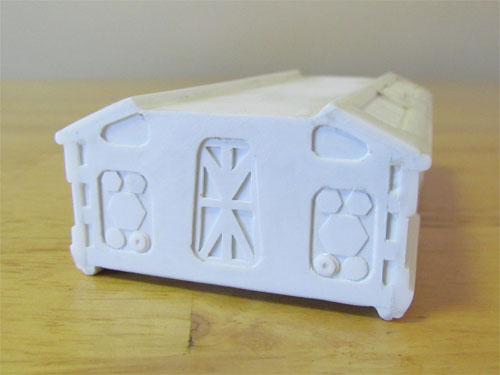
A spare MPC passenger pod bottom piece…
…was used to scratch build a cargo pod. 2 mm and 1 mm styrene rods were used for the front and rear supports…
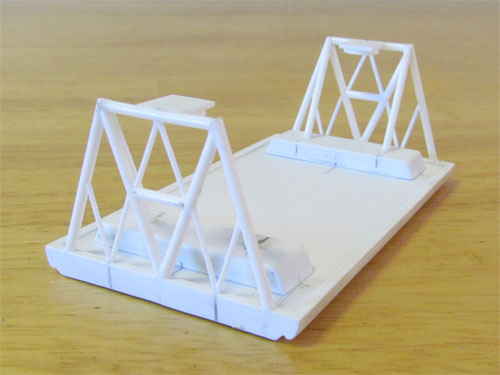
…and magnets were installed for connection to the spine. Evergreen Metal Siding (1 mm thick, .75 mm spacing) was used on the floor and 1 mm styrene sheet used for the rectangular ‘blocks’. The landing gear…
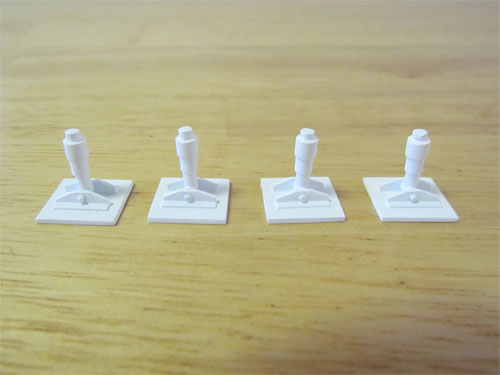
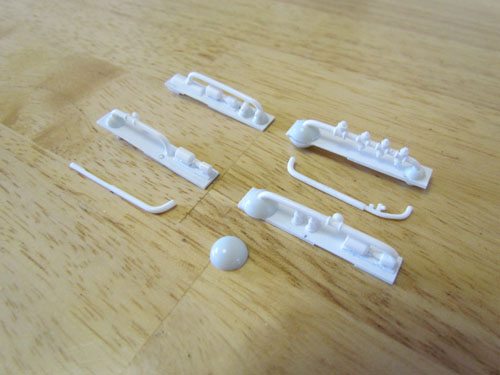
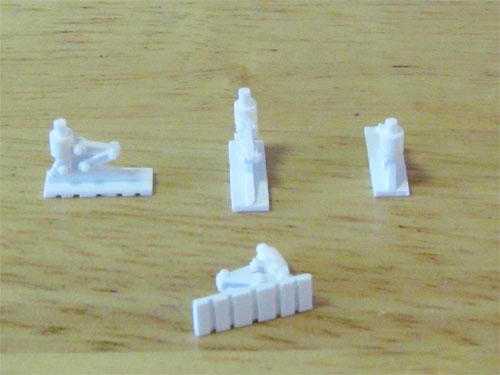
…is made up of various styrene tubes and rods (4 mm/3.2 mm tube and 2.5 mm rods) and 1 mm and .5 mm styrene sheet. Each foot is made to swivel with brass rod pins. A set of aluminum thrusters will be attached to the bottom when it’s all painted. I scratch built two Nuclear Waste Containers…
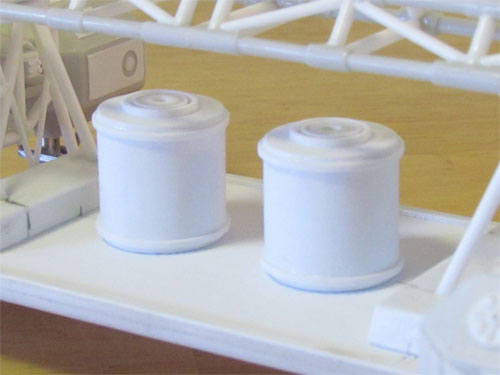
…using .5 mm and .3 mm sheet styrene glued around .5 mm top and bottom plates pieces. 11, 7.9 & 4 mm tubes were used for the top rings and 1 mm styrene strips for the raised bands.
I used the kit’s shoulder pods but removed the raised details and shortened them a couple of millimeters. The details on the kit’s parts are more representative of the Eagle 2 studio model so I replaced them with details seen on Eagle 1.
I also attached prongs for connection to the cages so they simply plug in with no need for glue, just like the original Eagle 1 studio model.
The landing gear…
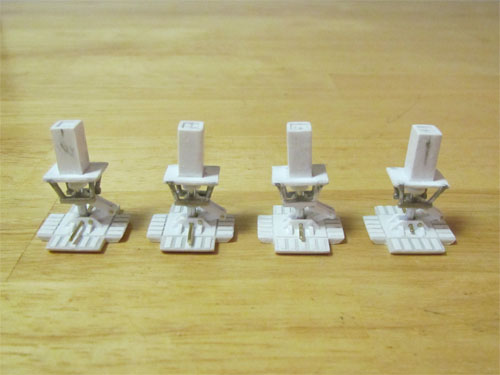
…was scratch built and made to retract with the use of aluminum tubes and the footpads are made to swivel. The footpads are the one’s from the MPC kit with the details removed and replaced with Eagle 1’s details.
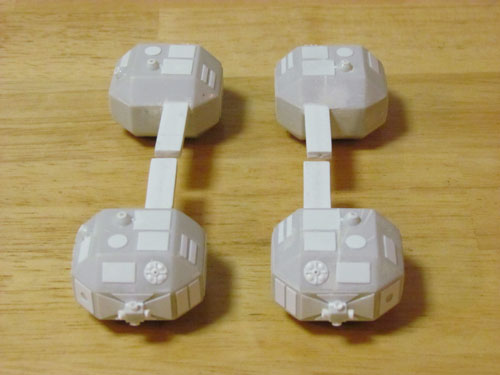
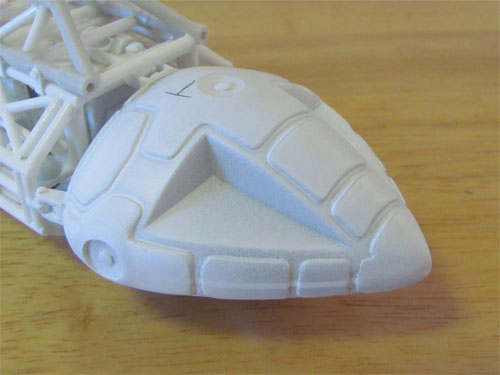
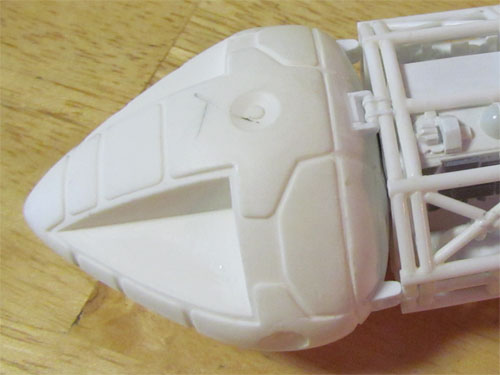
The MPC kit’s command module (CM) has a back piece made up of a couple of pieces of 1.5 mm styrene sheet with .3 mm styrene raised panels. 1 mm styrene was glued in between the top and bottom halves and 4 new brackets were added. The 4 sensor dishes were filled with putty and have 2 mm styrene rod glued into the centers to form the raised detail. The CM…
…is also removable with the use of magnets. In addition to the MPC kit’s CM I had a resin Small Art Works CM…
…in the stash that I decided to use as an alternate. I shortened the back by 5 mm’s and added the 4 brackets. A magnet was installed inside as I did with the MPC kit’s CM.
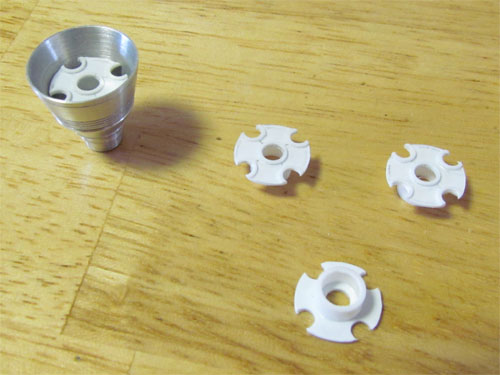
The last parts I had to make were the engine baffles, which were scratch built with .5 mm styrene and tubing for the raised details.
The Eagle has a unique hull color that involved doing some research which I’ll talk more about in the third and final installment as well as weathering and the decals…
Michael Scarola
Why didn’t you just use Paragrafix’ photoetch set and save yourself some labor?
Dale, I didn’t use the Paragrafix photoetch set for a couple of reasons. The Paragrafix photoetch is made to specifically fit the 12″ MPC Eagle kit as it is out of box. In particular the photoetch passenger pod bulk heads match the angles of the eves of the kit but aren’t correct to the studio model. I re-built the passenger pod to have match the studio model. I also already had some small metal parts from a WARP Eagle that I used on the landing gear. After that there wasn’t too much left on the Paragrafix photoetch set that I needed.
Thanks,
Mike.