Recommended Sites


Transforming the Classic MPC Eagle Kit – Part 1
As promised, here is the first in a series of articles by Michael Scarola showing the steps he has taken to accurize a 12″ MPC Eagle.
Transforming the Classic MPC Eagle Kit – Part 1
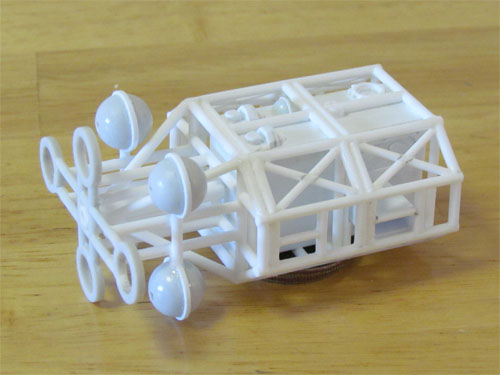
After all these years I finally got around to building a Space 1999 Eagle. The Eagle is a unique ship that actually looks like it could work as intended. I love its organic yet utilitarian design. For this build I started with an MPC Eagle and decided to make some modifications of the existing kit parts and also do some scratch building along the way. The MPC Eagle 1 kit is a classic that has been around since the TV show began and represents an Eagle nicely but does have some simplified sections and details that I felt I could improve upon. I wanted to use as much of the original kit parts as possible while attempting to make it accurate to the original Eagle 44” studio model.
The build…
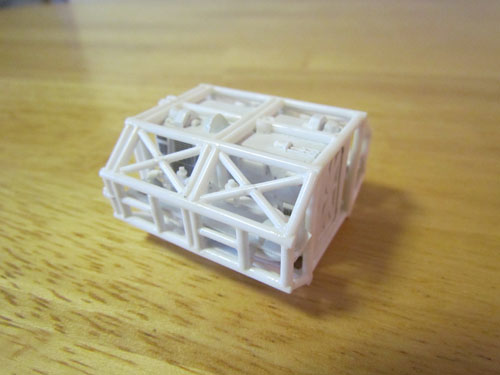
I used a WARP kit I have and access to a friend’s set of Daniel Prud’Homme Eagle blueprints as reference. I decided to start by scratch building the front and rear cage sections. I made a jig…
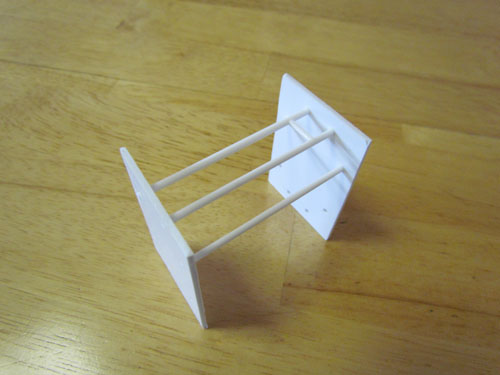
…out of a couple of pieces of 1.5 mm styrene sheet that helped keep everything straight and aligned. Using a round file I ‘fish mouthed’ the ends of the styrene rods so it would all fit together the same as the studio model. 2 mm styrene rods were used for the larger main rods and 1.6 mm rods for the smaller ones. This image shows one of the cage sections after removal from the jig.
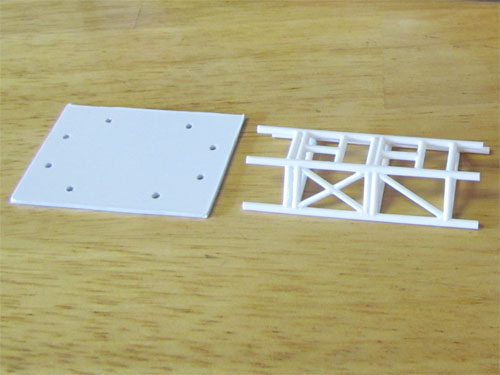
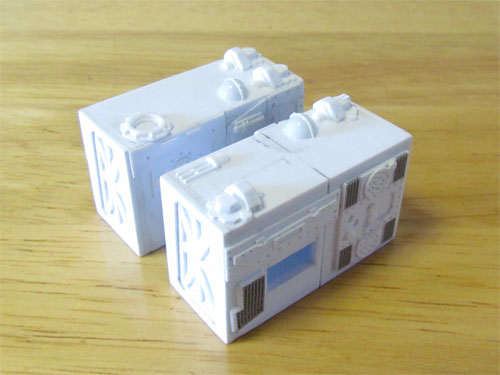
The MPC kit’s spine was shortened and narrowed and a flat file was used to re-shape the tubing since they are flat on the backsides. I replaced the inner supports with 2 mm and 1.6 mm styrene rods.
The corridors inside the spine were scratch built using 1.5 mm sheet styrene with channels made for attaching the shoulder pods. The doors at the ends of each corridor are pieces of .5 mm styrene layered to create the recesses.
The original 44” studio model’s corridor doors were drawn on but these doors match the ones on the passenger pod and look more realistic so I went with this approach.
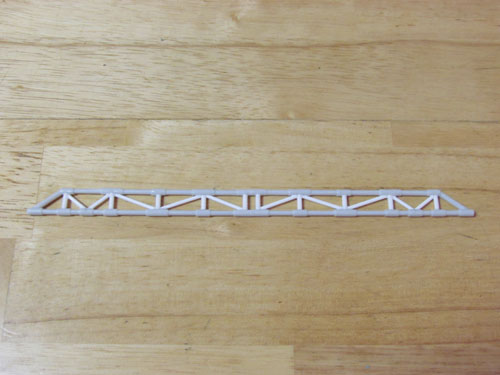
The details on the sides and tops of the corridors…
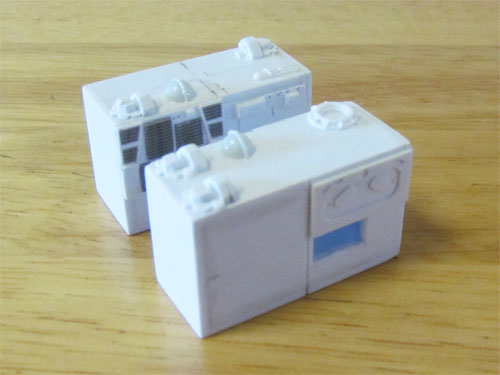
…were made from scaled down measurements taken from Daniel Prud’Homme’s Eagle 1 blueprints. I used .4 mm sheet styrene layered and other various sizes to create the side details that were actually kit tank parts on the original studio model. All the grill details are made from open grate platforms from Tichy Train Group. The details on top were a bit more challenging. On the studio model most of these consisted of model parts from Saturn V and Gemini kits. I layered .4 mm styrene for the ‘Saturn V’ end details and shaped the ends of sprues taken from a Polar Lights 1/1000 TOS Enterprise kit for the round ‘Gemini’ details. The Polar Lights 1/1000 TOS Enterprise kit has some nice large diameter sprues that I’ve used to scratch build parts on a few models I’ve worked on. That kit keeps on giving.
Now that the cages and corridors were completed I put them together using 2 mm diameter styrene rods that now completed the sections.
It was now time to move on to the rear of the Eagle’s frame. 2 mm styrene rods were used to make the framework that the cross section frame is attached to.
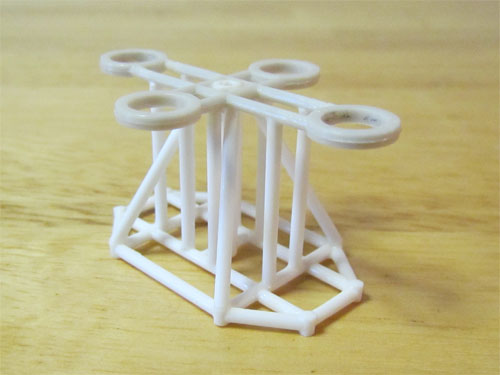
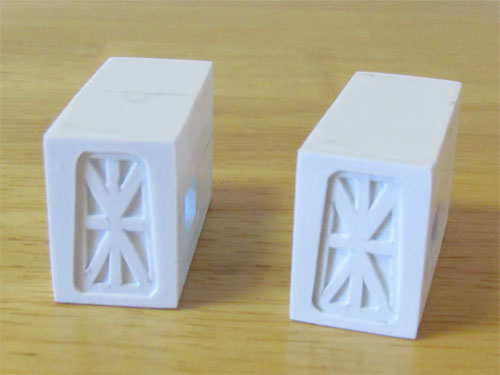
I used all 4 of the engine bottles and ‘balls’…
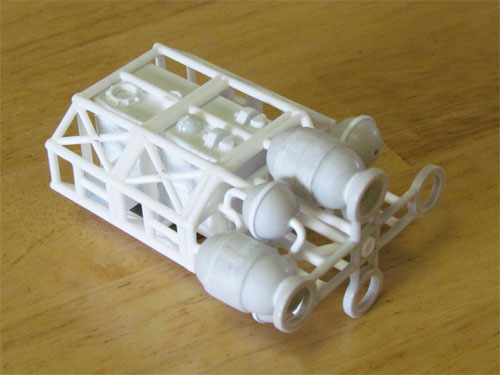
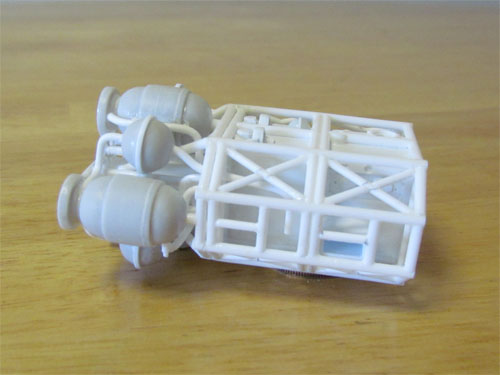
…as well as the rear cross frame from the MPC kit. I modified these parts a bit to more closely match the studio model. The bottles were shortened and new raised detail glued in between the ball halves. The piping, matched to the blueprints, was added to tie it all together.
In the next installment I’ll cover the building of the shoulder pods, landing gear, command module, passenger pod and the cargo pod…
Michael Scarola
Please clarify what’s meant by “fish mouthed.”
Roger – I used a round file to file the ends of the inner rods so they slide right over the longer horizontal rods. They lock into place this way. This is what I meant by “fish mouthed”. I hope this makes sense.
Mike.
The idea for the jig is great. I modified an AMT issues of the Eagle years ago and just hollowed out the existing cages. This looks like a much easier and faster solution if I ever decide to tackle that build again.