Recommended Sites


Space: 1999 Models: New 1/72 scale Eagle kit Pt. 6
If you think you are experiencing deja vu, it isn’t just you… This post was published in error earlier. Here it is again following the correct order. Continuing our guest series reviewing the new 1/72 Eagle test shots. Enjoy!
Getting Ready for Paint!
By E. James Small
OK folks, here we are on the home stretch before we break out the spray cans and air brushes!
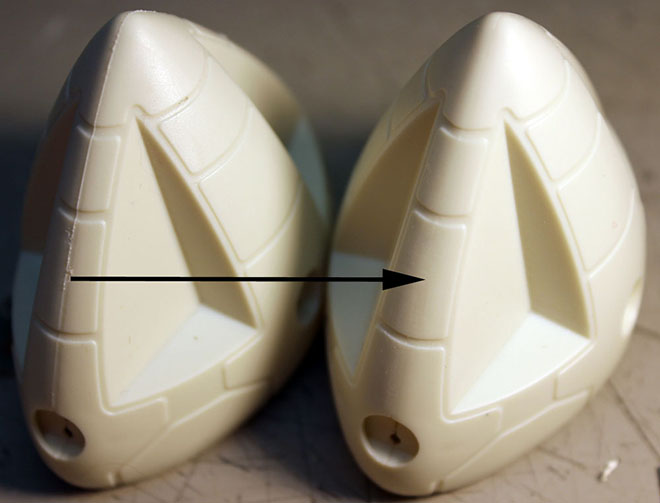
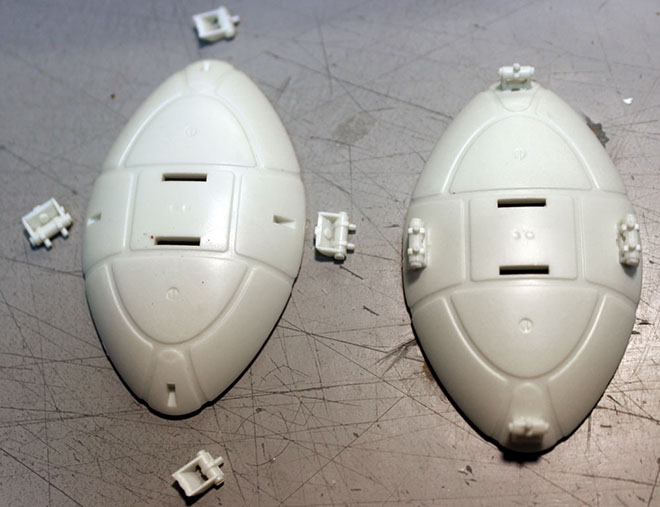
If there is one part of this model that is the most confusing, it’s the shoulder pods. Yes, they are simple to build, but really easy to screw up parts orientation, so if there’s one place where you REALLY have to pay close attention to the instruction diagrams, it’s here. These are the assemblies that you triple check before applying glue. I’ve even seen some of those lower cost “pro” builders get that stuff wrong on the larger 22” model! Meh, you get what you pay for I guess.
First you need to understand how the detailing on the pods work on the Eagle. Note that the pods are mirrored front to back and side to side. In other words, the detailing on the pods left to right are mirrored from each other and the details between the front and rear are also mirrored… except for ONE detail…
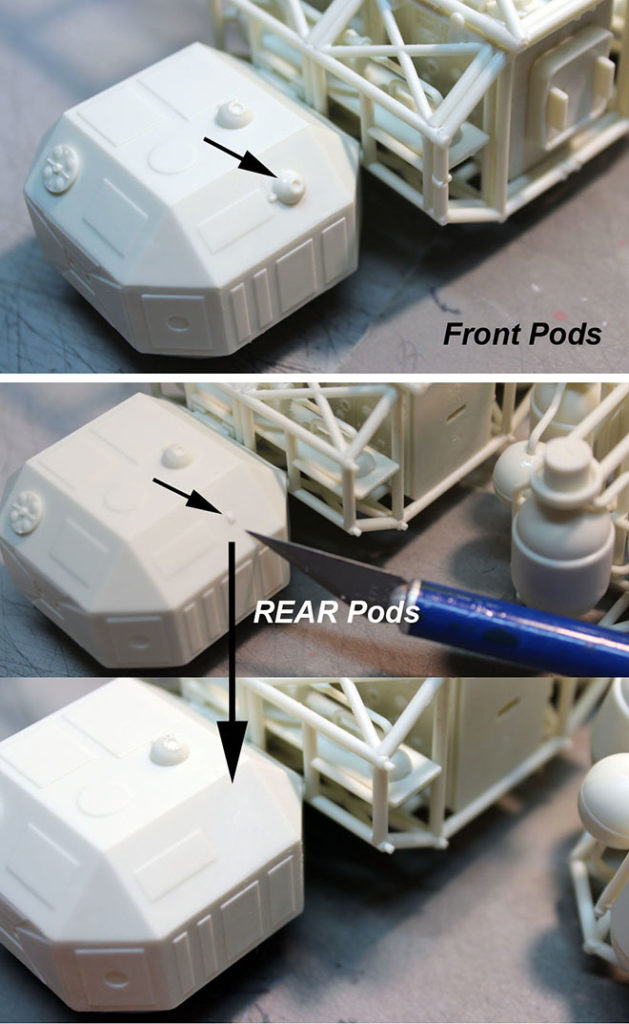
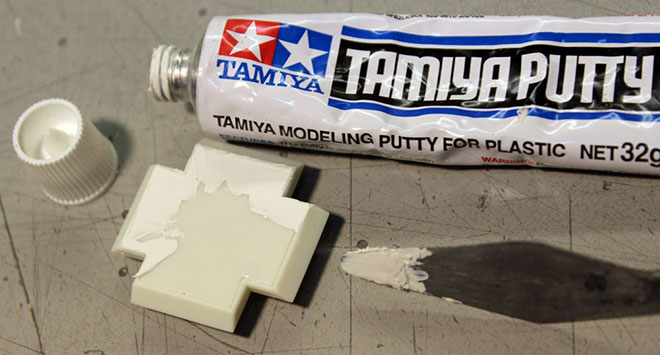
Note that the little dome shown by the arrow on the front pods are left off on the rear pods, so you’ll need to carve or sand off the little locator tab on the rear surfaces as shown. Of course, if you WANT to, you can also put domes on the rear pods too. It’s just that they were left off on the original for some reason. The footpads are two pieces and simple enough but there is a seam/joint running around the bottom that needs to be filled in and then, when putty is fully dry, sanded down.
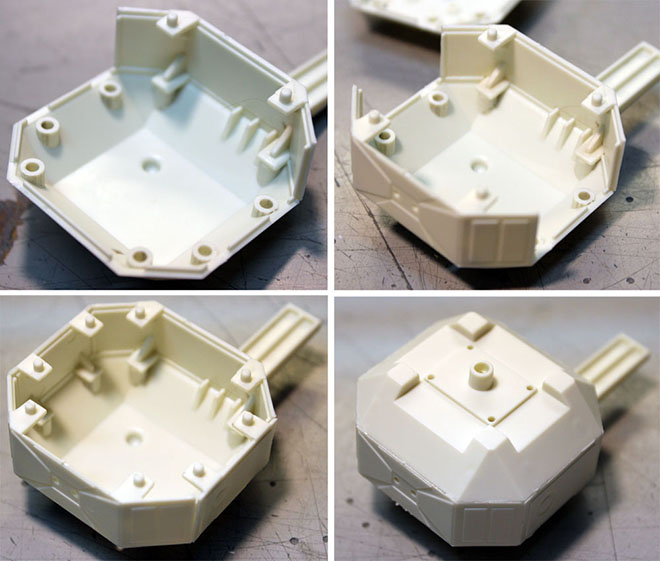
The nosecone assembly is best handled like this:Put the two main halves together, dry. Then using water thin liquid cement, touch a few drops along the joint, allowing the cement to “wick in” and get carried along the joint with capillary action. Then, after the solvent has worked at melting the plastic for a few seconds, firmly press the two halves together, making he plastic/solvent squish out the sides. DO NOT WIPE IT OFF. Allow it to dry like that overnight. Then, when dry, you can sand down the joint nice and smooth and no puttying is needed. Most joints on the kit can be handled this way. The footpad bottoms, as above, seem to be the only exception.
Now glue the nosecone clamps to the back of the nosecone section. Before the glue sets, offer the assembly to the front cage section to make sure the pins locate properly to the holes in the frame.
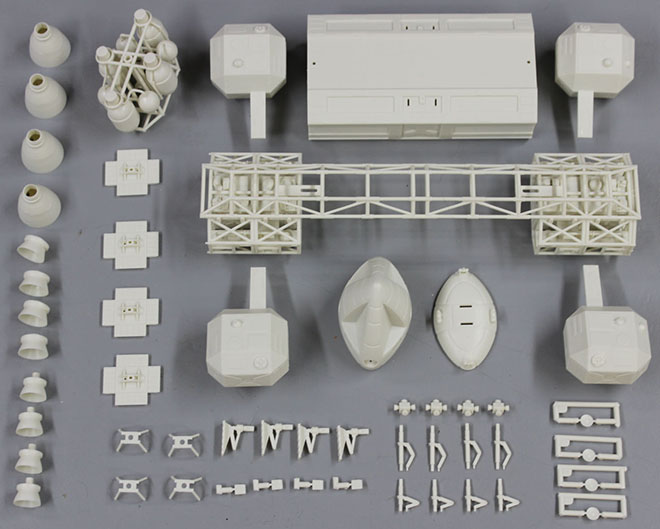
Now glue the frames to the spine (watch orientation!! Doors on cage boxes point towards each other!) and you should have all the subassemblies as shown in this final picture below. Some parts, such as the little sensor dishes for the nosecone and the black ribbed bits for the top of the Passenger Pod doorframe are left attached to the runners for easier handling when painting. Do what is easiest for you. I left out the assembly procedure for some of the simpler parts like the engine bells as that should be a no brainer. Clean up any unsightly seams etc. following standard modelbuilding procedures. At this stage you are ready to begin painting. That will be covered in a later post. Stick around!
Nice job on putting the 2 halves of the CM together.
It’s all coming together. I eagerly await photos of the finished model. As usual James, you’re doing a bang up job.
HI Jamie can you make star trek kits from the fan flim star trek axanar hope for the 1/1000 k’tinga will come soon
We have the license to do any ship from any of the official Star Trek TV shows and movies except for the three films produced by Bad Robot. We hope to do a 1/1000 Ktinga at some point, but it is too soon to say we will do it “soon”.
HI JAMIE so can you not do the ships from the fan flim axanar if you can it would be nice if they in 1/1000 or 1/537 scale did you no the series space above and beyond by fox from 1995 no models from the show ever got made
Hi, any news on progress with the kit? Really looking forward to the finished article with the pint job.