Recommended Sites


Archive for March 24th, 2016
Round 2 Models: Please welcome a special guest
Hi guys. A while… a long while now… ago I was approached by a new, but respected modeler by the name of Michael Scarola. He was working on modifying a couple of our sci-fi kits and was pulling out all of the stops to make his buildups as accurate as the kits were iconic. We chatted a bit and we decided to have him document his process on the builds and post the results on our blog. We have had these in the can for some time now, but I’ve just come across a sliver of time to schedule them to publish.
Mike did some magnificent work to transform our classic 18″ AMT Star Trek U.S.S. Enterprise and our 12″ MPC Space:1999 Eagle. We’ll be starting with posts about his Enterprise model to coincide with our recent re-issue of the kit that commemorates the 50th anniversary of the television show. You should find the kit available now along with our re-issue of the Klingon Bird-of-Prey. Each series of articles will be three parts with some follow-ups showing beauty shots of his finished models. Off we go with part 1 of “My Enterprising Journey”. Enjoy!
My Enterprising Journey: Building the Classis AMT 18” Enterprise – Part 1
Round 2 has been doing a wonderful job bringing back classic models that we love. The classic AMT 18” TOS Enterprise has been released several times over the past few decades but Round 2’s release breathed new life into it. To start, the original box art was a real treat and the best part is under the lid. The raised grid from the earlier releases was removed from the saucer’s top and a new, and very accurate, set of decals is provided.
Onto the build!
My original intent was to build this kit mostly out of box with the addition of a few resin parts. I started by downloaded a set of blueprints from Charles Casimiro which I sized to the AMT saucer’s diameter. I figured once the saucer matched the blueprints all the rest would start falling into place. The profile of the dorsal (neck) matched the blueprints and I found that the secondary hull and warp nacelles also sized up nicely. At this point I decided to attempt to go all out and try and make this build resemble the 11 foot long Enterprise studio model that was seen in original Star Trek throughout the whole series.
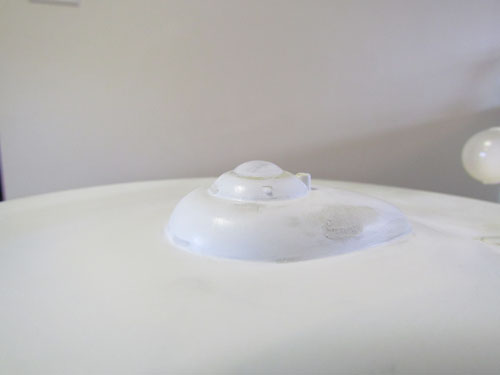
I started by removing the bridge and B/C deck structure from the top of the saucer. I replaced it with a part from Don’s Light & Magic (DLM), which I lengthened by 4 mm.
I re-shaped the Linear Accelerator using a razor saw and various files.
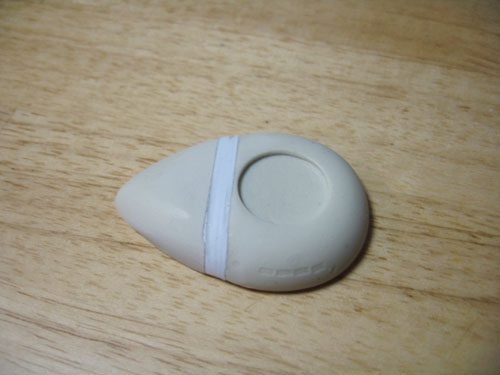
A new bridge dome was made using a spare nacelle dome from a Polar Lights 1/1000 TOS Enterprise kit.
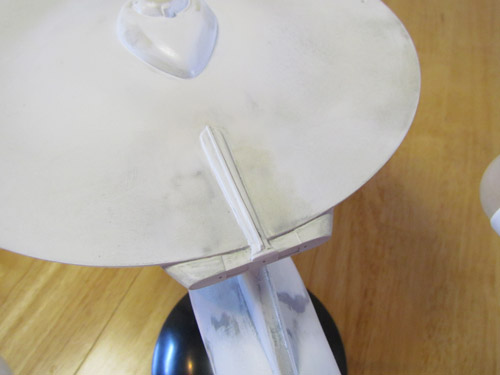
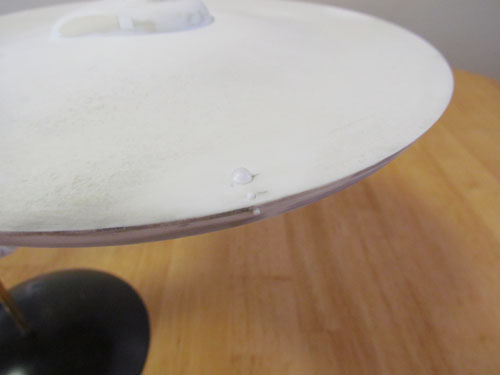
The bottom of the saucer proved to be a bit of a challenge. I glued strips of 1 mm styrene inside the saucer’s edge so I would have enough plastic to re-shape the outer edge’s contour.
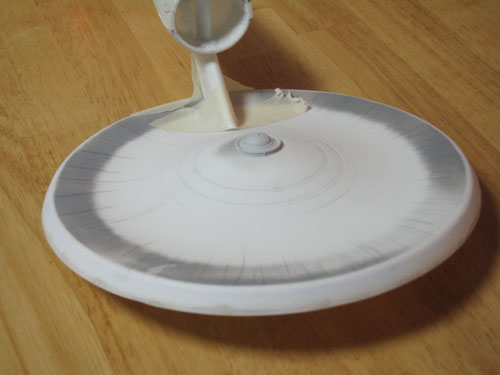
This was done using a razor saw, sanding sticks and lots of sanding. The 3 raised circular lines on the cone were removed and filled in as well as the 3 dimples by melting bits of plastic with liquid cement. The stepped area along the outer edge was removed and I added styrene sheet on the inside center of the cone and sanded down the raised area where the planetary censor attaches. The rest of the work involved sanding the bottom until it was even which seemed to go on forever. To scribe the 3 rings into the cone I used a compass cutter.
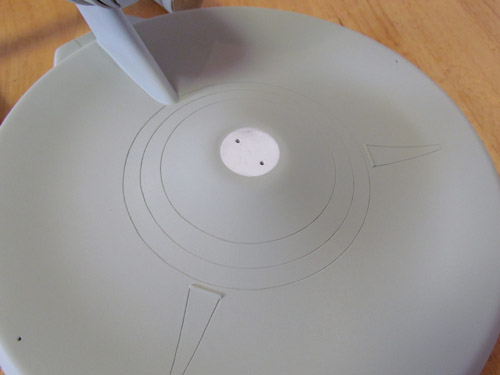
The above pic shows the completed work on the bottom of the saucer with the ‘triangles’ scribed in. For the navigation lights I used pieces of clear sprue from a Polar Lights 1/1000 TOS Enterprise kit. They are made to go in like pegs when the model is finished
The kit’s saucer does make an excellent platform to add details and modifications. The overall shape of the saucer is somewhat close to the studio model and just takes a bit of elbow grease to start looking the part. From the time I started my research this seemed like the most logical part to start on for the build.
In my next installment I’ll cover the secondary hull, nacelles, nacelle pylons, bussard domes and the base…
Michael Scarola