Recommended Sites


Archive for March 19th, 2013
GLUING A SNAP KIT IS A SNAP! …Part 2
You can turn a snap-fit kit into a competition quality model if you know a few tricks.
By Mark McGovern
Continued…
Keeping a Model in Trim
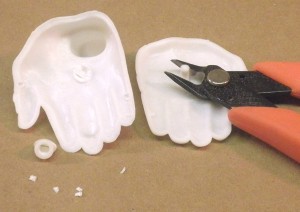
After cleaning the flash off the halves of one of the Incredible Hulk’s hands, I snapped them together, as you can see in Figure 1 (this was a test shot, which is why the plastic is white). You can see quite a seam showing between the parts. My aim when I build a model is to create the appearance of the subject in miniature. Since no Hulk in his comic book, television, or movie incarnations has ever been shown with seams running around his body, I did everything I could to eliminate them.
With most glue kits, and certainly snap-fits, the parts can be made to fit better simply by removing the locators molded into them. I used sprue cutters for this job because the snap-fit locators were so large, Fig. 2. A curved #10 hobby knife blade was helpful for cutting in tight places.
If you hold your kit part up to a strong light so you can look along its edges, you’ll see that they’re not flat. The may be rounded or have lots of irregularities, where what’s needed are flat surfaces that will be fused together by the plastic cement you’ll use. Sanding the part edges flat is the first step in assuring a good fit; I used 150-grit sandpaper to do this.
The best fit comes with a little more work. I held the hand halves together in front of the light and checked for gaps. The light showed them clearly; by sanding the point where the parts were touching, I was able to close most of the gaps. At some points, I penciled arrows on the outsides of the parts to show me just where to sand. When I felt I had the best fit I could get, I glued the parts and clamped them. By the way, sanding the mating surfaces has the additional benefit of adding “tooth” to the edges, which gives the cement more surface area to grip; this ensures a stronger bond between the parts.
Stuck on Modeling
There’s really no single material that’s best for every plastic modeling job, so I keep a variety of paints, glues, etc. on my workbench to fill various needs. I used liquid cement for this assembly and tube glue for the larger ones, like the upper body. After the liquid cement had fused the hand halves, a thin line of melted plastic was left in the seam. A little scraping and sanding (with progressively finer grades of wet-or-dry sandpaper, ending with 400-grit) pretty well removed the melted plastic and the seam, Fig.3.
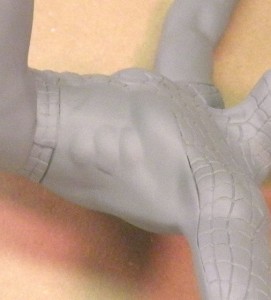
With the exception of the Hulk’s trousers, I followed these procedures for the entire model. Round 2 wanted the fists used only so those assemblies, along with the head, were cemented to the upper body and arms with tube glue. The gaps between these assemblies were filled with two-part epoxy putty because it sets slowly enough to be blended and sculpted. This made it possible to blend the hands into the wrists and head into the neck for a natural (?) appearance. A little more sanding with the 400-grit wet-or-dry sandpaper completed the job. Fig. 4 shows the results under paint.
To be continued….